
Coherent UI & Unity3D input tutorial

Hey everybody! My name is Hristo and I joined the Coherent Labs team a few months ago. I would like to share with you a tutorial that I just prepared about how we can control the input received by Coherent UI and Unity 3D.
1. Purpose
The purpose of this tutorial is to show how we can disable and enable input of Coherent UI views and Unity. It also shows how you can detect input when using multiple views. There are three basic scenarios for this Input sample:
1. Only Coherent UI input is working
2. Only Unity input is working
3. Both Coherent UI and Unity3D input are working
Coherent UI & Unity3D input tutorial
2. Basic setup
2.1 3D scene

To demonstrate the input scenarios we create a simple scene in Unity. It has one camera to which all the Coherent UI views will be attached. It also has unity FPS controller used for movement and a 3D sphere object that will be used to to test Unity mouse input. The sphere has a script called “RotateSphere”. It starts/stops rotating the ball on click using the following code:
|
1 2 3 4 5 6 7 8 9 10 11 12 13 14 15 16 17 18 19 20 21 22 23 24 25 26 27 28 |
public class RotateSphere : MonoBehaviour { public bool rotatable = true; // if the ball has status rotatable rotate it void Update() { if (rotatable) { transform.Rotate(0,20*Time.deltaTime,0); } } // toggle rotatable status on mouse click void OnMouseUp() { if(rotatable) { rotatable = false; Debug.Log(string.Format("ball stopped")); } else { rotatable = true; Debug.Log(string.Format("ball started")); } } |
2.2 Coherent UI views and html/css elements

We add 4 Coherent UI views to the main camera of the scene. One will be used for all the buttons, labels and input fields that we will use for Coherent UI input testing. The other three will be used for testing of multiple views. We set the corresponding pages to each of the views in the url field in the unity inspector. The pages are prebuild using simple html5/css. You can find more info about html5/css at w3schools.com/ or use web development tools like Adobe Edge
2.3 Unity GUI
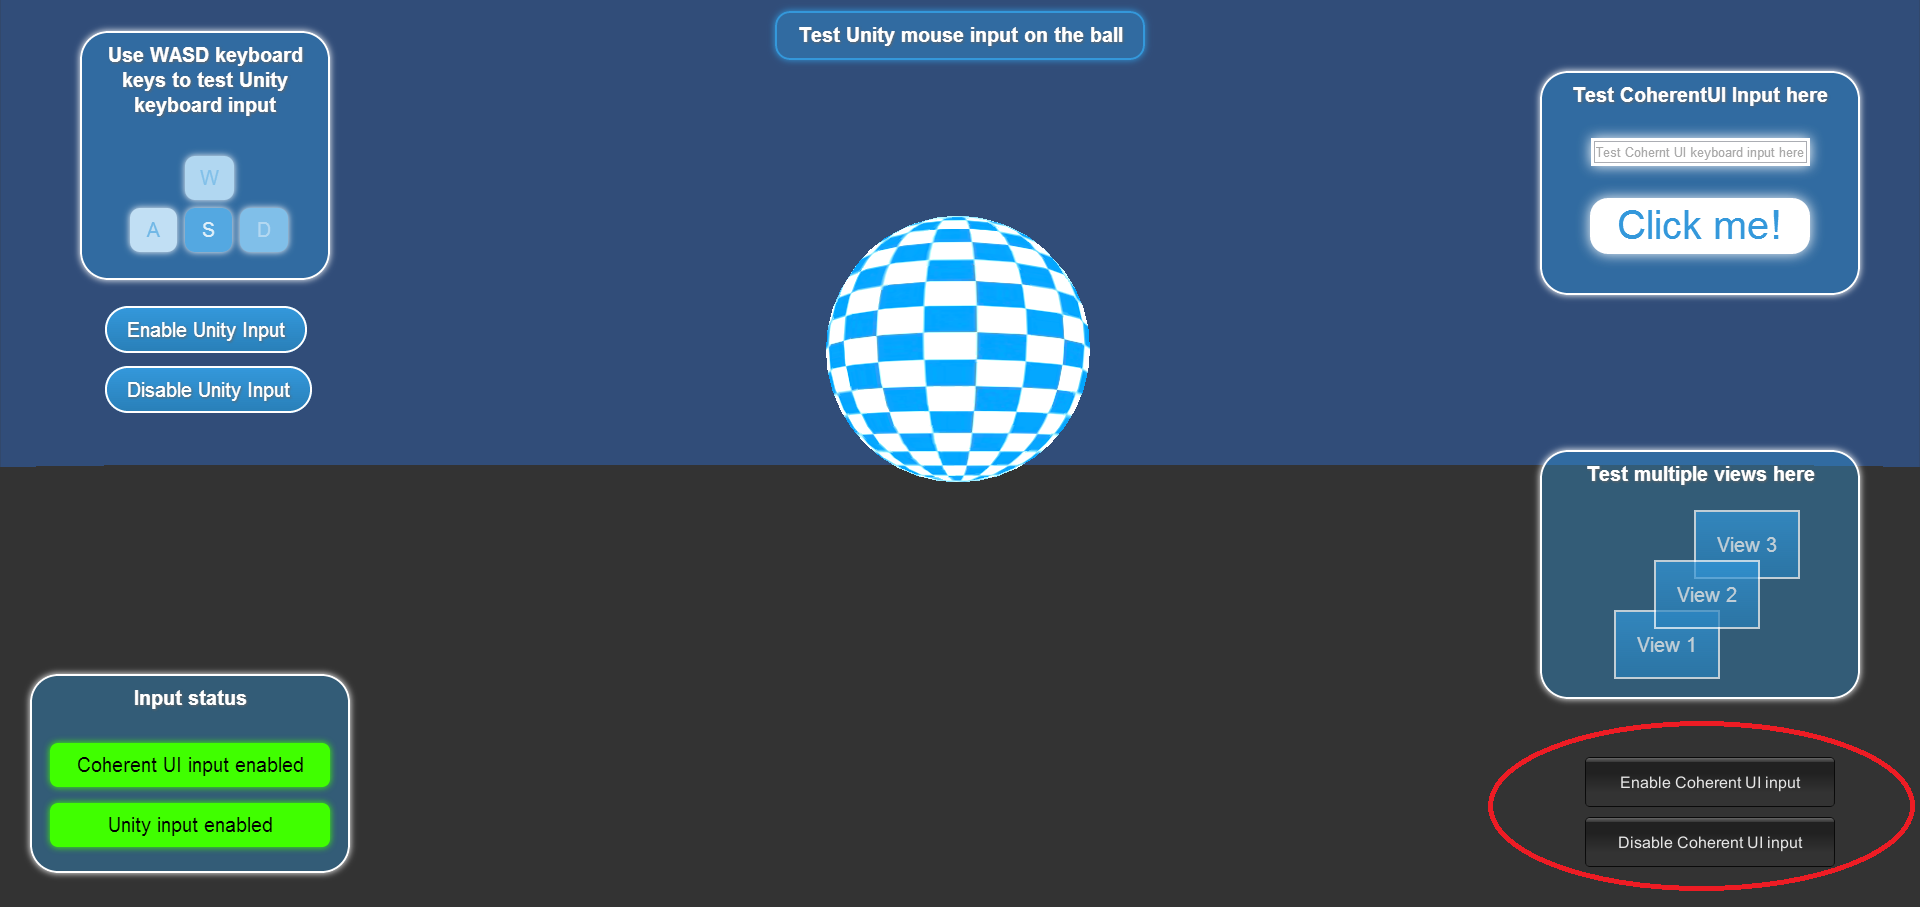
We need Unity GUI buttons in order to disable/enabled Coherent UI input. To do so we create new script called “Main” and attach it to the main camera. Then we add to it a OnGUI method and two buttons so that we can disable and enable CoherentUI input. They are positioned at the bottom-right corner of the screen.
|
1 2 3 4 5 6 7 8 9 10 11 12 13 14 15 16 17 |
void OnGUI() { GUIStyle customButton = new GUIStyle("button"); customButton.fontSize = 16; if (GUI.Button(new Rect (Screen.width - 335,Screen.height - 150,250,50), "Enable Coherent UI input", customButton)) { ToggleInput(InputBehavior.CoherentUI_Unity3D); Debug.Log("Coherent UI input enabled!"); } if (GUI.Button(new Rect (Screen.width - 335,Screen.height - 90,250,50), "Disable Coherent UI input", customButton)) { ToggleInput(InputBehavior.Unity3D_Only); Debug.Log("Coherent UI input disabled!"); } } |
2.4 Binding
We set up a two-way binding that will allow interaction between the scene and the views. It will trigger events when clicking on the GUI buttons and it will update the “Input Status” window. For more information about binding you can check out the binding sample that comes along with Coherent UI.
2.5 Toggling input status
We need a method that will toggle between the three scenarios defined in the beginning of the tutorial. We first define a enum data type that contains the three scenarios.
|
1 2 3 4 5 6 |
public enum InputBehavior { CoherentUI_Only = 1, Unity3D_Only = 2, CoherentUI_Unity3D = 3, } |
Then we create a method that toggles between the scenarios and uses methods for enabling/disabling Coherent UI and Unity input.
|
1 2 3 4 5 6 7 8 9 10 11 12 13 14 15 16 17 18 19 |
public void ToggleInput(InputBehavior input) { var inputController = GameObject.FindGameObjectWithTag("InputController").GetComponent<InputController>(); InputState = input; switch (input) { case InputBehavior.CoherentUI_Only: ToggleCoUIInput(true); inputController.enabled = false; break; case InputBehavior.Unity3D_Only: ToggleCoUIInput(false); inputController.enabled = false; break; case InputBehavior.CoherentUI_Unity3D: inputController.enabled = true; break; } } |
3. Enable/disable Coherent UI input
To enabled/disable the Coherent UI input we use a simple method called ToggleCoUIInput. It goes through each of the views in the scene and changes the ReceivesInput property to either “true” or “false”.
|
1 2 3 4 5 6 7 8 9 10 |
// enable input for all Coherent UI views public void ToggleCoUIInput(bool enable) { var UISystem = Component.FindObjectOfType(typeof(CoherentUISystem)) as CoherentUISystem; foreach (var item in UISystem.UIViews) { item.ReceivesInput = enable; } } |
It also triggers event called “CoUIInputEnabled” to javascript that changes the css styles so that the Coherent UI looks greyscale when it is disabled. It also changes the text for the “Input status” window.
|
1 2 3 4 5 6 7 8 9 10 11 12 13 14 15 16 |
engine.on('CoUIInputEnabled', function (enabled) { var elem = document.body; var coui = document.getElementById("coui"); if(enabled) { elem.setAttribute("class", "nogs"); coui.setAttribute("class", "enabled"); coui.innerHTML="Coherent UI input enabled"; } else { elem.setAttribute("class", "gs"); coui.setAttribute("class", "disabled"); coui.innerHTML="Coherent UI input disabled"; } |

4. Enable/disable Unity input
To disable the unity input we first set the “ReceivesInput” property of the views to “true” which causes all the input events to be “used”. The unity components that we use check if the Event is used and if it is they ignore it. You can find more information about “Event.Use” at https://docs.unity3d.com/Documentation/ScriptReference/Event.Use.html . If the unity component does not check whether the events is used we need to manually disable it. For example the Character Controller from FPS controller needs to be manually disabled when we disable unity input.
5. Enable both Coherent UI and Unity input
To enabled both Coherent UI and Unity input we create a method called “ToggleUnityInput”. When the unity input status is changed it checks if both the unity and Coherent UI are enabled and if it’s so set to the appropriate input state.
|
1 2 3 4 5 6 7 8 9 10 11 12 13 14 15 |
private void ToggleUnityInput(bool enable) { Debug.Log(string.Format("Unity Input {0}", enable? "enabled" : "disabled")); var main = GameObject.FindGameObjectWithTag("MainCamera").GetComponent<Main>(); var newInputState = Main.InputBehavior.CoherentUI_Only; if (enable) { newInputState = (Main.InputBehavior)((int)main.InputState | (int)Main.InputBehavior.Unity3D_Only); } else { newInputState = (Main.InputBehavior)((int)main.InputState ^ (int)Main.InputBehavior.Unity3D_Only); } main.ToggleInput(newInputState); } |
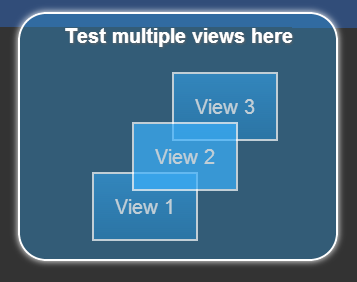
6. Multiple views
The purpose of this test is to show how you can forward the mouse input to the view that the mouse is currently on when you have multiple views. When you hover over one of the views it changes it’s css so it looks brighter.
To do this we use the following code from CoherentUISystem:
|
1 2 3 4 5 6 7 8 9 10 11 12 13 14 15 16 17 18 19 20 21 22 23 24 25 26 27 28 29 30 31 32 33 34 35 36 37 38 |
CoherentUIView cameraView = m_MainCamera.gameObject.GetComponent<CoherentUIView>(); if (cameraView && cameraView.ClickToFocus) { var view = cameraView.View; if (view != null) { var normX = (Input.mousePosition.x / cameraView.Width); var normY = (1 - Input.mousePosition.y / cameraView.Height); normX = normX * cameraView.WidthToCamWidthRatio(m_MainCamera.pixelWidth); normY = 1 - ((1 - normY) * cameraView.HeightToCamHeightRatio(m_MainCamera.pixelHeight)); if (normX >= 0 && normX <= 1 && normY >= 0 && normY <= 1) { view.IssueMouseOnUIQuery(normX, normY); view.FetchMouseOnUIQuery(); if (view.IsMouseOnView()) { if (isClick) { // Reset input processing for all views foreach (var item in m_Views) { item.ReceivesInput = false; } // Set input to the clicked view cameraView.ReceivesInput = true; SetViewFocused(true); } return; } } } } |
It goes through all the views and first it disables the input by setting the “ReceivesInput” property to “false”. Then if the mouse is over the view it sets only its “ReceivesInput” property to “true”. That way only the view that the mouse is currently over receives input.
You can try the input yourself, by downloading it from Here.
I really hope you’ll find this tutorial useful. If you have any questions or comments please post them in our forum.