Timeline animations and widgets in Coherent Editor 1.3
Hey guys,
We’ve just released the latest version of the Coherent Editor – 1.3 and it’s packed with many new features and improvements. We decided to write this post to tell you a bit more about some of the most interesting of them – the visual timeline, the widget system and the new asset import option from Adobe Photoshop.
Visual timeline animations
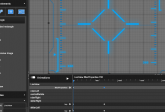
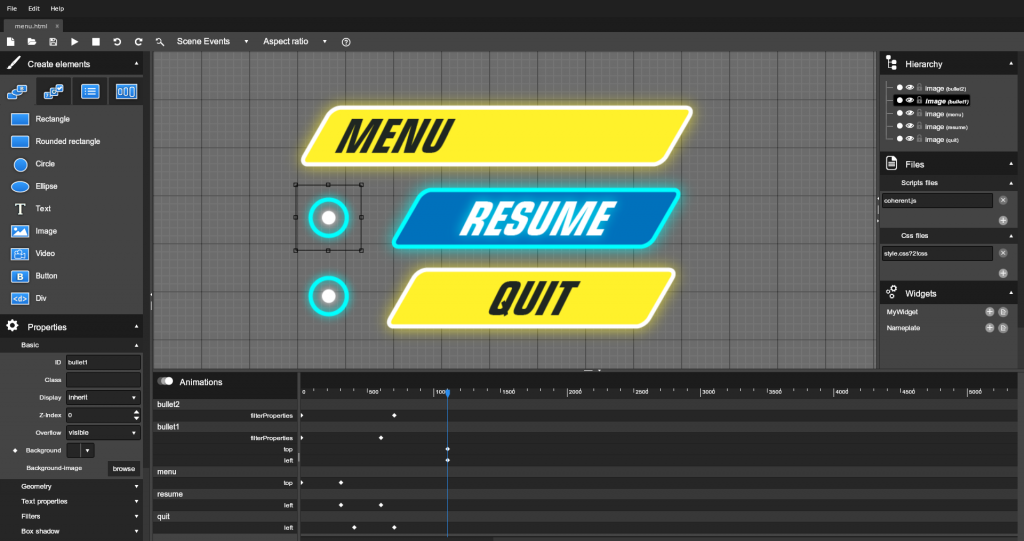
Needless to say animations are essential for any game UI. With the new visual timeline introduced in Coherent Editor 1.3 they can be created and edited faster and easier than ever before. Using the intuitive visual interface you can quickly add amazing animations to your UI without any scripting or external CSS files. Furthermore the animations are based on CSS which have superior performance compared to JavaScript.
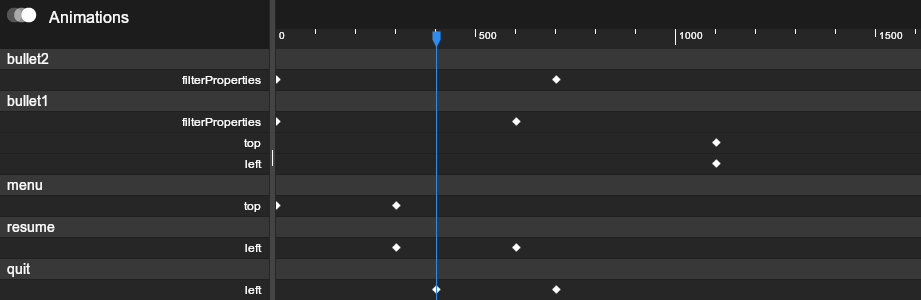
To create an animation simply select the element, move the pinhead to the time that you want the animation to start, set the desired property and click on the keframe icon. Then move the pinhead to the time that you would like the animation to end, set the ending value of the property, click the keyframe icon and that’s it!
The created animations are standard CSS so you can preview them in Coherent Editor, live in the actual game or even in your own browser. If your are using Chrome you can actually preview the sample HTML page below which was made with the Coherent Editor.
A detailed guide for the visual timeline is available in the online Docs.
Widgets
Another really useful feature of the Coherent Editor that is new in 1.3 is the new widget system. It provides an easy way to group individual UI elements into reusable prefabs. Using widgets has two main benefits:
- All instances of a specific widget share its visual appearance
- Multiple team members can work on different parts of the UI at the same time
Sharing visual styles
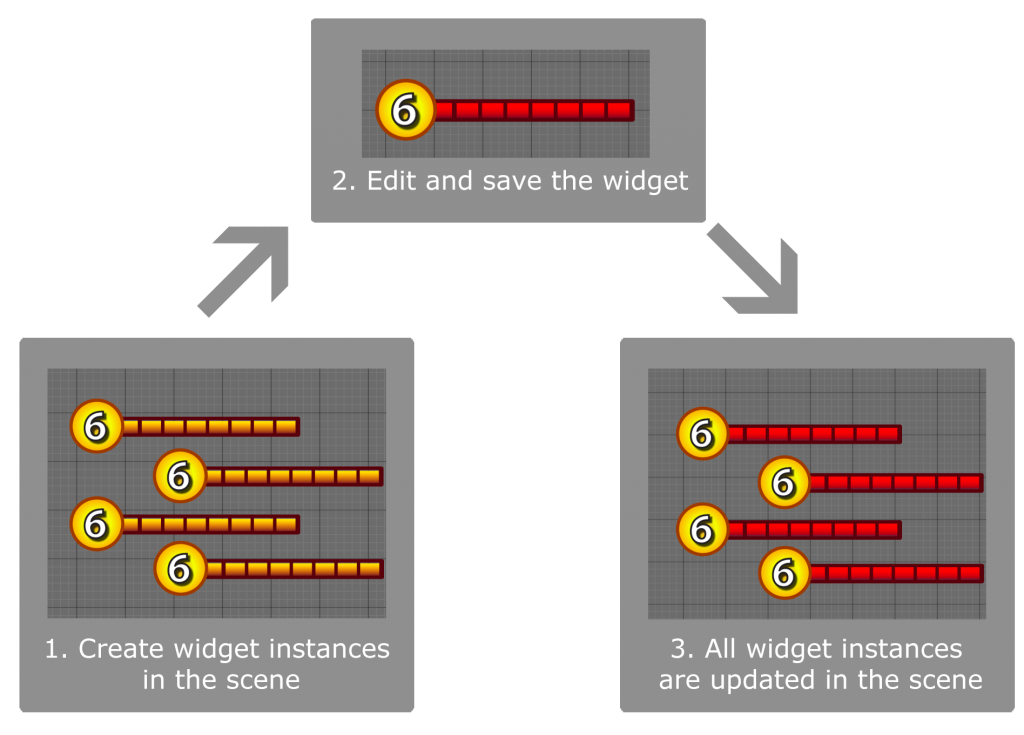
Editing a widget and saving it makes the changes available to all its instances that are currently in the main scene. This a great way to share the same visual style across multiple UI elements. The widget’s instances have not only its default visual appearance but its animations as well so using widgets is a great way to share animations too.
Team collaboration
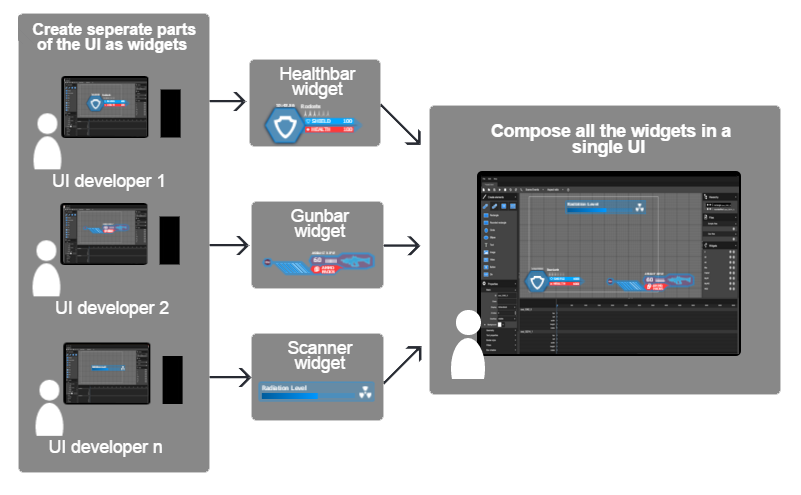
Using widgets multiple team members can work on different parts of the UI at the same time. Each of the UI developers can create parts of the UI as widgets and then export them. Then the chief UI developer can combine all the widgets in a single UI composition.
More information about the widget system is available in the online Docs.
Import from Adobe Photoshop
Individual standard images can be added by creating new image element from the Create panel. Apart from this option the Coherent Editor has also an unique feature that allow you to import assets from Adobe Photoshop even faster.
This method provides two main benefits:
- you can import multiple image assets with one action
- you can keep the positioning of UI elements that was set in Adobe Photoshop
To use the method you just need to follow a few basic steps:
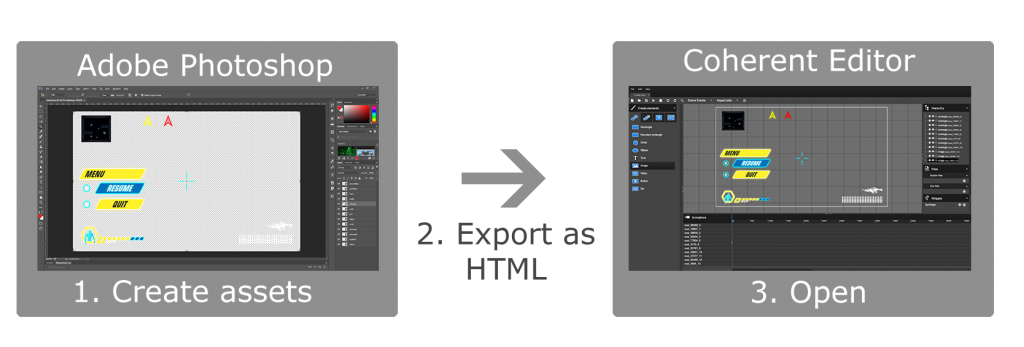
- Create your UI assets in Adobe Photoshop
- Convert them to slices and export them as HTML page
- Open the exported HTML page in the Coherent Editor
Again more detailed guide about this feature can be found in the online Docs.
But this is not all – Coherent Editor 1.3 has new rendering backend (that provides up to 2x faster performance), new image files support, localization options as well as many other improvements.
Go ahead and check the latest features of the Coherent Editor 1.3 either in the online preview demo or in your copy of Coherent GT.
Hristo