What is JavaScript linting and how can it improve your workflow?

In this tutorial, we’ll have a look at linting – what is JavaScript linting, what are its benefits, and how to integrate JSHint in your workflow.
What is a linter?
A linter is a static code analyzer that parses your code and looks for typos, potential bugs such as syntax errors, leaking variables and more. Incorporating linters in your workflow will save you time, maintain code quality and produce safer code. There are both online tools and plugins that you can use, and to illustrate the point, we are going to show you how to lint JavaScript.
What is JSHint?
The most popular linting tool in the JavaScript community is probably JSHint. It is open-source and can be used both online and offline.
Because of its big user base, JSHint is improving and changing quite often. Therefore, questions and bugs are more likely to be discussed and fixed. Further information on who uses this code analyzer can be found here.
Installing JSHint
JSHint offers standalone files for browser like environments and standalone files for Mozilla’s Rhino JavaScript engine in the dist directory of the latest release. Every release of JSHint is published to the package manager for npm. Therefore, Node.js is a prerequisite.
The package can be installed in your project directory or globally from the command line like:
|
1 |
npm install -g jshint |
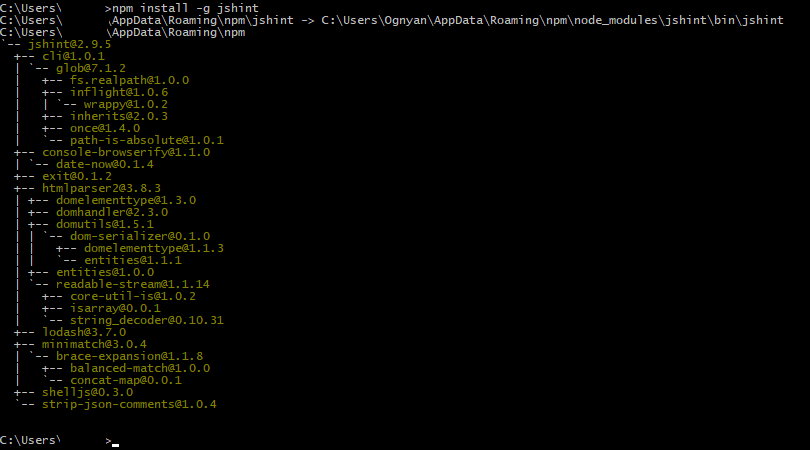
This gives you the JSHint command-line interface.
Now, to test if JSHint is working, create a file in your current directory called demo.js and fill it with this code:
|
1 2 3 |
function func() { console.log("Test") } |
After that, when executing the following command which scans the demo.js file:
|
1 |
jshint demo.js |
You should see the error:

If you don’t see it, you should reinstall npm and JSHint.
Note: If you see this error:
![]()
You should set your PATH environment variable to the npm folder in AppData.
Using JSHint
After you have setup JSHint, you can use it either through the command-line tool that comes with the package or through the JavaScript module.
The command used for linting is jshint and there are many flags that customize it such as – – verbose
|
1 |
jshint --verbose myfile.js |
that adds message codes to the JSHint output.

One useful command is
|
1 |
jshint . |
which runs the linter recursively through all the files and folders of your directory.
You can also ignore some files by creating an ignore file and listing multiple file names, file paths or file path patterns. JSHint will look for this configuration in:
1. The location specified with the – – exclude-path flag.
2. A file named .jshintignore located in the current directory or any parent of its parents.
Example .jshintignore file:
|
1 2 3 4 |
ignored.js another.js ignoreimmediatechildren/*.js ignoreincludingsubdirectories/** |
Note: If the search doesn’t find any of these options, jshint will not ignore any files. JSHint offers you the ability to not only lint .js files, but also other formats like .html by using the – – extra-ext flag:
|
1 |
jshint --extra-ext=html . |
This command will lint all .js and .html files and folders in your directory.
You can also configure the tool to extract JavaScript from HTML files before linting with the – – extract=[auto|always|never] flag. If the flag is set to auto JSHint, it will try to extract JavaScript only if the file looks like HTML.
To try it out, create a demo.html file and fill it with:
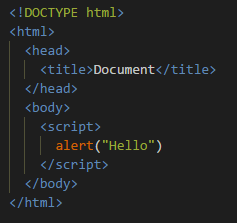
and then run:
|
1 |
jshint --extract=auto demo.html |
You should see the warning for the JavaScript error in the HTML.

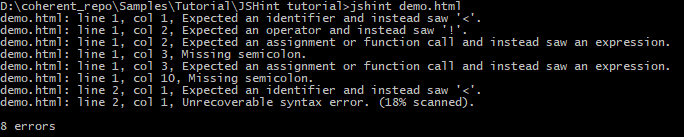
Note: This is the result with the default – – extract=never :
A useful command is the combination of the – – extra-ext and – – exctact flags to lint all JavaScript inside .js and .html files by first extracting it in the latter.
|
1 |
jshint --extra-ext=html --extract=auto . |

This produced relevant error messages for all the files in our directory.
In addition to the the command-line tool, there are many plugins that utilize great visual effects for easier linting.
Configuring JSHint
One big advantage of JSHint is that, although it comes with a default set of warnings, it is very configurable. This code analyzer provides you with different ways to specify which properties you want to track. Let’s explore four common ways:
- Using a .jshintrc file.
A .jshintrc file is basically a JSON file that specifies which JSHint options to turn on and off.
|
1 2 3 4 5 6 7 8 9 10 |
{ "curly": true, "undef": true, "latedef": false, "immed": false, "globals": { "jQuery": true } } |
If you use this option, JSHint will look for the .jshintrc file in the same directory as the file being linted. If the file does not exist, it will move one level up the directory tree until one is found or the file system root is reached. This setup allows you to have different configuration files per project.
2. Changing the package.json.
You can configure JSHint by adding shintConfig values in the .packange.json file:
|
1 2 3 4 5 6 7 8 9 10 11 12 |
// package.json { // ... "jshintConfig": { "esnext": true, "undef": true, "unused": true, "predef": [ "MY_GLOBAL" ] // etc... } } |
Note: If the input comes from stdin, JSHint doesn’t attempt to find a configuration file.
3.Using the – – config flag.
With the – – config flag, you can set the location of the file from which JSHint should load linting options.
|
1 2 |
jshint --config ../path/to/config.json |
4. Inline configuration.
JSHint also offers you the ability to configure it from within your .js files. This happens by adding comments that start with jshint or globals and following them with a comma-separated list of values.
|
1 2 |
/* jshint nocomma: true, unused: true */ /* globals GLOBAL */ |
The jshint comment prohibits the use of the comma operator and warns about unused variables. The globals comment on the other hand informs JSHint about the global variable GLOBAL.
Both single and multi-line comments can be used for configuration. Moreover, they are function scoped, so if they are placed inside a function, they will only affect its body.
Here are some useful links about linting:
Using JSHint through the command-line
Raygun blog post about linting
Your feedback is important for us! If you have any questions about how to integrate JSHint in your workflow, write a comment below or start a discussion in our Forum.