1.14.0.5
Coherent HB for UE4
A modern user interface library for games
This tutorial will show you how to add the Hummingbird plugin into a project and create two types of UI elements - a HUD and an in-world UI view . Here are the steps to achieve this:
1. Install the Hummingbird plugin
First, you need to install the Hummingbird plugin using the installer wizard. The installer auto-detects the UE4 engine versions that are available on this computer and gives you the options to install a sample game
Then start the Unreal Editor, and choose either an existing project or create a new one via New Project -> Blueprint -> Blank, and save it in a folder of your choice.
The first thing you have to do is to enable the Hummingbird plugin in the editor. From the main menu click Edit -> Plugins, then navigate to the User Interface section and find the Hummingbird Plugin and click the checkbox Enable. You'll have to restart the editor and when you do a new drop-down menu will appear - Hummingbird.
Then create a new level and open the world settings. From the Game Mode section, click the + button to create a new GameMode override, let's name it MyGameMode.
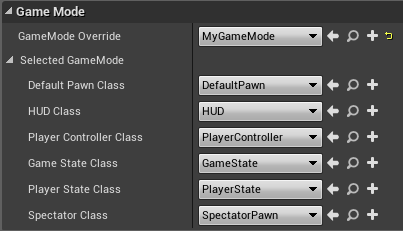
MyGameMode.
3. Add a HUD
From the Hummingbird menu, choose Add HUD. This will change the current GameMode's HUD class to HBGameHUDBP and will initialize it. Also, it will add a hb_hud.html page in YourProjectDir/Content/UIResources/ directory, if not already present; then this page will be opened in your default browser.

coui://uiresources/YourHUD.html.
To see its content, open the HBGameHUDBP blueprint in the Blueprint Editor. If you experience difficulties locating HBGameHUDBP blueprint, you need to set Show Plugin Content and Show Engine Content checkboxes in the Content Browser View Options and search for HummingbirdPlugin Content. Here's a brief explanation of what happens:
HummingbirdInputActor, and then setting Accept mouse input to true.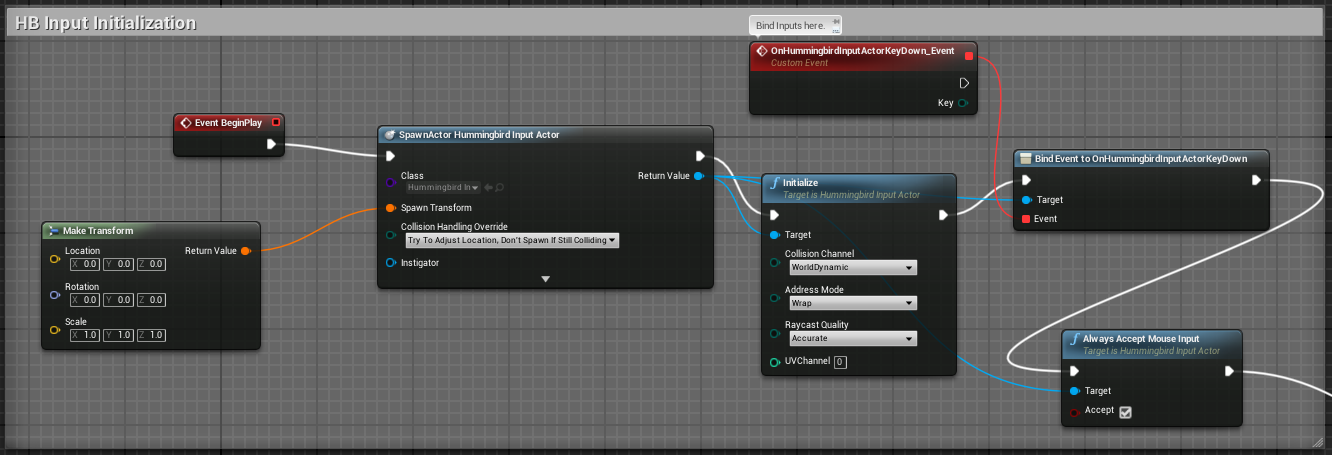
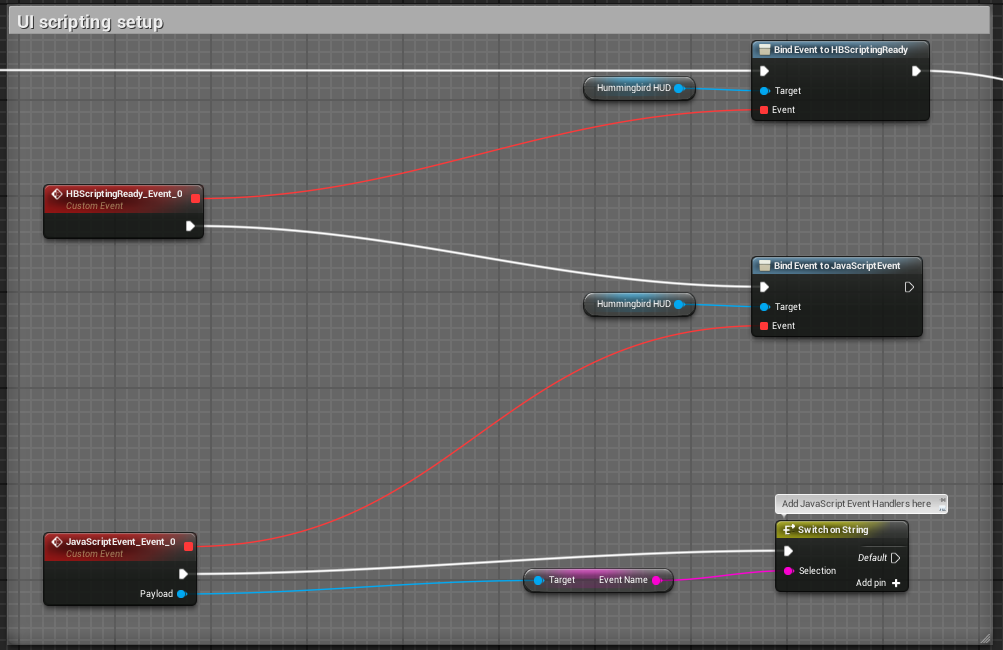
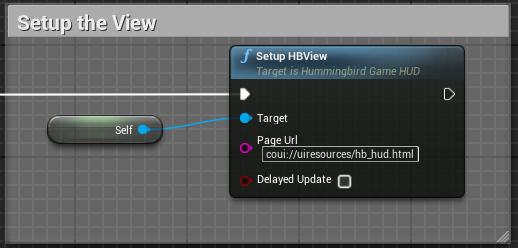
The only part that we cover in this tutorial, is the View setup. The UI Scripting and the input will be covered in upcoming tutorials.
The page is set to coui://uiresources/hb_hud.html by default, so the newly created page by Add HUD will be used if you skip changing it. However, you can change it whenever you want to a local page, placed in the uiresources folder and use the coui:// scheme.
4. Add in-world UI
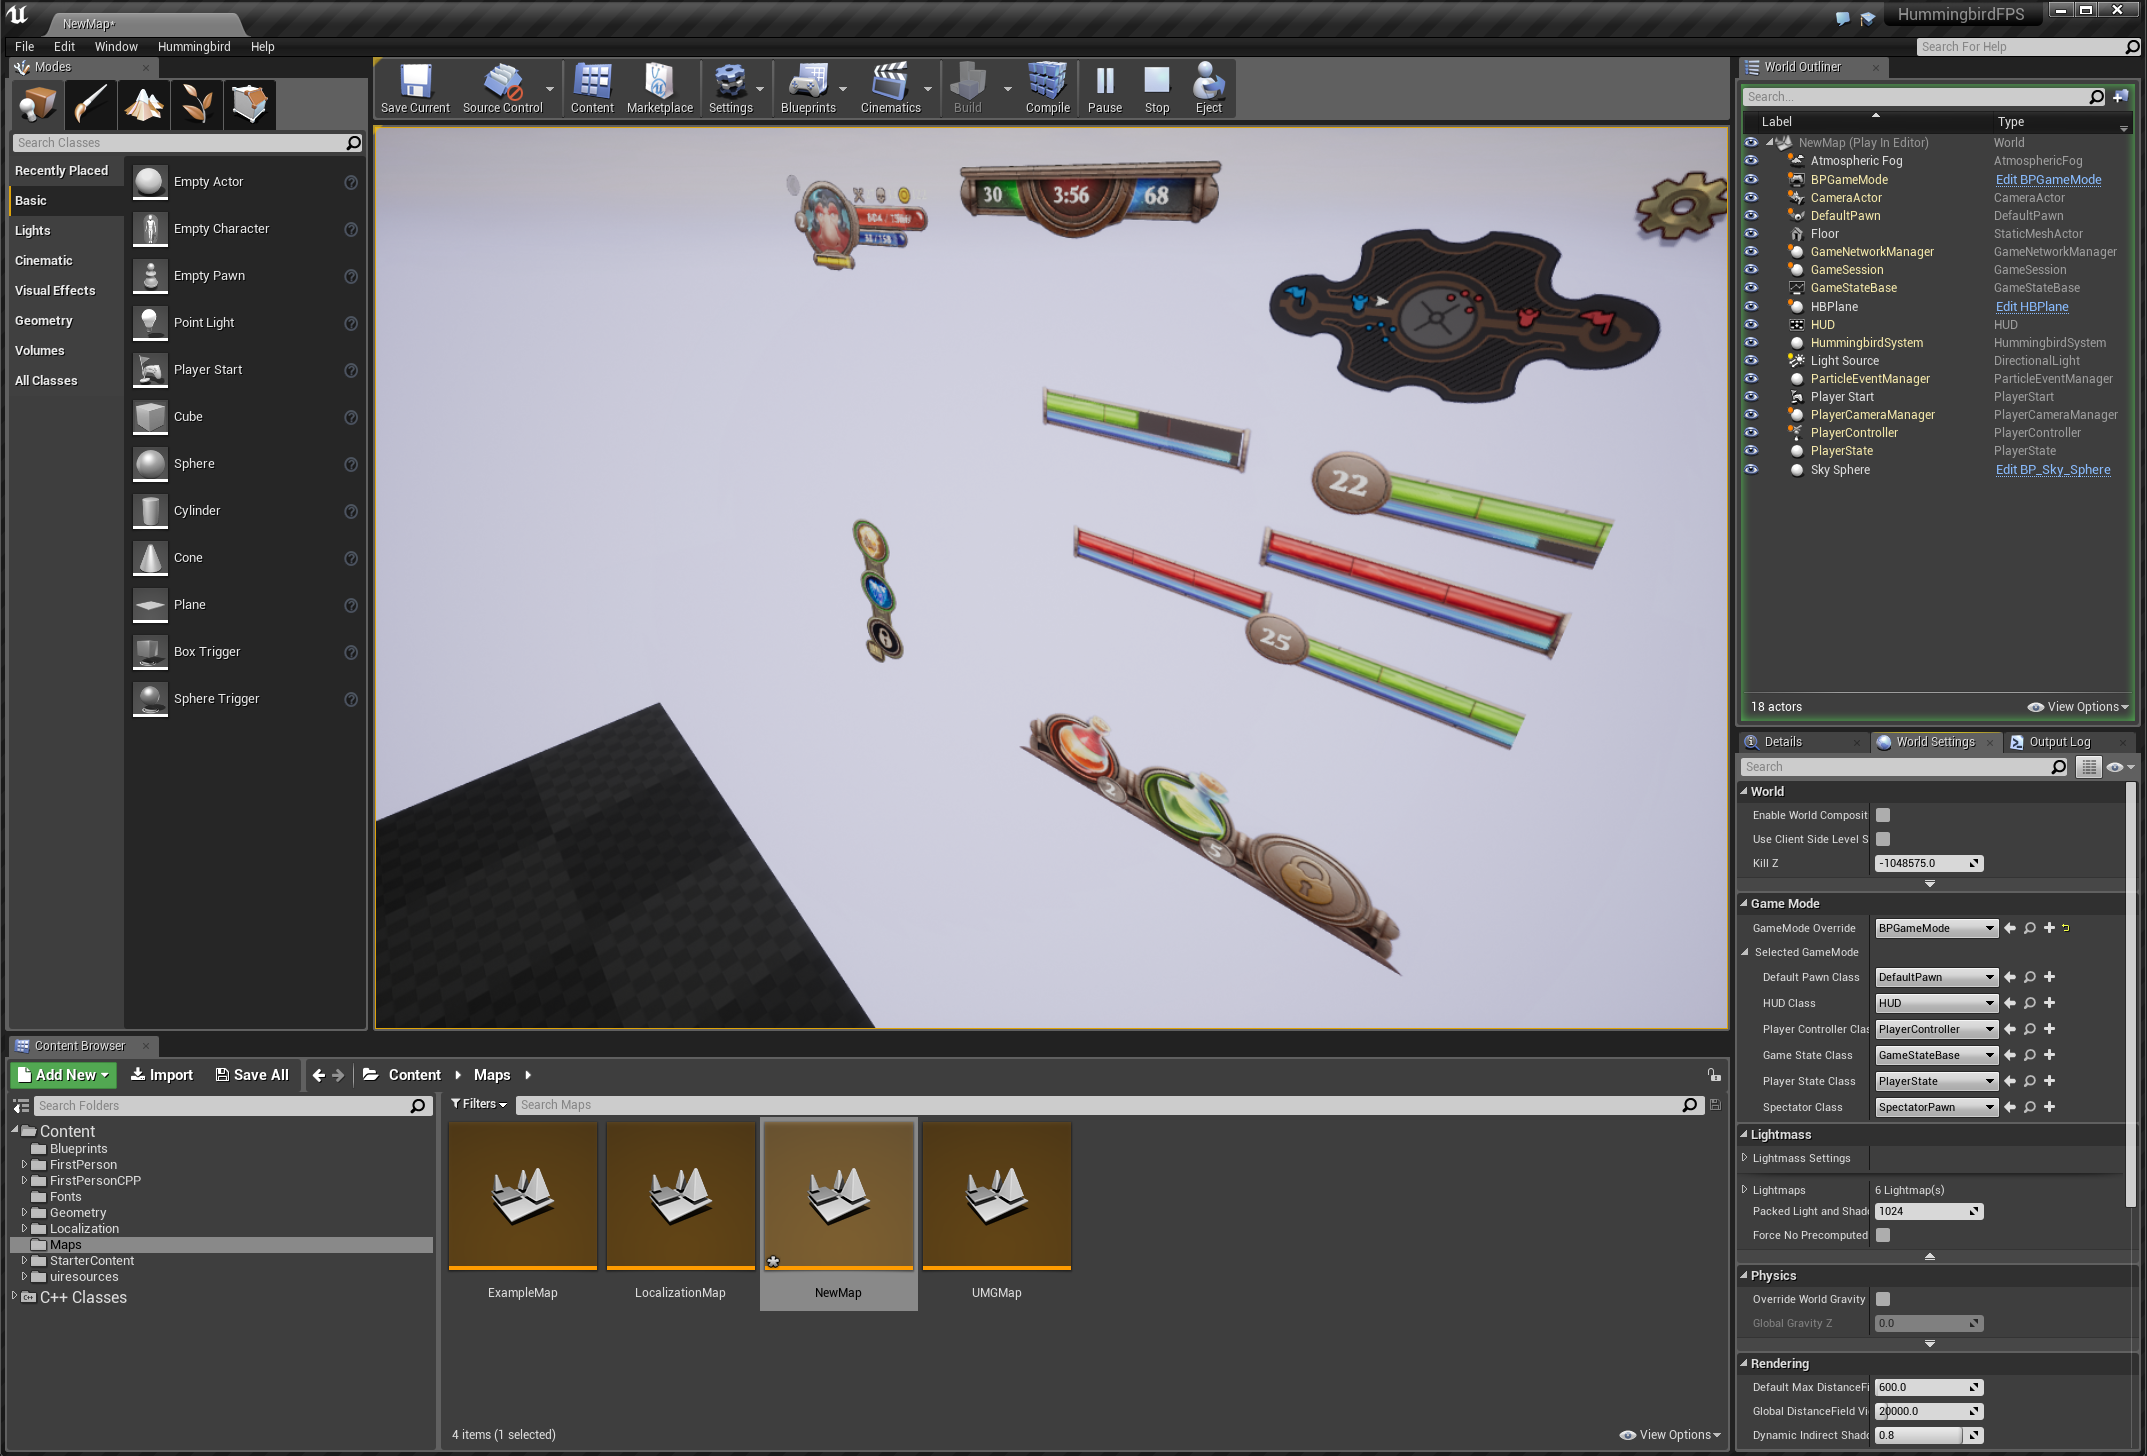
Choose Hummingbird -> Add In-world UI. This will add a HBPlane to your scene, just in front of the player. You can change its transform via the World Transform in the Details tab of the HBPlane.
Click Edit HBPlane from the same tab and its blueprint will open. As you can see, it has a Hummingbird component and the UI scripting already set up for this view.
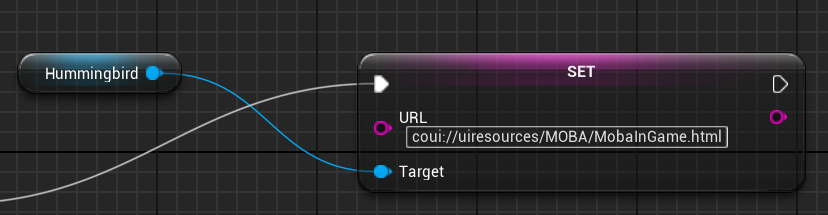
Follow these steps to setup the view:
HBPlane blueprint.SetURL node and set the URL to coui://uiresources/YourHUD.htmlBegin play and connect it with the URL setter.Play.Lets do the same with one of our Hummingbird samples:
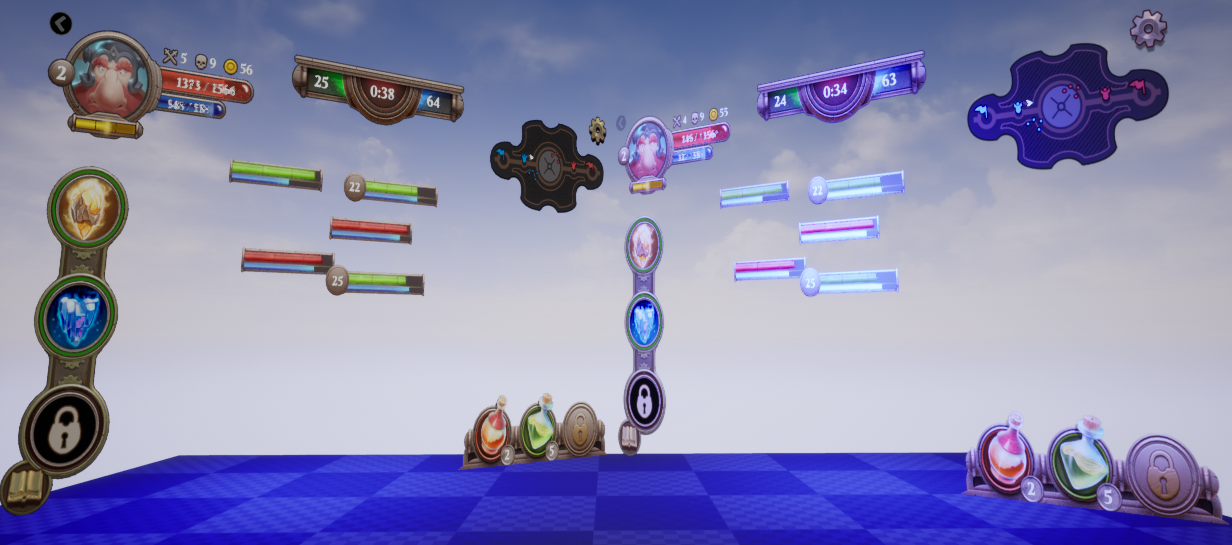
Here is the final result:
In order to showcase the difference between HBMaterial and HBMaterialLit materials let's compare them side by side with the same UI. In order to make it clearly visible, we can also add bright point lights that are also color tinted.
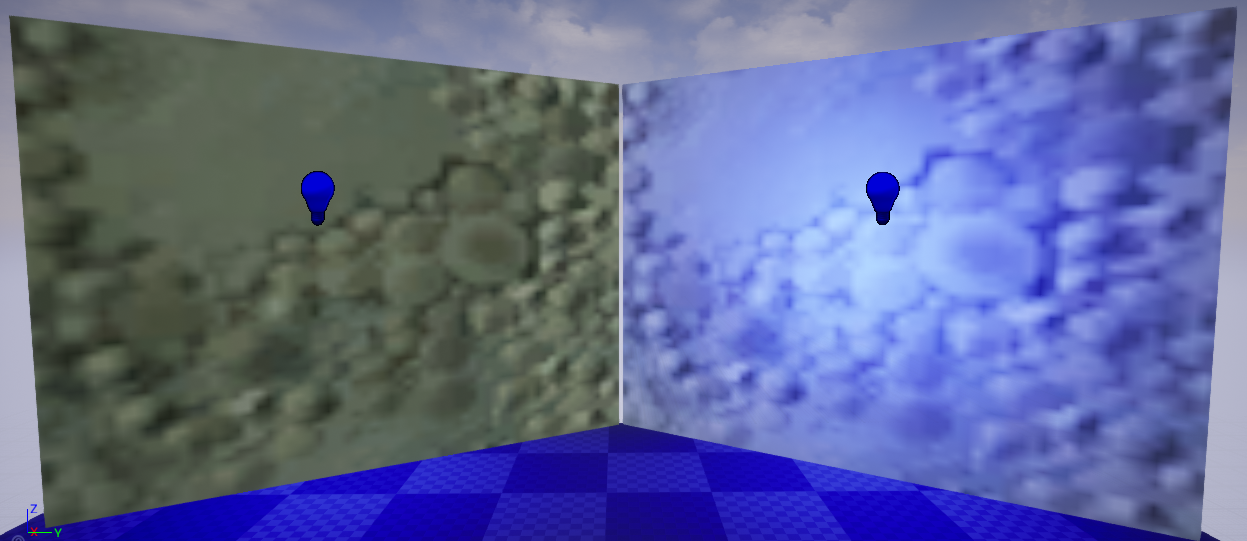
On hitting the play button in the editor, the In-world UI using HBMaterial remains unaffected by the lighting, while the one using HBMaterialLit is properly lit and tinted.
Hummingbird can be installed as either engine plugin or a game plugin. Each of them having their own merit.
This is the default option of installation. When you have Hummingbird installed as an engine plugin, the plugin will be available for all of the games that are created with that particular instance of the UE4 engine. This is useful when you are working on more than one game at the same time, or you are prototyping.
Usually the game plugin option is used when using a binary engine. This is because this is the only way to build a plugin when using a binary engine. Another reason why you would like to use Hummingbird as a game plugin would be if you don't want the plugin to be visible to other games using the same engine.
Hummingbird's plugin uses three modules:
Hummingbird has to be added as a third-party dependency to UE4. This will make sure that all shared libraries (.dll, .dylib, etc.) are loaded when the game starts and they will be referenced by the engine correctly.
The Hummingbird installer will make sure that all the modules are installed correctly.
The installer provides some other useful items such as a sample game and a collection of ready-to-use HTML5 kits.
After you've installed the plugin, you need to enable it from the UE4 editor:
If you are only going to use Hummingbird through the UE4 Editor / Blueprints, you are done. If you going to to use Hummingbird through C++ code, make sure your game references our plugin in its Build.cs file. Doing so is trivial - open YourGame/Source/YourGame/YourGame.Build.cs. Add the following lines to the constructor of the class YourGame:
PrivateDependencyModuleNames.Add("HummingbirdPlugin");
PrivateDependencyModuleNames.Add("Hummingbird");
"Plugins": [
    {
        "Name": "HummingbirdPlugin",
        "Enabled": true
    }
]
coui://) in YourGame/Content folder.Hummingbird consists of several core classes:
UHummingbirdBaseComponent is an abstract class, actor component, which contains the necessary code to hook Hummingbird up with UE4.UHummingbirdComponent is derived from the BaseComponent and can be used to add UI in the 3D world. It's one of the core Hummingbird classes and represents a single HTML page that is rendered. Also holds methods for manipulating the view.UHummingbirdHUD is derived from the base component and can be added to a AHUD actor to add HUD.AHummingbirdGameHUD is A HUD class that is derived from AHUD and is the easiest way to use Hummingbird - you can just replace your AHUD class with this one. It's a wrapper around UHummingbirdHUD with fairly simple implementation. This should be your main starting point if you want to have a Hummingbird View attached on your view.AHummingbirdInputActor is the input actor is responsible for capturing and forwarding mouse and keyboard input to the currently focused Hummingbird View. It must be spawned and initialized in the game world.SHummingbirdWidget is a slate widget capable of running Hummingbird.UHummingbirdWidget is an UMG widget capable of running Hummingbird.These are almost the same steps as in the previous section but generating project files will fail if your game has no C++ code.
Open the editor and enable the Hummingbird plugin for your game using the Window -> Plugins dialog. Hummingbird plugin is in the Installed / User Interface section.
Attaching a Hummingbird View to a 3D object in the game world is actually a very easy thing to do - all you have to do is:
UHummingbirdComponent to the objectTo quickly try out Hummingbird - try the provided HummingbirdFPS game.
HummingbirdFPS sample game requires UE 4.19.0 or later, which is also the requirement for the Hummingbird plugin.
The first thing you have to do is to install the Hummingbird plugin using the installer wizard. The installer auto-detects the UE4 engine versions that are available on this computer and gives you the options to the Hummingbird sample game.
There you can see a few samples we are distributing with the sample game. There you will find a few UE4 maps, where we are using a mixture of C++ code and blueprints to show the ways to integrate Hummingbird Views in your UE4 game.