 |
Coherent UI for Unity3D
2.5.3
A modern user interface library for games
|
|
Coherent UI for Unity3D
2.5.3
A modern user interface library for games
|
The samples provide a starting point for you. They are located in Assets/CoherentUI/Samples and the required scripts are already configured.
The samples are based on a simple scene we've set up for you. The scene consists of a light, a floor, a cube, and a FPS controller so you can move around. There are a few key points in the base sample you should be aware of.
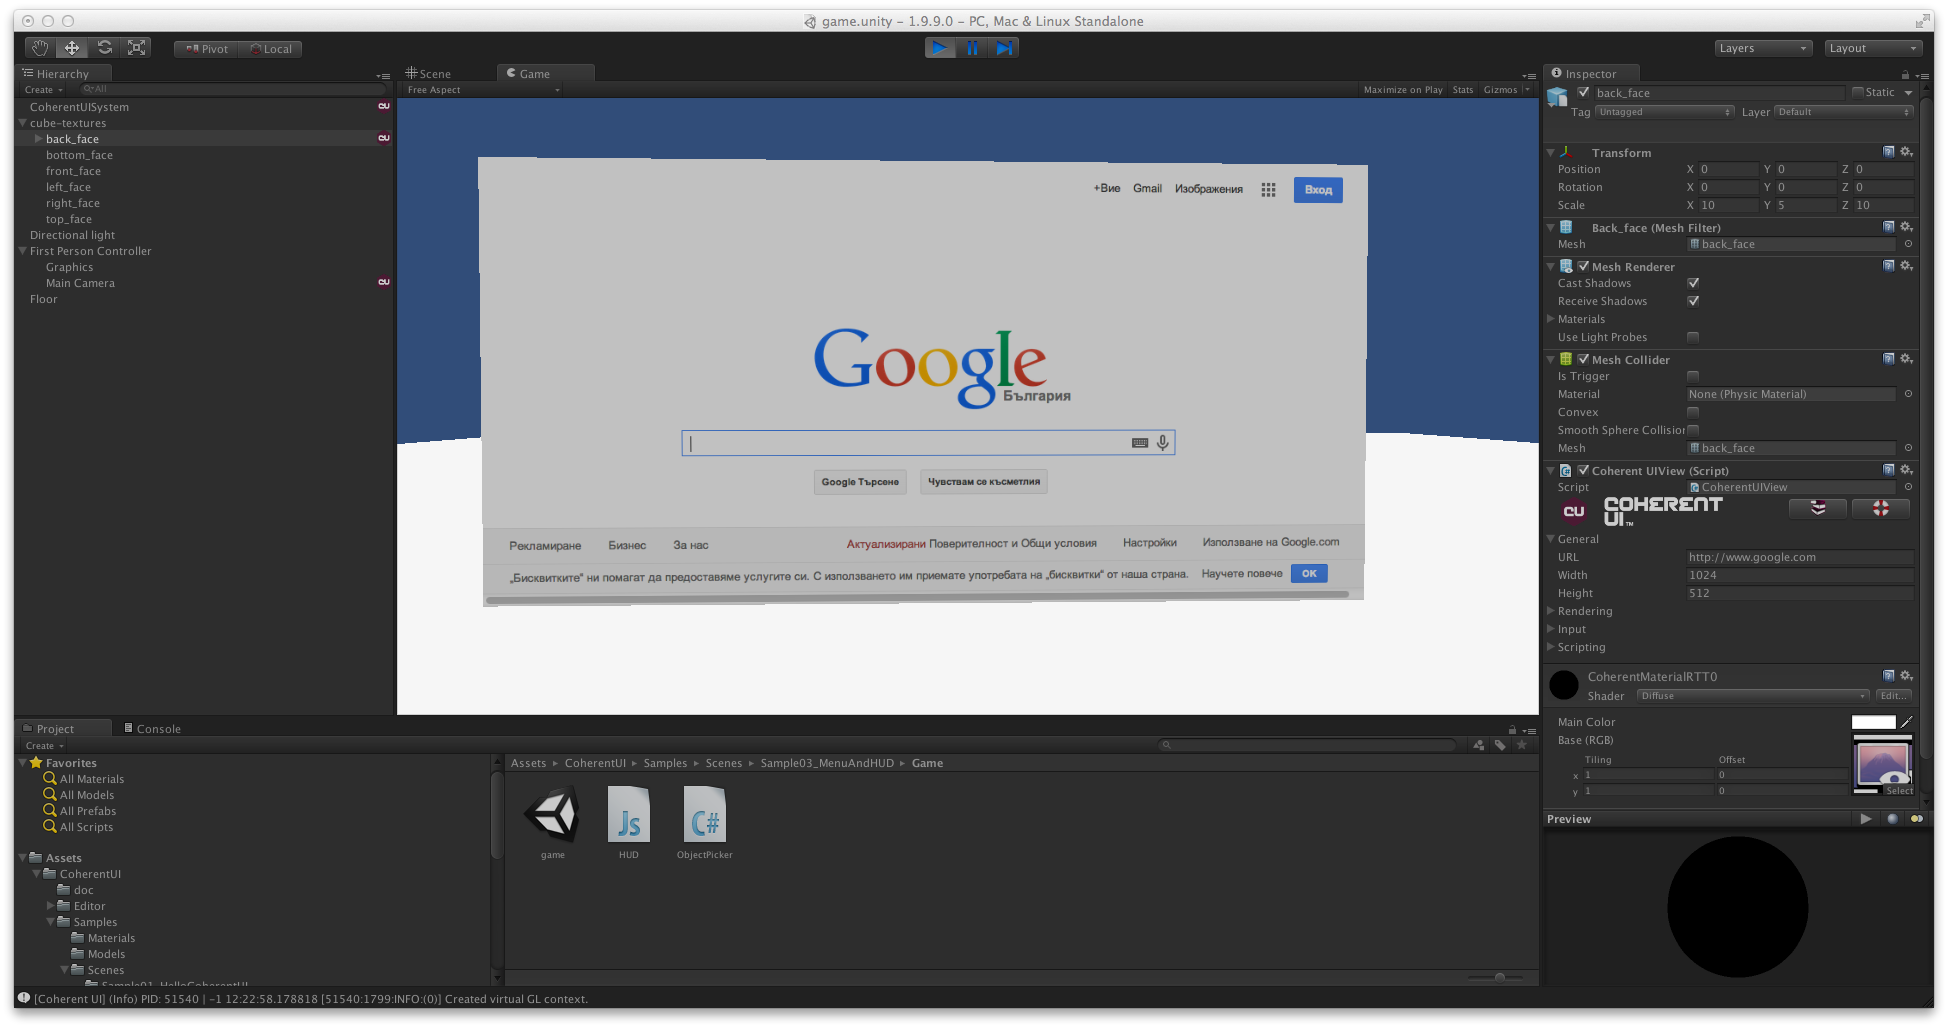
MouseLook script has been modified a bit - you can toggle if it's active using the Alt key. This was done for convenience so you can navigate over the page, projected on the cube easily, without looking around. The CharacterMotor script has also been modified for the same reason.MeshCollider components. They are needed by Unity to produce texture coordinates in the raycast hit info. The texture coordinates, in turn, are needed to calculate the position of the hit point on the Coherent UI View.Just hit play - and you'll see a rotating cube and a sign, saying "Hello, Coherent UI". The sample demonstrates the easiest possible setup for Coherent UI for Unity3D. The scene is made of a cube in front of the camera with a script that rotates it, and a Coherent UI component attached to the main camera. The component's URL is set to a local resource using our special coui:// protocol and the "Transparent" checkbox is ticked. You can preview the page displayed in your browser to see what you can expect.
You can also add a CoherentUIView component to a 3D object if you like. To do so, locate the CoherentUIView script under Standard Assets/Scripts/Coherent UI/CoherentUIView in the Project window and then add it to the object of your choice. In Unity3D 4.x you can do that from the inspector windows by clicking "Add component".
Here's a sample where a Coherent UI View component is added to a cube. Make sure you tick the "Click to focus" checkbox for the view to get input forwarding easily.
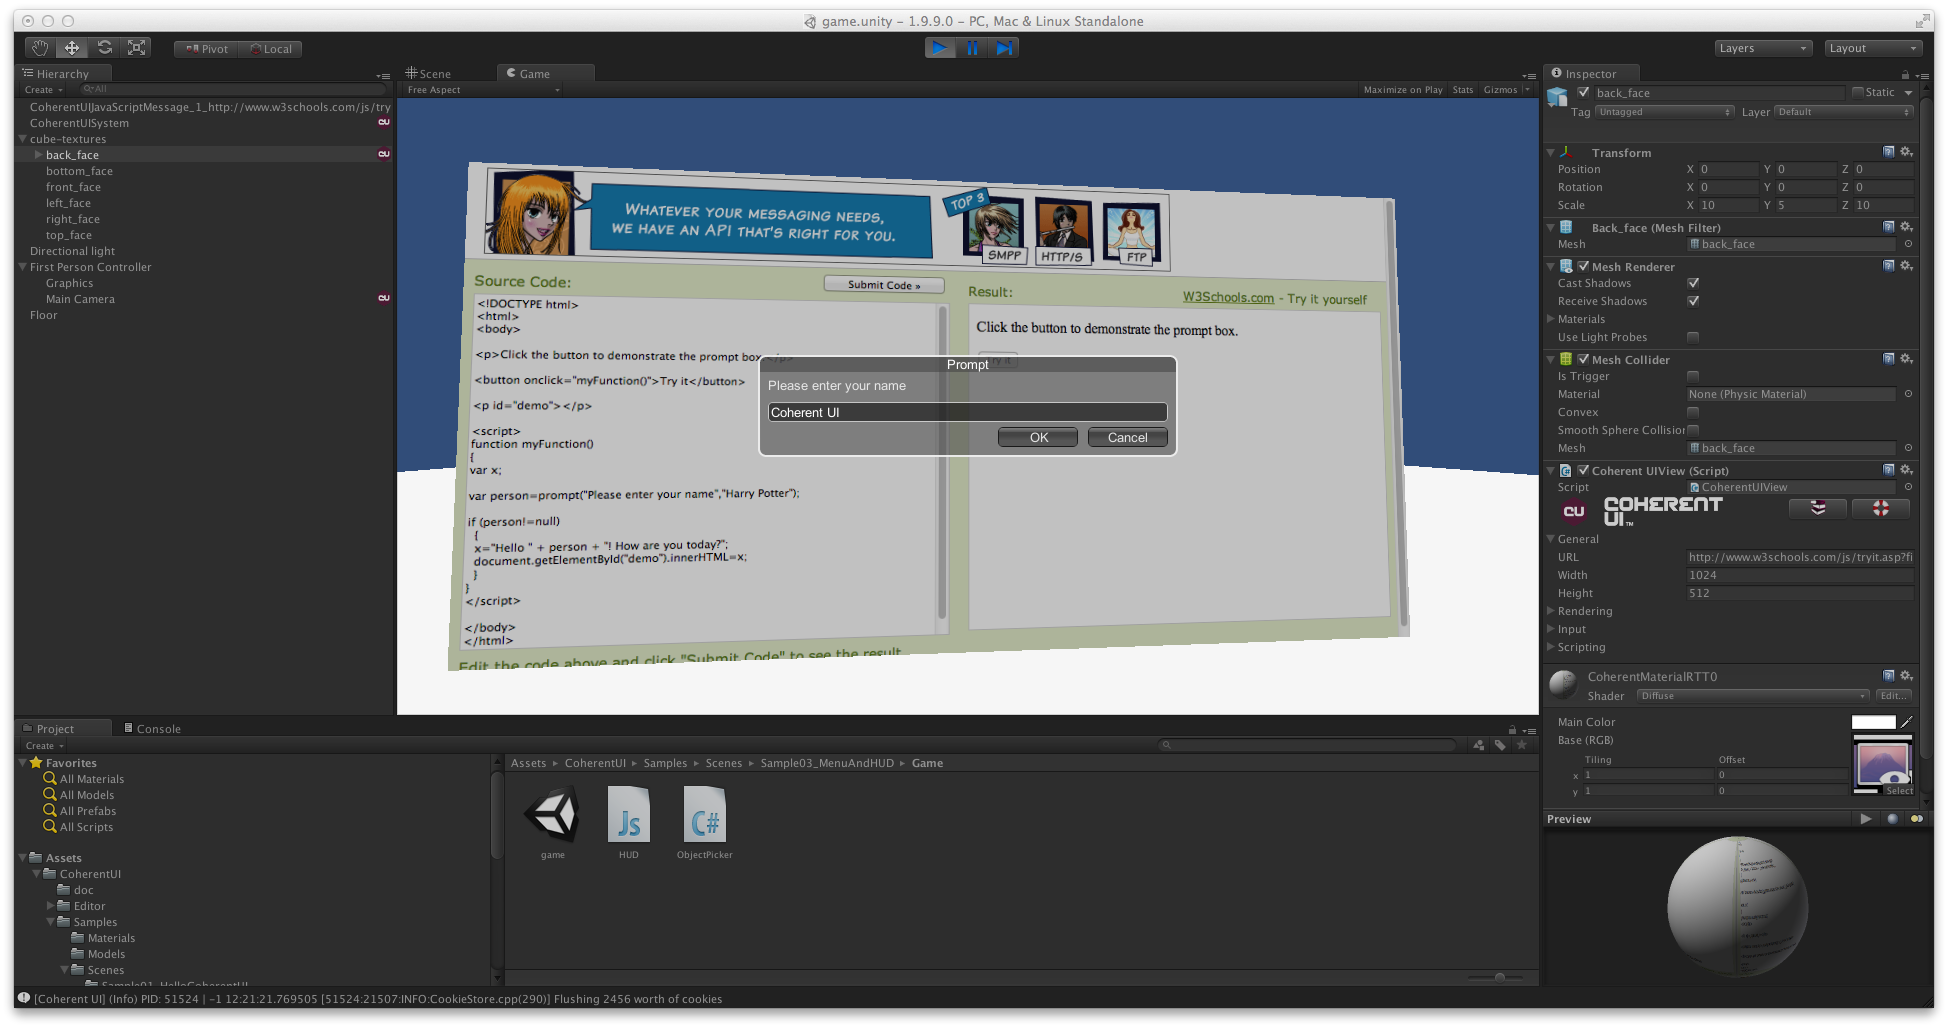
You can also try pages that show dialog boxes, such as
If you do not handle the Listener events for dialog boxes by yourself they will be handled automatically by Coherent UI.
This sample uses a facebook application that shows some of your photos in a rotating circle. You'll see how to customize the View and ViewListener behaviour to suit your needs.
coui:// links.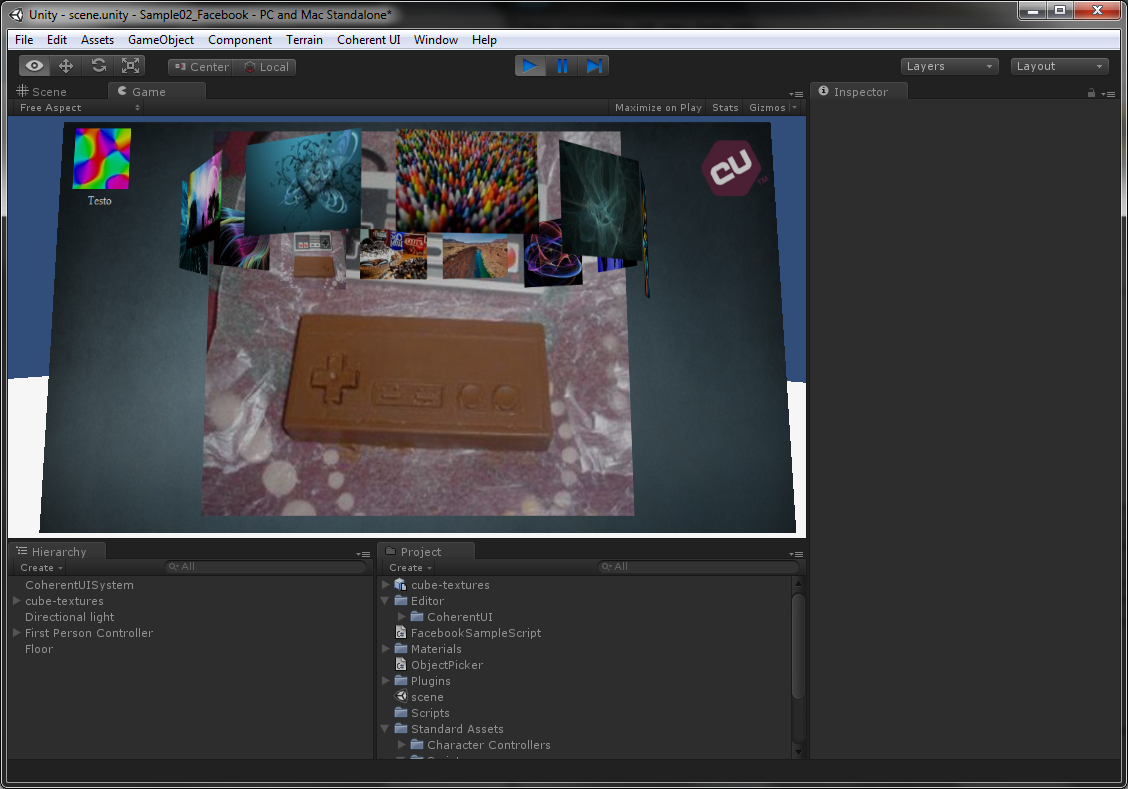
You will find a new script - FacebookSampleScript. We need to modify the default behaviour of UnityViewListener for this sample. The key points are:
Start method the FacebookSampleScript obtains the CoherentUIView component in the game object.Start method the script also attaches to the CoherentUIView.OnViewCreated event to enable intercepting URL requests and to the UnityViewListener.URLRequest event to redirect the Facebook login URL to the local HTML page.This is the easiest way to handle events provided by the UnityViewListener. Another option is to derive the UnityViewListener and CoherentUIView but that is unnecessary.
The FacebookSampleScript.OnURLRequestHandler checks if the requested URL is the one that was registered in the Facebook Application settings (this might be any made up URL). If that's the case, we redirect it to the local page that uses our Facebook application. You will find the page we're redirecting to in the sample project folder under FacebookSample/facebook.html.
Now that we've explained what the class does, the only thing left is to hit play. You can press Alt to stop moving/looking so you can browse in the Facebook application.
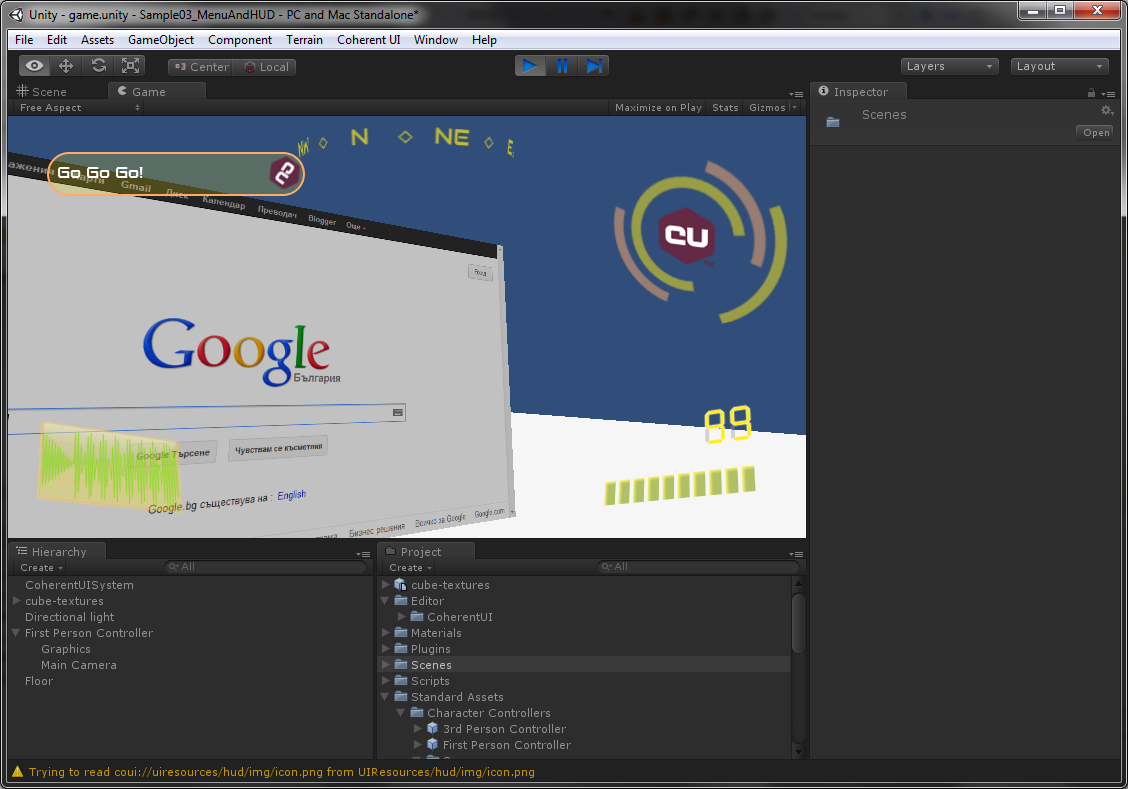
This sample shows a game menu and HUD built with Coherent UI.
coui:// links.Double-click the Menu scene in the Project window (located in Scenes) to make it active, if it isn't already. In the Menu scene we have a MenuScript component attached to the camera. MenuScript does three things:
Update()In the game, we have another component for controlling the view - HUD, this time implemented in UnityScript. Each frame the component updates the compass orientation, based on its transformation.
In addition to updating the compass, the HUD component takes care of disabling the CharacterMotor component when the focus is on a Click-to-focus view. The HUD script attaches to CoherentUISystem::OnViewFocused event and changes the canControl property of the selected CharacterMotor whenever a Click-to-focus view gains or loses focus. This allows typing in the focused view without moving the character. Here is the HUD component in code:
In the game scene we have one more component - ObjectPicker, that takes care of directing the input to the correct CoherentUIView. First it checks whether the mouse is on a HUD element and if it is not, then raycasts and checks whether the mouse is over the browser window. Make sure the "Support Click Through" checkbox is ticked on the HUD CoherentUIView - this allows you to detect whether the mouse is over a transparent area in the View. If the property is left unchecked the input will never reach any objects in the world, because the system will think that the mouse is always over the HUD.
This sample will demonstrate communication between Unity3D and JavaScript used by the HTML page loaded in a Coherent UI View.
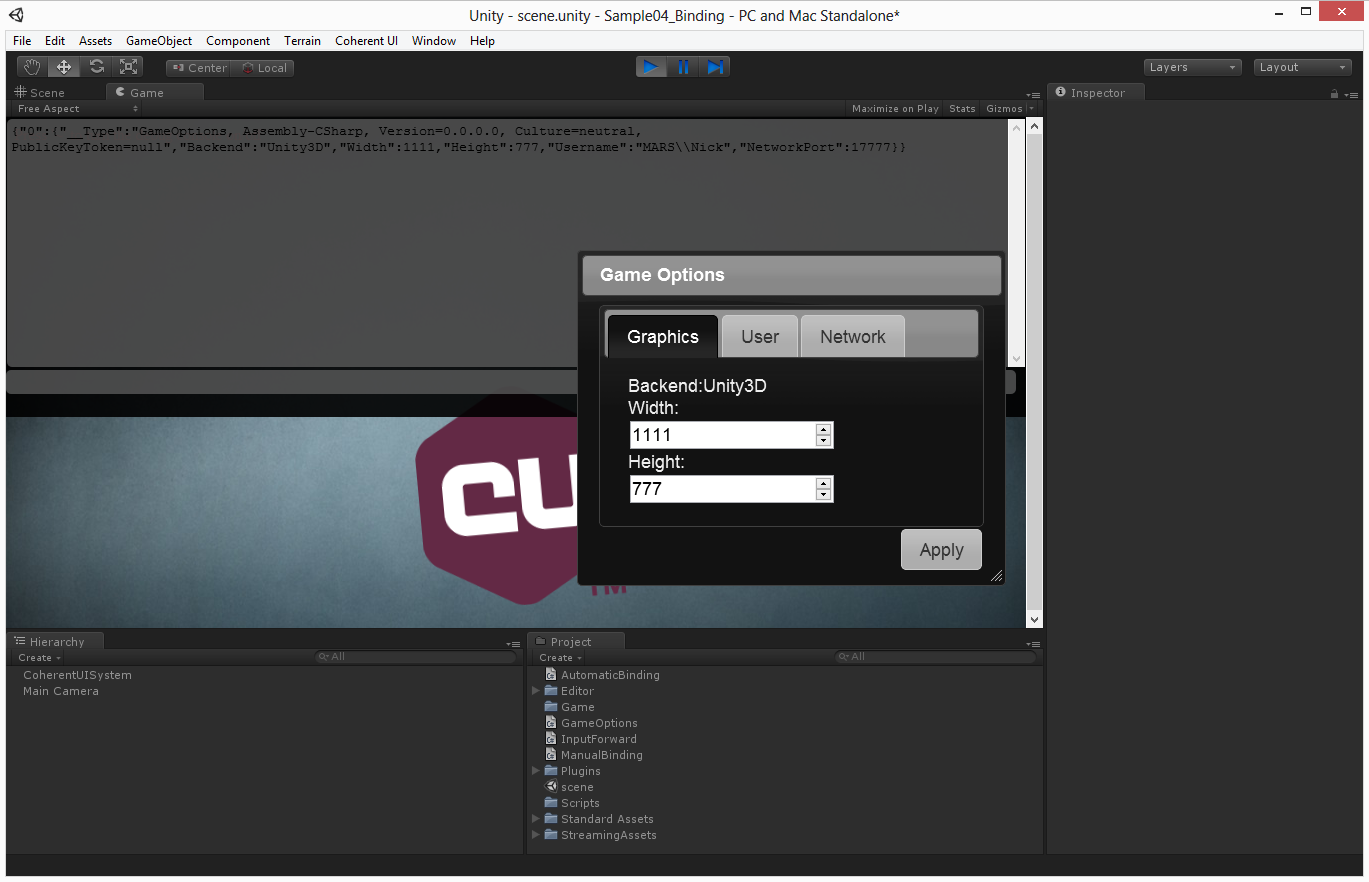
coui:// links.The sample shows a simple options dialog. The options are passed from JavaScript to Unity3D and back to exercise the binding. This walkthrough will give you a brief overview of the Coherent UI Binding fundamentals but be sure to check out the Binding section in this guide, as well as the Binding for .NET section in the general reference document.
First, when passing custom object types between Unity3D and JavaScript, you must first inform Coherent UI about the data in the type. You can do that using the CoherentType attribute:
Now the GameOptions structure will correspond to a JavaScript object having the same properties. Note that you can rename a property using the CoherentProperty attribute. In this case, the "NetPort" property will correspond to "NetworkPork" in JavaScript.
After exposing the properties, we need to register some event handlers. This can be done in two ways. The first way to bind event handlers is to add a handler for the ReadyForBindings event of the UnityViewListener (manual binding). The second way (.NET only) is to add a CoherentMethod attribute to the method you want to bind (automatic binding). See the CoherentMethod section in this guide for more details.
We'll explore the manual binding first. Start by registering a handler for ReadyForBindings:
The handler would look like this:
Now, when JavaScript calls engine.call("ApplyOptions", options), Unity3D will execute its handler - namely the (Action<GameOptions>)this.ApplyOptions method registered above.
The options structure passed as a parameter looks like this:
Note that there is one "internal" property - __Type. This property defines the mapped type and is essential for correct behavior of the binding provided by Coherent UI.
The "ApplyOptions" handler just bounces the options back to JavaScript:
gameConsole:Trace will dump the options object in the console.
The automatic binding saves us the first two steps - instead of registering a handler in the UnityViewListener callback you can decorate a method with the CoherentMethod attribute:
The first argument of the attribute is the JavaScript function that we're binding. The second defines whether the function is an event (opposed to a call - calls are single-cast only).
Calls can also return a value. Let's inspect the "GetLatency" binding:
Since the execution of JavaScript is not synchronous you will receive the result in a callback. Coherent UI provides a promise/future pattern for convenience. This is the "GetLatency" JavaScript call in all its glory:
As you can see from the script, the value returned by Unity3D will be passed to the callback as an argument.
This sample also shows how to use binding of .Net methods. For detailed explanation see "Exposing Methods" in the "Binding for .Net" chapter in the API documentation.
The sample exposes an instance of MyMath to JavaScript.
When the game is up and running, we request the MyMath instance, store it as a global object and register two console commands that use it.
To try out the commands press ~ to open the game console and type sum 40 2.
When you need multiple handlers for a JavaScript function you need to register an event. This can be done by the Coherent.UI.View.RegisterForEvent method for manual binding
and passing true as a second parameter of the CoherentMethod attribute for automatic binding.
Bear in mind that events cannot return a value.
If you want to handle an event in JavaScript, you need to register a handler using the engine.on call.
An event can be triggered by JavaScript by using
or by Unity3D using
where m_View is CoherentUIView.
This concludes the binding demo walkthrough.
This sample demonstrates reading resources from an archive through a custom file handler.
The scene is just a simple camera that has an attached CoherentUIView component and another one that forwards input to the view. The important component for this sample is CustomFileHandlerScript. It sets the CoherentUISystem factory function object in its Awake method so the system is initialized with the custom handler.
In fact, that's all the component has to do - set the CoherentUISystem.FileHandlerFactoryFunc prior to any Start method being called. The returned CustomFileHandler is the class that does the actual reading/writing. The methods the user needs to implement are:
They will be called for all coui:// links and for the cookies (if enabled).
The input URL can be interpreted in any way you see fit for your handler. In the example we try to open the link coui://UIResources/mainmenu/menu.html. The mainmenu/menu.html is actually compressed in an archive. First we verify that the host part of the URL (UIResources) is what we expect for compressed resources and then proceed to search the archive for the resource.
Since Coherent UI supports asynchronous reading/writing of resources, when done with the I/O operations, you must use the ResourceResponse or ResourceData object to signal the outcome. You can do that by using the SignalSuccess and SignalFailure methods.
System.Runtime.InteropServices.Marshal class. Here's a short snippet that reads a file and then copies the managed buffer in an unmanaged buffer provided by the ResourceResponse object:Make sure you check out the code in CustomFileHandlerScript for a complete example.
This sample demonstrates how you can control what part of the input is forwarded to Unity3D by using JavaScript. The sample starts with an overlay that has 3 buttons on the left side, area for testing input forwarding on the right, and a red box in the world. The buttons enable/disable the input forwarding for touches on the right side of the overlay and the third one bumps the box upwards. When you touch the box a little force is applied and it should move forward as if you pushed it. If you touch the box in the right area of the overlay the force is applied only if input forwarding is enabled.
There are also buttons for toggling the overlay and mouse look controller in the top left corner for convenience.
Code-wise speaking, when you make a touch on a "Transparent" Coherent UI View, the engine.checkClickThrough function is called. You can check its code in coherent.js. Basically it obtains the DOM element from the touch coordinates and begins a series of checks. First, if the element is the document body or has the coui-noinput class, input is directly sent to the client (Unity3D). Otherwise, the element is checked for having a coui-inputcallback class. If it does, the element's couiInputCallback is invoked which determines whether the input is forwarded or consumed; if it doesn't have such class, input is consumed.
The sample enables/disables the input forwarding on the right area by removing/adding the coui-noinput class to the corresponding DOM element. In this sample, only the DOM element for the right area has the class coui-inputcallback and its couiInputCallback function is set when the engine has signaled it's ready. The function itself doesn't do anything special, it just always returns true, meaning that the input is consumed in JavaScript and never sent to the client (Unity3D).
You can also bump the box upwards which is a demonstration for the binding for Coherent UI Mobile. It's very much the same as binding for .NET/Unity3D standalone so we'll not go in detail here.
Summing up:
couiInputCallback which ultimately returns true if you want to consume the input or false if you want to forward it to the client.Note that for obtaining the element below the touch point we're currently using document.elementFromPoint. In the sample, the right area is represented by a <div> and there's some text inside it as a child element. Only the <div> has the coui-inputcallback class. If you touch the text its element will be checked for the coui-inputcallback class and since it doesn't have one input will be consumed. Since we want to apply the logic for all touches inside the area this presents a problem. One solution is to add the coui-inputcallback class to all child elements and set their couiInputCallback functions to the same variable. Another solution is to use the pointer-events CSS property on the children elements, e.g.:
This is how the sample solves the problem. Note that this is an experimental CSS property and prevents elements from being the target of pointer events. This is fine in the sample but may have adverse effects in your code so use it with caution.
This sample demonstrates how you can create UI elements in your games for the Oculus Rift, using the CoherentUI and OculusVR integrations in Unity. The focus of the sample is on creating a HUD element that can be used with the Oculus headset.
You can get Oculus ready for use in Unity by following these steps:
Now we are ready to proceed with the sample. As you can see, there is an OVRPlayerController in the Scene menu (it can be added from Oculus -> Prefabs -> OVRPlayerController). The controller is comprised of two things: a simple character controller and another OVR prefab - OVRCameraController. The latter is used as an interface between Unity and the two cameras. Double-click it to reveal its children objects. Double-clicking the OVRCameraController will show the cameras and a plane object attached to the right camera. This plane is used as a surface for drawing the HUD. There is an CoherentUIView component attached to it, which uses coui://UIResources/MenuAndHUD/hud/hud.html as a page. It is suggested that for drawing HUD elements you attach the surface to the right camera for optimal results.
This is basically all you need to draw the HUD. Hit play to see the result
The Mobile Surfaces sample shows how to use Coherent UI views on surfaces for mobile platforms. The sample shows a texture with a Coherent UI view on it that is rotating. Every 100 frames the view is changed and the texture is updated by calling the 'UpdateView' method of the view.
The sample shows a simple scene with a Live Game View. The scene consists of a "game world" with a plane as ground, four rotating colored cubes and a light.
On the main Camera a Coherent UI View is attached that serves as an in-game HUD(heads-up-display). The Live Game View is part of the HUD. A Coherent UI Live Game View component is also attached to this camera and hence to the UI - it is the "link" between the View and the provider of the 3D images.
A second camera is fixed on the cubes and provides the source data. Everything this camera renders is automaticcally sent to the UI View linked to it as a dynamic "ImageData" object in the UI JavaScript Code. The HUD.html page draw the Live View with the following code:
Every time a new frame is drawn by the "live" camera the "onEngineImageDataUpdated" is called on all "canvas" elements that define it in the page. There you can use the data in whatever fashion you need. In this sample we draw the image into the canvas and write some text on it. When you "Play" the game you'll see the four rotating cubes drawn in the HUD in the lower left corner as the "live" camera sees them.
Note that now the images of the camera are part of the UI DOM, so you can achieve all UI effects with it. The canvas elements can be animated, 3D transformed int the UI, post-effects can be applied on them, they can be interactive etc.
Via Live Game Views in a real game you can trivially have 3D animated unit portraits, animated items in the UI, 3D mini-maps, security cameras etc.
This sample demonstrates the usage of Input Method Editor for languages that require more complex input such as Chinese. To have IME enabled for a particular view you should just put a check on the Enable IME property of the CoherentUIView and this is all you need to do to have support for IME in your view.
Open the IME Sample, change your input language to one that requires IME, for example Chinese and hit play. Try to write something in the dialog that appears and hit 'Enter' or just press the 'Say' button. What you just wrote will appear in the dialog window.
Enabling IME does a few things:


