Making split screen UI with Gameface
3/28/2022
Kaloyan Geshev
The concept of split-screen mode is widely embraced in many cooperative (co-op) multiplayer games. This mode allows two or more players to engage in gameplay together on a shared screen, each utilizing distinct controllers or keyboard bindings. Within these games, individual players receive unique feedback through UI widgets displayed on their portion of the screen.
Utilizing the capabilities of Gameface and web technologies, you can effortlessly create your game UI widgets just once and subsequently instantiate them for every player connected to the game. Additionally, you have the ability to link each player’s data model to their respective widgets, enabling all players to view their real-time stats within the game, particularly when engaged in split-screen mode.
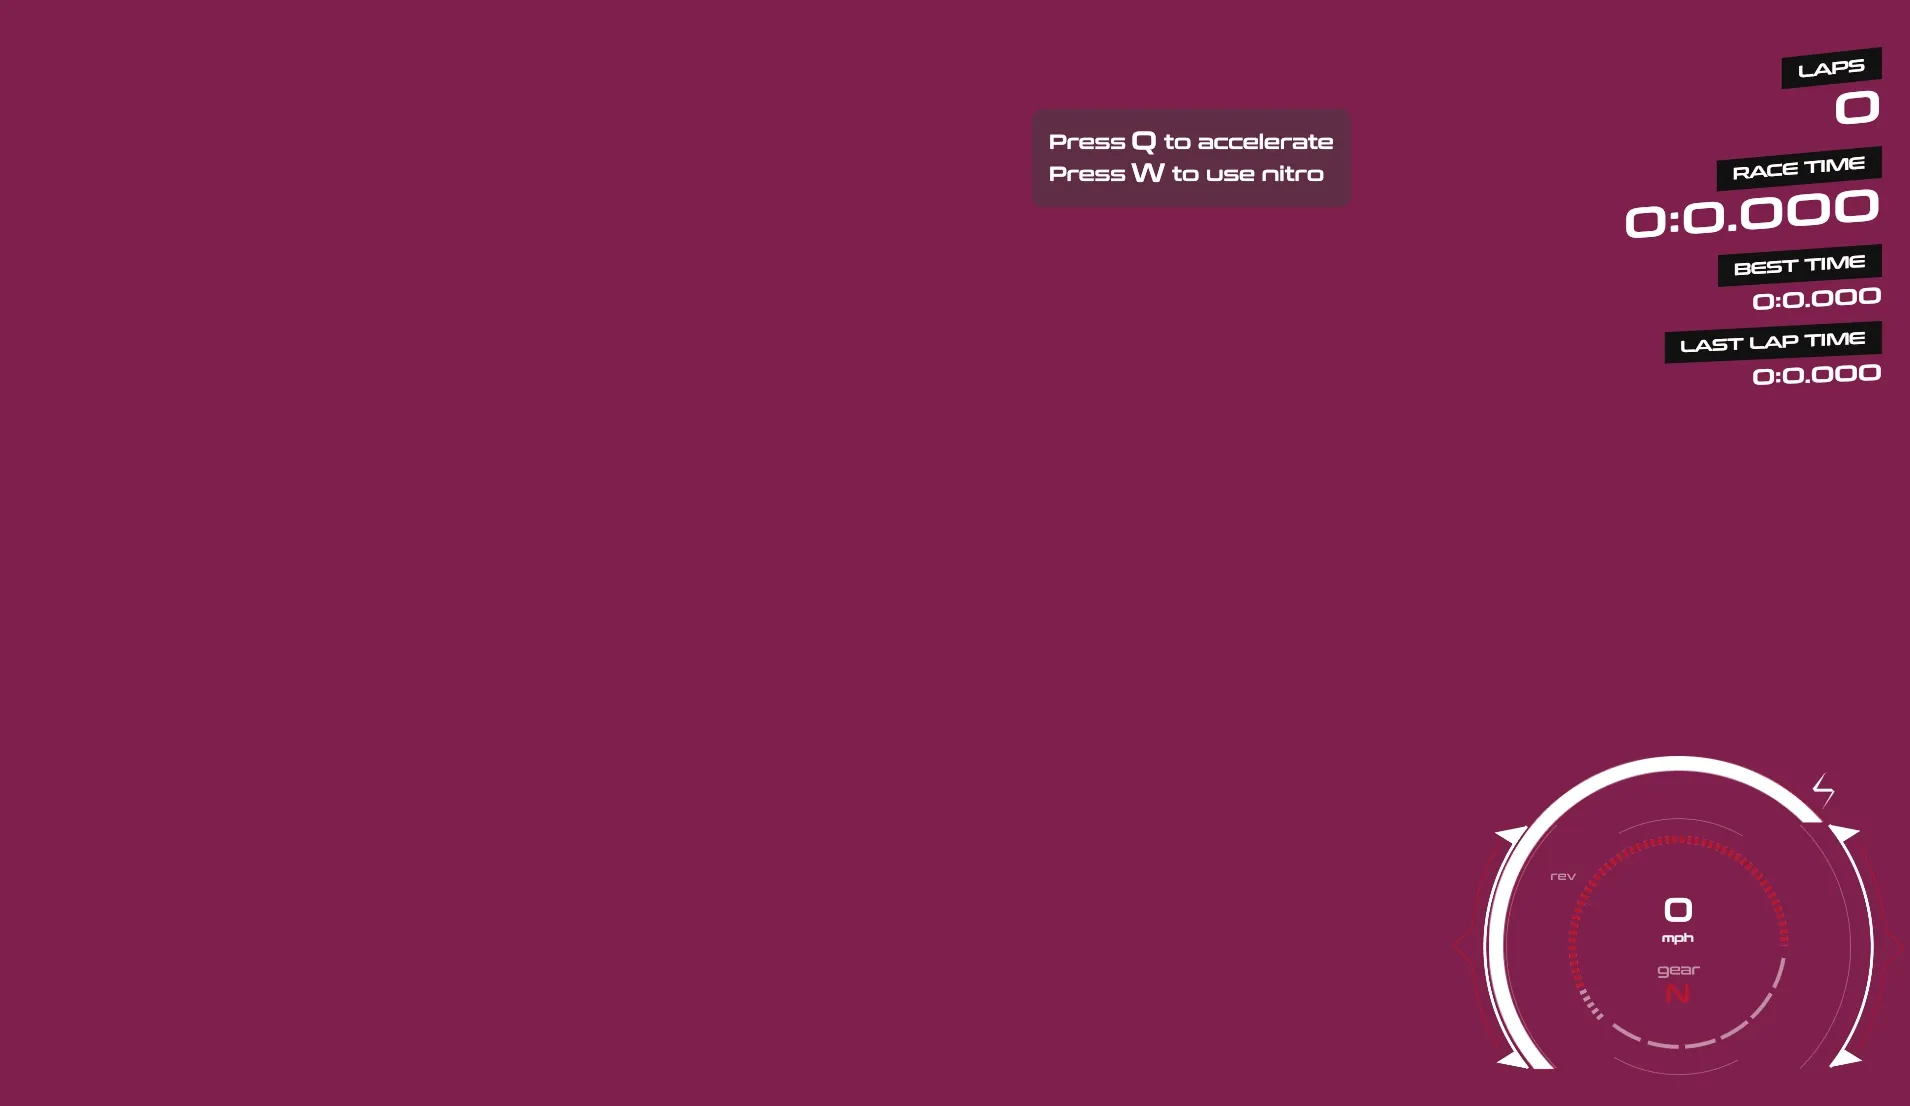
Showcase overview
To demonstrate the simplicity of achieving this using Gameface, we’ll reuse certain widgets from the ‘Racing Game UI’ to create a split-screen UI for the game. For a comprehensive overview of all the UI widgets featured in this game, you can explore the entire ‘Racing Game UI’ series on our YouTube channel .
The main idea here is when two or more players are connected locally in the game the screen being split into two or more sections, each showcasing individual widgets (gauge, lap timer, map, etc.) to each of the players. For simplicity, we’ll focus on the gauge for now, although this approach is applicable to all other widgets.

Source location
You can review the complete sample source within the ${Gameface package}/Samples/uiresources/UI Tutorials/split-screen-ui directory.
Sample demonstration
To showcase the functional split screen in the sample, we have introduced a mock JavaScript model that dynamically updates at runtime. Additionally, we’ve implemented the following keyboard bindings to test the split screen:
- Pressing
Padds a new player. - Pressing
Oremoves a player. - Each player’s screen has a tip message with controls that update the player’s gauge state such as rpm, gear, speed, or nitro.
Split screen UI in details
Binding widgets with the game data model
The gauge widget’s source is reused from the Racing Game UI, displaying the car’s rpm, gear, and speed. We’ve enhanced it by adding a nitro bar. The following HTML snippet outlines the widget’s structure at a high level.
1<div class="gauge">2 <div class="rpm">...</div> <!-- Element representing the rpm -->3 <div class="nos-icon">...</div> <!-- Shows an icon on the top of the nitro bar-->4 <div class="nos">...</div> <!-- Shows the nitro bar background image-->5 <div class="nos-fill">...</div> <!-- The current car's nitro-->6 <div class="speedometer">...</div> <!-- The speed of the car-->7 <div class="gears">...</div> <!--T he current gears graphic and the current car's gear-->8</div>Within each element, there are SVG elements bound to the player car model data for a visually appealing representation. The RPM, for instance, has the following structure:
1<div class="rpm">2 <svg width="100%" height="100%" viewBox="0 0 228 195" fill="none" xmlns="http://www.w3.org/2000/svg">3 <path4 d="M220.5 114C220.5 96.486 216.181 79.2422 207.925 63.7962C199.669 48.3503 187.731 35.1788 173.168 25.4485C158.606 15.7182 141.869 9.7295 124.439 8.01283C107.009 6.29615 89.4251 8.9045 73.2442 15.6068C57.0634 22.3092 42.7852 32.8986 31.6744 46.4371C20.5636 59.9756 12.9632 76.0454 9.54637 93.2229C6.12955 110.4 7.0018 128.155 12.0859 144.915C17.1699 161.675 26.3088 176.923 38.6931 189.307"5 stroke="white"6 stroke-width="7"7 stroke-opacity="0.5"8 />9 <path10 d="M220.5 114C220.5 96.486 216.181 79.2422 207.925 63.7962C199.669 48.3503 187.731 35.1788 173.168 25.4485C158.606 15.7182 141.869 9.7295 124.439 8.01283C107.009 6.29615 89.4251 8.9045 73.2442 15.6068C57.0634 22.3092 42.7852 32.8986 31.6744 46.4371C20.5636 59.9756 12.9632 76.0454 9.54637 93.2229C6.12955 110.4 7.0018 128.155 12.0859 144.915C17.1699 161.675 26.3088 176.923 38.6931 189.307"11 stroke="#BD162C"12 stroke-width="7"13 class="rpm-bar"14 data-bind-style-stroke-dashoffset="{{Player.car.rpm}}"15 />16 </svg>17</div>Here, the car’s rpm is dynamically bound to the SVG path’s stroke dash offset, updating the stroke dynamically with the player’s model.
For more detailed information on data binding in Gameface, refer to the documentation.
Wrapping up the UI for split screen
The player’s UI is encapsulated and can be instantiated multiple times - for each connected player. The structure is defined as follows:
1<div class="main-screen" data-bind-for="index,Player:{{Players}}">2 <div3 class="screen-wrapper"4 data-bind-style-left="{{Player.screenRect.x}}+'%'"5 data-bind-style-top="{{Player.screenRect.y}}+'%'"6 data-bind-style-width="{{Player.screenRect.width}}"7 data-bind-style-height="{{Player.screenRect.height}}"8 data-bind-class="'players-'+{{Players.length}}"9 > <!-- data-bind-class attribute will be used later for scaling down the UI when more players are connected to the game -->10 <div class="gauge">...</div> <!-- UI of the gauge widget-->11 <div class="lap-timer">...</div> <!-- UI of the lap timer widget-->12 <!-- Additional UI for the player -->13 </div>14</div>with the following styles:
1.main-screen {2    width: 100%;3    height: 100%;4    position: absolute;5}6
7.screen-wrapper {8    position: absolute;9}
Here are a few aspects that require our attention:
- We utilize the
data-bind-forattribute to create multiple instances of the UI for individual players. To achieve this, we rely on the game’sPlayersmodel, which is an array containing the state information for each player. An illustration of thePlayersarray might be:
1[2 {3 id: 0,4 screenRect: { x: 0, y: 0, width: '100%', height: '100%' },5 car: {6 rpm: 120,7 speed: 0,8 gear: 'N',9 laps: 0,10 nos: 100,11 currentTime: '0:0.000',12 bestTime: '0:0.000',13 lastTime: '0:0.000',14 }15 }16]- We establish the screen wrapper element responsible for containing the player’s widgets, which will be rendered individually for each player’s state in the
Playerarray. - We bound the layout of the screen wrapper with the in-game screen data for each player ensuring proper positioning of all players’ screens within the UI. The required data from the game includes the top-left coordinates of a player’s screen and the width and height of the screen.
Scale down each player’s screen
When additional players join the game, the user interface within the split screen should adjust its size to ensure that the gauges fit appropriately within the allocated space. This adjustment can be accomplished by scaling down each player’s screen using CSS.
Firstly, we need to dynamically assign a class to the screen-wrapper element based on the number of players:
1<div class="screen-wrapper" data-bind-class="'players-'+{{Players.length}}" ... >This ensures that the class changes with the player count.
Next, we apply scaling adjustments via CSS for the widgets. Here’s an example of how this can be done:
1.players-2 .gauge {2    transform: scale3d(0.7, 0.7, 1);3}4
5.players-2 .tips {6    font-size: 1.7rem;7}8
9.players-2 .lap-timer {10    transform: scale3d(0.8, 0.8, 1) rotateY(-15deg) translateY(5vh);11}12
13.players-3 .tips,14.players-4 .tips {15    font-size: 1.6rem;16}17
18.players-3 .gauge,19.players-4 .gauge {20    transform: scale3d(0.6, 0.6, 1);21}22
23.players-3 .lap-timer,24.players-4 .lap-timer {25    transform: scale3d(0.5, 0.5, 1) rotateY(-15deg) translateY(5vh);26}
Conclusion
By implementing this setup, you can effectively integrate split-screen functionality into your UI. Simply introducing an additional player into the game and appending its state to the Players array, along with its corresponding screenRect data, is enough for the UI to respond to the change, resulting in the automatic splitting of the screen.