Manager UI (part 2): Cross component interactions and utility components (Toast, Tooltip)
3/8/2025
Martin Bozhilov
This is the second tutorial in the Manager UI series. In the last tutorial, we created the layout of the sample and a grid component with drag and drop functionality.
In this tutorial, we will add a side navigation component and some utility components like a toast and a tooltip. The side navigation will allow us to add and remove items from the grid.
Additionally, we will add a toast component which we will use to display an error message to the user if the grid is full and a
tooltip component which will show a tooltip when hovering over the grid items to tell the user which screen they are hovering on.
Side navigation component
The navigation component will allow us to add items to the grid. Let’s first build the layout of the component.
Displaying the icons
To display the icons, we will create a map that will hold the icons paths.
We will then iterate over the items in the grid and display the icons by getting the icon’s reference in the map with the item’s ID.
1import GameLogo from '@assets/logo.png';2import teamRosterIcon from '@assets/icons/team-roster.png';22 collapsed lines
3import matchTacticsIcon from '@assets/icons/match-tactics.png';4import teamSettingsIcon from '@assets/icons/team-settings.png';5import playerStatsIcon from '@assets/icons/player-stats.png';6import matchCalendarIcon from '@assets/icons/match-calendar.png';7import teamMoraleIcon from '@assets/icons/team-morale.png';8import financialsIcon from '@assets/icons/financials.png';9import transferMarketIcon from '@assets/icons/transfer-market.png';10import matchStatsIcon from '@assets/icons/match-stats.png';11import teamNewsIcon from '@assets/icons/team-news.png';12import scoutingIcon from '@assets/icons/scouting.png';13import managerStats from '@assets/icons/manager-stats.png';14import cancelIcon from '@assets/icons/cancel.png';15import styles from './SideNav.module.css';16import { Component, createSignal, For } from 'solid-js';17import { addItem, gridState } from "../../store/gridStore";18import NavIcon from './NavIcon';19import Toast from "../Util/Toast";20import { Item } from '../../../types/types';21import Block from "@components/Layout/Block/Block";22import Flex from "@components/Layout/Flex/Flex";23import TextBlock from "@components/Basic/TextBlock/TextBlock";24import Image from "@components/Media/Image/Image";25
26const SideNav: Component = () => {27 const imageMap = new Map<number, string>([28 [1, teamRosterIcon],29 [2, matchTacticsIcon],30 [3, teamSettingsIcon],31 [4, playerStatsIcon],32 [5, matchCalendarIcon],33 [6, teamMoraleIcon],34 [7, financialsIcon],35 [8, transferMarketIcon],36 [9, matchStatsIcon],37 [10, teamNewsIcon],38 [11, scoutingIcon],39 [12, managerStats],40 ]);41
42 return (43 <Flex direction='column' justify-content='start' align-items='center' class={styles.SideBar}>44 <Block class={styles.Logo}>45 <Image src={GameLogo} class={styles.LogoImage} />46 </Block>47 <Flex direction='column'>48 <For each={gridState.items}>49 {(item) => <Image class={styles.Icon} src={imageMap.get(item.id)}/>}50 </For>51 </Flex>52 </Flex>53 )54}55
56export default SideNavLet’s add the CSS
1.SideBar {2    width: 100%;3    height: 100%;4    border-right: 3px solid #606067;5}6
7.Logo {8    max-width: 100%;9    margin: 2vmax;10}11
12.LogoImage {13    width: 5vmax;14    height: 5vmax;15}16
17.Icon {18    width: 2.5vmax;19    height: 2.5vmax;20    margin-bottom: 1vmax;21    cursor: pointer;22}
And Finally, import it in the HUD.tsx file and add it in the Column1 component.
1import SideNav from '@custom-components/Navigation/SideNav';2
3return (4    <Layout>5      <Row class={styles.Hud} >6        <Column1>7          <SideNav />8        </Column1>9        <Column11>10          <Grid />11        </Column11>12      </Row>13    </Layout>14);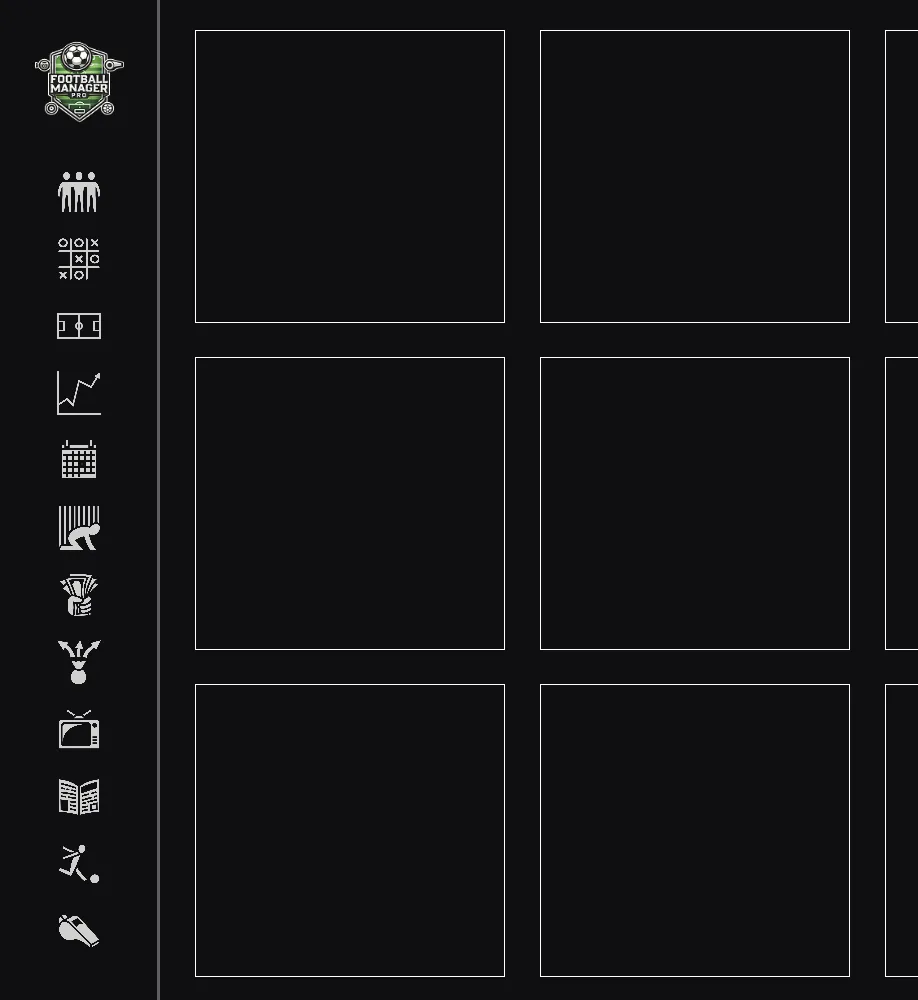
Adding items to the grid
To add items to the grid, we will add an onClick event to the icons. When an icon is clicked, we will add the item to the grid.
Since we want to also display a tooltip with the item’s name when hovering over the icon, it is a good idea to separate the icon into a separate component.
Let’s create a NavIcon component. Our new component will accept the item, imageMap, and a click function as props. The click function will be called when the icon is clicked.
9 collapsed lines
1import { Component, createSignal } from "solid-js";2import styles from './NavIcon.module.css';3import { Item } from "../../../types/types";4import Tooltip from "../Util/Tooltip";5import infoIcon from '@assets/icons/info.png';6import Block from "@components/Layout/Block/Block";7import Flex from "@components/Layout/Flex/Flex";8import TextBlock from "@components/Basic/TextBlock/TextBlock";9import Image from "@components/Media/Image/Image";10
11type NavIconProps = {12 item: Item,13 imageMap: Map<number, string>,14 click: (item: Item) => void15}16
17const NavIcon: Component<NavIconProps> = ({item, imageMap, click}) => {18 return (19 <Block class={`${styles.Icon} ${item.active ? styles['Icon-Disabled'] : ''}`} >20 <Image21 class={`${styles['Icon-Image']} ${item.active ? styles['Icon-Image-Disabled'] : ''}`}22 click={() => click(item)}23 src={imageMap.get(item.id)!} />24 </Block>25 )26}27
28export default NavIconWe can use the item.active property to disable the icon if it is already in the grid. Let’s add the styles for our NavIcon component.
1.Icon {2    width: 2.5vmax;3    height: 2.5vmax;4    margin-bottom: 1vmax;5    position: relative;6    cursor: pointer;7    transition: opacity 0.25s ease-in-out;8}9
10.Icon-Image {11    max-width: 100%;12    max-height: 100%;13    opacity: 0.8;14}15
16.Icon-Image:hover {17    opacity: 1;18}19
20.Icon-Disabled {21    opacity: 0.5;22    cursor: auto;23    pointer-events: none;24}
Now, let’s import the NavIcon component in the SideNav.tsx file and use it to display the icons.
1<For each={gridState.items}>2 {(item) => <Image class={styles.Icon} src={imageMap.get(item.id)}/>}3</For>4<For each={gridState.items}>5 {(item) => <NavIcon item={item} imageMap={imageMap} click={clickHandler} />}6</For>What’s left is to add the logic for adding an item to the grid. In our gridStore.ts file, we will add a new function addItem that will handle the logic.
The logic for adding an item is simple. We will create a helper function - findAvailablePosition which will loop through all cells and try to find an empty cell and the adjecent cells that can
fit the item we are trying to add. If we find a suitable position, we will add the item to the grid and update our model.
This way the next time the user loads the game, the item will be in the same position. Finally, we will return true to indicate a successful addition.
1function addItem(id: number) {2    let hasAdded = false;3    setGridState('items', item => item.id === id, produce(item => {4        const cellPosition = findAvailablePosition(item, item.sizeX, item.sizeY);5
6        if (cellPosition) {7            const { row, col } = cellPosition;8            item.row = row;9            item.col = col;10            item.x = cells[row][col].element?.offsetLeft!;11            item.y = cells[row][col].element?.offsetTop!;12            item.active = true;13
14            occupyCell(row, col, item);15
16            hasAdded = true;17
18            updateGridDataModel();19        }20    }))21
22    return hasAdded23}24
25const findAvailablePosition = (item: Item, sizeX: number, sizeY: number): Position | undefined => {26    for (let row = 0; row < MAXROWS; row++) {27        for (let col = 0; col < MAXCOLS; col++) {28            if (isCellBlockValid(row, col, item, sizeX, sizeY)) {29                return { row, col }30            }31        }32    }33}
The only thing left is to implement the clickHandler function in the sideNav. This function will call the addItem function and display a toast message if the grid is full.
Displaying a Toast component
To display a toast message, we will create a Toast component. Our Toast will accept
- a
showprop that will determine if the toast should show or not, - an optional
durationprop that will determine how long the toast should be displayed, - an optional
onHidefunction that can be called before the toast hides.
1import { createEffect, createSignal, ParentComponent, Show } from "solid-js";2import styles from './Toast.module.css';3import { Portal } from "solid-js/web";4import Block from "@components/Layout/Block/Block";5
6type ToastProps = {7    show: boolean,8    duration?: number,9    onHide?: () => void,10}11
12const Toast: ParentComponent<ToastProps> = (props) => {13    const [isOpen, setIsOpen] = createSignal(false);14
15    const displayDuration = props.duration ?? 2000;16
17    let timer: number | undefined;18
19    createEffect(() => {20        if (!props.show) return setIsOpen(false);21
22        setIsOpen(true)23
24        if (timer) window.clearTimeout(timer);25
26        timer = window.setTimeout(() => {27            setIsOpen(false);28            props.onHide?.();29        }, displayDuration)30    })31
32    onCleanup(() => {33        if (timer) clearTimeout(timer);34    });35
36    return (37        <Portal>38            <Block class={`${styles.Toast} ${isOpen() && styles.Show}`}>{props.children}</Block>39        </Portal>40    )41}42
43export default Toast;
The Toast will have an isOpen signal which will help us control the visibility of the toast. Additionally, we will use a timer to hide the toast after a certain duration.
Lastly, the Toast will be rendered with the help of the
Portal component. This will allow us to render the toast directly as a child of the body element.
Let’s add the CSS for the Toast component.
1.Toast {2    padding: 1.25vmax 1.5vmax;3    background-color: #ED1054;4    color: #FFF;5    border-radius: 10px;6    display: flex;7    justify-content: center;8    align-items: center;9    text-align: center;10    position: absolute;11    left: 50%;12    opacity: 0;13    transition: transform 0.35s ease-in-out, opacity 0.35s ease-in-out;14    transform: translate(-50%, -100%)15}16
17.Show {18    opacity: 1;19    transform: translate(-50%, 20%);20}
Now, let’s import the Toast component in the SideNav.tsx file and implement the clickHandler function to display items in the grid.
1const SideNav: Component = () => {2 const [toastMessage, setToastMessage] = createSignal("");3 const [showError, setShowError] = createSignal<boolean>(false);4
14 collapsed lines
5 const imageMap = new Map<number, string>([6 [1, teamRosterIcon],7 [2, matchTacticsIcon],8 [3, teamSettingsIcon],9 [4, playerStatsIcon],10 [5, matchCalendarIcon],11 [6, teamMoraleIcon],12 [7, financialsIcon],13 [8, transferMarketIcon],14 [9, matchStatsIcon],15 [10, teamNewsIcon],16 [11, scoutingIcon],17 [12, managerStats],18 ]);19
20 const clickHandler = (item: Item) => {21 const isAdded = addItem(item.id);22 if (!isAdded) {23 setToastMessage(`Unable to show ${item.name} window`);24 setShowError(false); // Reset first25 setTimeout(() => setShowError(true), 0);26 } else {27 setShowError(false);28 }29 }30
31 return (32 <Flex direction='column' justify-content='start' align-items='center' class={styles.SideBar}>33 <Block class={styles.Logo}>34 <Image src={GameLogo} class={styles.LogoImage} />35 </Block>36 <Flex direction='column'>37 <For each={gridState.items}>38 {(item) => <NavIcon item={item} imageMap={imageMap} click={clickHandler} />}39 </For>40 </Flex>41 <Toast show={showError()} onHide={() => setShowError(false)}>42 <Flex align-items='center'>43 <Image src={cancelIcon} class={styles['Error-Icon']} />44 <TextBlock>{toastMessage()}</TextBlock>45 </Flex>46 </Toast>47 </Flex>48 )49}Here, we defined a toastMessage signal that will hold the message we want to display in the toast. We also defined a showError signal that will determine if the toast should be displayed or not.
When an icon is clicked, we call the clickHandler function.
If the item is successfully added to the grid, we hide the toast.
If the grid is full, we set the toastMessage signal and show the toast.
And since we made our Toast render its children, we can pass the massage and add an error icon to the toast.
1.Error-Icon {2 width: 2vmax;3 height: 2vmax;4 margin-right: 0.5vmax;5}If you save the changes and click on an icon, you should now be able to add new items to the grid and display the toast if there is no space.
Adding tooltip to the icons
One little improvement we can add is a tooltip to the icons. The tooltip will show the name of the item when we hover over the icon.
The Tooltip component will be very similar to the Toast as it will accept a show prop that will determine if it should be shown.
The Tooltip will also render its children.
1import { ParentComponent, Show } from "solid-js";2import styles from './Tooltip.module.css';3import Block from "@components/Layout/Block/Block";4
5
6type TooltipProps = {7    show: boolean,8}9
10const Tooltip: ParentComponent<TooltipProps> = (props) => {11    return (12        <Show when={props.show} >13            <Block class={styles.Tooltip}>{props.children}</Block>14        </Show>15    )16}17
18export default Tooltip;
Styles:
1.Tooltip {2 padding: 0.75vmax;3 background-color: #3F404A;4 opacity: 1;5 border: 1px solid white;6 border-radius: 5px;7 z-index: 1000;8 position: absolute;9 top: 0;10 left: 0;11 transform: translateY(100%);12 white-space: nowrap;13}Now, let’s import the Tooltip component in the NavIcon.tsx file and use it to display the item’s name when hovering over the icon.
1const NavIcon: Component<NavIconProps> = ({item, imageMap, click}) => {2 const [showTooltip, setShowTooltip] = createSignal(false);3 return (4 <Block class={`${styles.Icon} ${item.active ? styles['Icon-Disabled'] : ''}`} >5 <Tooltip show={showTooltip()}>6 <Flex align-items="center">7 <Image src={infoIcon} class={styles.InfoIcon} />8 <TextBlock style={{margin: 0}}>{item.name}</TextBlock>9 </Flex>10 </Tooltip>11 <Image12 class={`${styles['Icon-Image']} ${item.active ? styles['Icon-Image-Disabled'] : ''}`}13 click={() => click(item)}14 mouseenter={() => setShowTooltip(true)}15 mouseleave={() => setShowTooltip(false)}16 src={imageMap.get(item.id)!} />17 </Block>18 )19}We added a showTooltip signal that will determine if the tooltip should be shown. We then added the mouseenter and mouseleave events to show and hide the tooltip when hovering over the icon.
And just like with the Toast, we added an icon next to the message.
1.InfoIcon {2 width: 1vmax;3 height: 1vmax;4 margin-right: 0.5vmax;5}And that’s it! We can now see the item’s name when hovering over the icon.
Removing items from the grid
With our current setup, implementing item removal will be very easy.
We can add a removeItem function in the gridStore.ts file that will:
- set the
activeproperty of the item tofalse. - clear the cell where the item is located.
- update the grid data model.
1const removeItem = (id: number) => {2    setGridState('items', item => item.id === id, produce(item => {3        item.active = false4        clearCell(item)5    }))6
7    updateGridDataModel();8}
Now, we can add this function to the onClick event on the grid items.
1<div class={styles['CellItem-drag']} ></div>2<div class={styles['CellItem-close']} onClick={() => removeItem(item.id)}>3 <div class={styles.CloseIcon}>X</div>4</div>And that’s it! We can now remove items from the grid.
Displaying components in the grid items
Since the grid items are screens within our Football Manager game, there is one final thing we have to add to the Grid component - the ability to display components in the grid items.
We are going to achieve this by creating a screens-registry.ts file where we will match the name property of each item to a component it should render.
1import Test from "@custom-components/Util/Test";2import { JSX } from "solid-js";3
4export const screenRegistry: Record<string, (props: any) => JSX.Element> = {5    "Team Roster": Test,6    "Match Tactics": Test,7    "Team Settings": Test,8    "Player Stats": Test,9    "Match Calendar": Test,10    "Team Morale": Test,11    "Financials": Test,12    "Transfer Market": Test,13    "Match Stats": Test,14    "Team News": Test,15    "Scouting": Test,16    "Manager Stats": Test,17}
Later, when we have build actual components for each screen, we can replace the Test component with the actual component.
Now, in the GridItem component, we will import the screenRegistry and use it to render the component based on the name property of the item. We are going to use the
Dynamic SolidJS component to render the item’s component.
1import { screenRegistry } from "../../../utils/screens-registry";2import { Dynamic } from "solid-js/web";3
4<For each={gridState.items} >5    {(item) => {6        const ScreenComponent = screenRegistry[item.name];7        return (8            <div9                ref={(el) => gridState.itemRefs.set(item.id, el)}10                style={{11                    top: `${item.y}px`,12                    left: `${item.x}px`,13                }}14                class={`${styles[`Item-${item.sizeX}x${item.sizeY}`]} ${styles.CellItem} ${item.active ? styles.Active : styles.Inactive}`}15                onMouseDown={(e) => handleMouseDown(e, item)}>16                    <Dynamic component={ScreenComponent} name={item.name} />17                <div class={styles['CellItem-drag']} ></div>18                <div class={styles['CellItem-close']} onClick={() => removeItem(item.id)}>19                    <div class={styles.CloseIcon}>X</div>20                </div>21            </div>22        )23    }}24</For>
We have implemented a placeholder Test component that will display the name of the screen. We will remove the Test component after we have built the actual components for each screen.
1const Test = (props: any) => {2    return <div>{props.name}</div>3}4
5export default Test
Conclusion
With these changes implemented, our grid is almost fully functional and we can soon proceed by adding the game screens for the Football Manager game!