Skewed settings menu
3/28/2024
Kaloyan Geshev
The settings menu stands out as a fundamental feature in gaming, offering players the ability to configure various aspects of their gaming experience such as controls, gameplay dynamics, and interface preferences.
Utilizing the components available for Gameface, creating such a menu becomes remarkably straightforward.

Showcase overview
In this showcase, we accomplished the following:
- Created an
Optionspage featuring multiple menus. - The primary menu categorizes settings into
GeneralandControls.- The
Generalmenu further segregates into submenus covering aspects ofGameplayandUser Interface. - The
Controlsmenu offers a single submenu option enabling keyboard mapping, facilitating the assignment of any key to a game action.
- The
Leveraging coherent-guic-cli , we initiated a webpack project, developed custom components to organize the sample’s source structure, and integrated custom controls not included in our components suite . Additionally, we utilized some components from the suite:
- Tabs to construct the main and submenus.
- Scrollable container to enable scrollability for tabs panels when options overflow the fixed container height.
- Stepper , radio button , rangeslider for designing the settings controls.
Source location
You can find the complete sample source within the ${Gameface package}/Samples/uiresources/UITutorials/SkewedSettingsMenu directory.
To review it, simply run the index.html page in Gameface from the ${Gameface package}/Samples/uiresources/UITutorials/SkewedSettingsMenu/dist folder.
If you wish to experiment with the sample, you can use the following commands:
npm i
It is required to first install the node modules via npm i inside ${Gameface package}/Samples/uiresources/UITutorials/SkewedSettingsMenu folder.
build
1npm run buildThis command will generate a production (minified) build in the dist folder.
build:dev
1npm build:devThis command will create a development build (non-minified) in the dist folder.
watch
1npm run watchThis command will start a development server with live reload. After running the watch command, you can launch the Player using the Player.bat file and provide the following url argument: "--url=http://localhost:9000". This allows you to preview the sample.
Sample in details
To organize our project effectively, we’ve segregated our pages and custom components for the settings menu into distinct folders:
${Gameface package}/Samples/uiresources/UITutorials/SkewedSettingsMenu/src/pages${Gameface package}/Samples/uiresources/UITutorials/SkewedSettingsMenu/src/components
Skewed menu effect
To achieve the skewed menu effect, we’ve employed the skew CSS transform property:
1transform: skewX(3deg) skewY(-3deg);
Initial component
We’ve introduced an initial component that extends the BaseComponent class, streamlining the process for our custom components. This approach minimizes code repetition in the script.js files of our custom components. For example, the settings-item component acts as a container for setting labels and controls, requiring modifications only in its styles.css and template.html files, without altering its script.js. By extending the InitialComponent class, we reduced the code repetition. Otherwise, we would need to define the init and connectedCallback methods for each custom component generated via coherent-guic-cli.
Settings page
The source of the main page of the sample is located in the ${Gameface package}/Samples/uiresources/UITutorials/SkewedSettingsMenu/src/pages/settings/settings-page.
Settings page wraps all the settings menus and panels. The main menu is defined using the gameface-tabs component, specifying its tab-headings and tab-panels.
Since gameface-tabs doesn’t open any tab by default, we manually trigger this action in the settings-page script.js file:
1init(data) {2 this.setupTemplate(data, () => {3 components.renderOnce(this);4 // attach event handlers here5 window.requestAnimationFrame(()=>{6 const tabs = this.querySelector('gameface-tabs');7 tabs.selectTab(tabs.getFirstTab());8 })9 });10}General and Control settings pages
Similar to the settings page, these two pages encapsulate the submenus section using the gameface-tabs component. Nested gameface-tabs allow the creation of submenus, as demonstrated in this sample.
Scrollble container
By default, Gameface doesn’t render a scrollbar on the right when content overflows an element on the page. To address this, we’ve introduced the scrollable container component , which defines a scrollable area and incorporates a slider for scrolling within that area. Additionally, the area can be scrolled via the mouse wheel. This component offers flexibility in designing custom sliders with custom arrows, as demonstrated in this example. We’ve modified the default styles of the scrollable container and repositioned the slider to the left side of the scrollable area.
For those interested in the restyling of the scrollable container, you can refer to the source between the comments /* Scrollable container styles start */ and /* Scrollable container styles end */ within ${Gameface package}/Samples/uiresources/UITutorials/SkewedSettingsMenu/style.css.
Settings controls
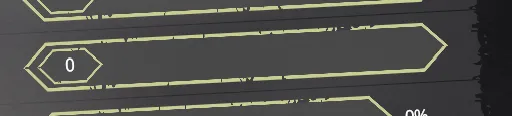
Stepper

For the stepper, we have utilized the gameface-stepper component, modifying its default styles to achieve the appearance shown in the image above. To view the adjusted styles, refer to the section between the comments /* Stepper styles start */ and /* Stepper styles end */ within the ${Gameface package}/Samples/uiresources/UITutorials/SkewedSettingsMenu/style.css.
Radio button

To implement the radio button functionality, we’ve employed both the gameface-radio-group and radio-button components. The following HTML snippet demonstrates their usage:
1<gameface-radio-group>2 <radio-button slot="radio-button" checked>3 <div slot="radio-button-content">4 <div class="radio-button-option left">5 <span slot="name">OFF</span>6 </div>7 </div>8 </radio-button>9 <radio-button slot="radio-button">10 <div slot="radio-button-content">11 <div class="radio-button-option right">12 <span slot="name">ON</span>13 </div>14 </div>15 </radio-button>16</gameface-radio-group>It’s worth noting that we’ve customized the default buttons slightly using the <radio-button slot="radio-button"> element. This allows us to incorporate HTML content beyond simple text for describing the button option. This customization enables us to create custom buttons, achieving the effect demonstrated in the image.
For the stylish selected state of the radio button, we’ve used the clip-path CSS property. To inspect additional styles applied to the radio buttons, you can refer to the source code between the comments /* Radio button styles start */ and /* Radio button end */ in the ${Gameface package}/Samples/uiresources/UITutorials/SkewedSettingsMenu/style.css file.
Rangesliders
For the rangesliders, we have utilized the gameface-rangeslider component in various configurations. Here, we focus on the custom handles of the sliders presented in different variations within the General -> Gameplay settings section:
Normal rangeslider

Rangeslider with value inside its handle
Rangeslider with value on the right
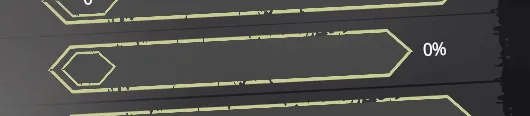
Rangeslider with value inside
The custom-handle attribute of the gameface-rangeslider component facilitates the customization of slider handles. For example, to display the value inside the handle, the following HTML snippet is used:
1<gameface-rangeslider2 class="mouse-sensitivity-y"3 orientation="horizontal"4 min="0"5 max="100"6 custom-handle=".mouse-sensitivity-y .guic-horizontal-rangeslider-handle"7></gameface-rangeslider>Here, the selector .mouse-sensitivity-y .guic-horizontal-rangeslider-handle targets the handle of the rangeslider.
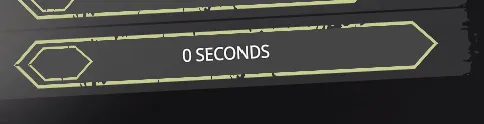
For other sliders, we incorporate HTML elements to render their values:
1<gameface-rangeslider2 orientation="horizontal"3 min="0"4 step="0.1"5 max="2"6 custom-handle="#boost-ramp-time"7></gameface-rangeslider>8<div class="option-value-over"><span id="boost-ramp-time"></span> SECONDS</div>We’ve customized the default styles of the gameface-rageslider to achieve the desired visual outcomes showcased in the images above. To review these new styles, refer to the source code between the comments /* Rangeslider styles start */ and /* Rangeslider styles end */ within the ${Gameface package}/Samples/uiresources/UITutorials/SkewedSettingsMenu/style.css file.
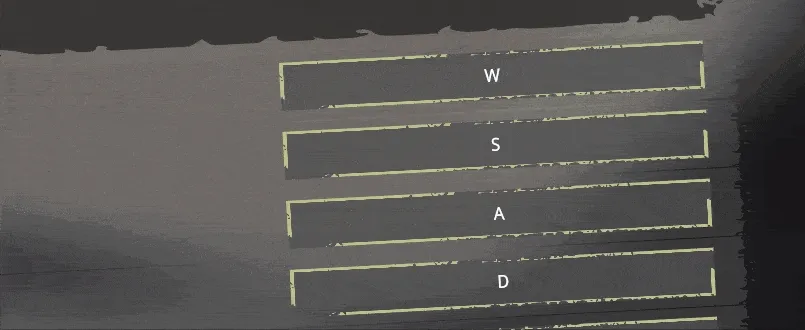
Keyboard key select
To enable key remapping in the Controls -> Keyboard mapping page, a custom component named keyboard-select was generated using the coherent-guic-cli.
This component’s purpose is to enable users to remap keys with another one simply by clicking on the component and then pressing another key from the keyboard.
To achieve this functionality, we’ve implemented a class definition for the keyboard-select component. You can find this class definition in ${Gameface package}/Samples/uiresources/UITutorials/SkewedSettingsMenu/src/components/keyboard-select/script.js.
Within the class definition, the activateSelect method is invoked upon clicking the component. It adds a click event listener to the document, allowing deactivation of the select when users click elsewhere. This preserves the previous value. However, if users press a key on the keyboard, the select is deactivated, and the new key is assigned to it.