Custom CSS Cursor
3/28/2024
Tony Gruev
A custom cursor is a must-have for every game, it brings forward the vibe and atmosphere of the game.
We will use only CSS and JavaScript to hide the default cursor and move a custom one with an image.
It is recommended to use the OS-controller Cursor .
The CSS Typed Object Model will be utilized for a better performance.
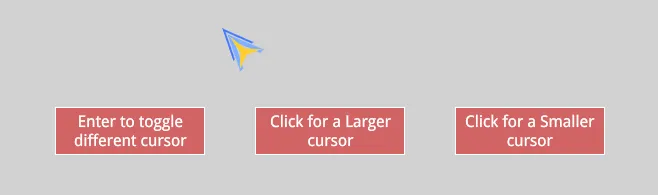
A sample showing changing the mouse cursor image and increasing its size can be found in the Gameface package in folder Samples\uiresources\UITutorials\CustomCSSCursor.
Fist of all we hide the default cursor with:
1html {2 cursor: none;3}Now the element for that cursor is:
1<div id="cursor" class="cursor"></div>The styles for the cursor:
1.cursor {2 position: absolute;3 top: 0;4 left: 0;5 width: 55px;6 height: 55px;7 background-image: url('./assets/mouse1.svg');8 background-position: 50% 0;9 background-repeat: no-repeat;10 /* pass events throught the cursor element */11 pointer-events: none;12 /*13 should always be on top of every element but can be14 omitted if top level elements don't have z-index and15 the cursor element is at the end of the <body>16 */17 z-index: 1;18}Although the default cursor may not be visible, it remains present. Therefore, when we click on the document, the .cursor element will capture the pointer events. To prevent this and allow the event to propagate to the element beneath the .cursor element, we must disable its pointer-events using pointer-events: none.
Important: Make sure the .cursor element has the highest z-index value over all the elements on the page. In case you don’t change the z-index - placing the .cursor element at the end of the <body> without z-index will suffice.
Mouse Movement Using attributeStyleMap
And finally the JavaScript we need:
1const cursor = document.getElementById('cursor');2// Cache the attributeStyleMap for the cursor element3const cursorStyleMap = cursor.attributeStyleMap;4// Save the new CSSTransformValue to reuse it in cursorStyleMap.set()5const mouseTransform = new CSSTransformValue([new CSSTranslate(CSS.px(0), CSS.px(0))]);6// Save the properties from CSSTransformValue that are going to be changed7const mouseTransformTranslateX = mouseTransform[0].x;8const mouseTransformTranslateY = mouseTransform[0].y;9
10document.addEventListener('mousemove', (e) => {11    const {x, y} = e;12    mouseTransformTranslateX.value = x;13    mouseTransformTranslateY.value = y;14    cursorStyleMap.set('transform', mouseTransform);15});
The cursor icon can be changed easily also.

For example, by entering another element:
1changeBox.addEventListener('mouseover', () => {2 cursor.classList.toggle('cursor2');3});And this requires only for the background image to be changed:
1.cursor2 {2 background-image: url('./assets/mouse2.svg');3}Limitations and Peculiarities
There are some particularities that need to be taken into account.
Remove the body margin
Disabling the margin on the body prevents the cursor element from being offset from the OS cursor position.
1body {2 margin: 0;3}Scrollable Page
In case the page is scrollable, you will need to take that into account in the mousemove EventListener:
1// ...2mouseTransformTranslateX.value = x + window.scrollX;3mouseTransformTranslateY.value = y + window.scrollY;4// ...Also the cursor element is updated only on mousemove and there is a need to watch for scrolling with the scroll event:
1let cacheMousePositions = {x: 0, y: 0};2
3document.addEventListener('scroll', (e) => {4    mouseTransformTranslateX.value = cacheMousePositions.x + window.scrollX;5    mouseTransformTranslateY.value = cacheMousePositions.y + window.scrollY;6    cursorStyleMap.set('transform', mouseTransform);7});
and the coordinates can be saved in the mousemove EventListener :
1cacheMousePositions = {x, y};Frame rate dependency
Since this front-end approach is relying on how fast the application is running, there will be a delay after moving the mouse and when the cursor element catches on. The lower the frame rate, the bigger the delay.
For information how to use the OS-controlled cursor, check the section below.
OS-controller Cursor (Recommended)
It is recommended to use the OS-controlled cursor - read the Cursor control in the Gameface documentation.