Generating conversations using AI in Gameface
WORKFLOW
29/3/2024
Veneta Kochovska

This guide takes you through the steps to integrate AI API into a user interface. AI can help improve various cases of user interactions and experience – achieving more human – like conversations between non player characters, it can improve accessibility via adaptive color schemes, completion suggestions or real time translation. We’ll explore the first of these perks – creating seamless conversations.
Using AI API
We’ll use openai to make requests for chat completion.
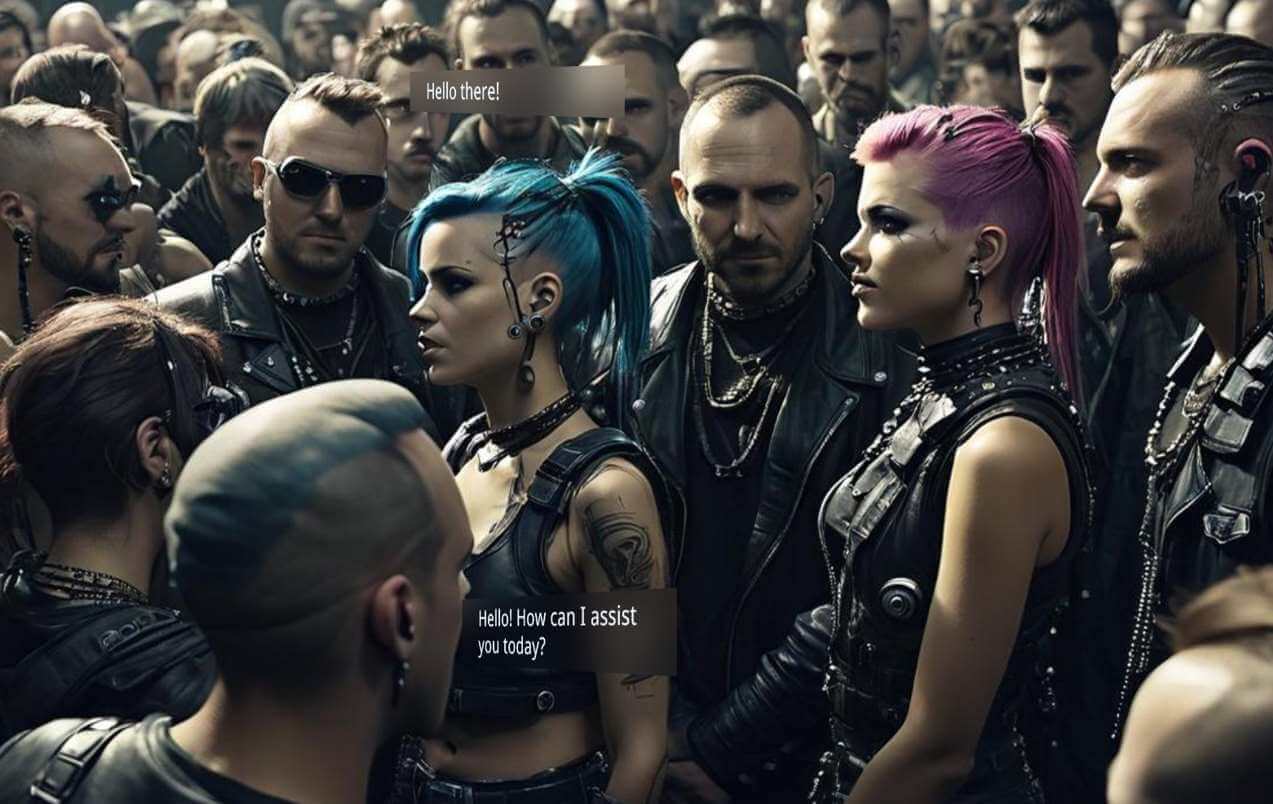
The markup for the UI is a simple structure of HTML elements that create subtitle boxes on top of some NPCs in the game:
<div class="flex">
    <div class="background">
        <div class="container player-1">
            <p class="subtitle rotateY-310"></p>
        </div>
        <div class="container player-2">
            <p class="subtitle rotateY-310"></p>
        </div>
    </div>
</div>
We’ll add a simple animation to create a pop-up effect:
.popup {
    animation-duration: 2s;
    animation-name: popup;
    animation-iteration-count: 1;
    animation-timing-function: linear;
    animation-fill-mode: forwards;
}
@keyframes popup {
    0% {
        transform: translateY(0px) scaleX(0);
    }
    100% {
        transform: translateY(-50px) scaleX(1);
    }
}
Openai’s API can be accessed using HTTP requests. They provide Python and Nodejs libraries, but for simplicity – we’ll use standard XMLHTTPRequests.
Before you can use the API – you need to crate an account and generate an API token that we’ll use to authenticate the requests.
Create the XMLHttpRequest object and open it:
const http = new XMLHttpRequest();
const url = 'https://api.openai.com/v1/chat/completions';
http.open('POST', url, true);
Set the request headers:
Content-Typespecifying the type of the bodyAuthorizationspecifying the auth token
http.setRequestHeader('Content-type', 'application/json');
http.setRequestHeader('Authorization', 'Bearer <token>');
Add an event handler for readystatechange – an event that is fired when the readyState property of the request changes and call the send method of the request:
return new Promise((resolve, reject) => {
    http.onreadystatechange = function () {
        if (http.readyState == 4 && http.status == 200) {
            const response = JSON.parse(http.responseText);
            return resolve(response.choices[0].message.content);
        }
        if (http.status !== 200) {
            return reject(http.status);
        }
    }

    http.send(JSON.stringify({
        "model": "gpt-3.5-turbo",
        "n": 1,
        "max_tokens": 20,
        "messages": [{
            "role": "user",
            "content": `"${input}"`
        }]
    }));
});
The onreadystatechange handler and the http.send calls are wrapped in a Promise to enable us to wait for the response:
const answer = await makeReq(message);Showing messages
To show the subtitles – we need to update the corresponding HTML elements’ content with the result from the completion request. The initial message is static – it will begin the conversation with openai’s API:
async function chat() {
    const playerA = document.querySelector('.player-1');
    const playerB = document.querySelector('.player-2');

    let message = 'Hello there!'
    showSubtitle(playerA, message);

    const answer = await makeReq(message);
    showSubtitle(playerB, answer);
}
And the showSubtitle function simply manipulates the DOM in order to update it:
function showSubtitle(container, message) {
    const subtitles = container.querySelector('.subtitle');
    subtitles.textContent = message;
    container.classList.add('popup');
}