How to use After Effects for Game UI
How to use After Effects for Game UI
Adobe After Effects is undoubtedly the world leading solution for Motion graphics and Special FX. From movies through television to game studios it is the go-to tool for a great range of tasks – keying, composing, tracking (to name a few). Furthermore it has a huge and very active community as well as a great ecosystem of third-party plugins.
In this tutorial, I’ll show you how you can use After Effects to recreate the special FXs in the Mission select screen of our FPS Kit.
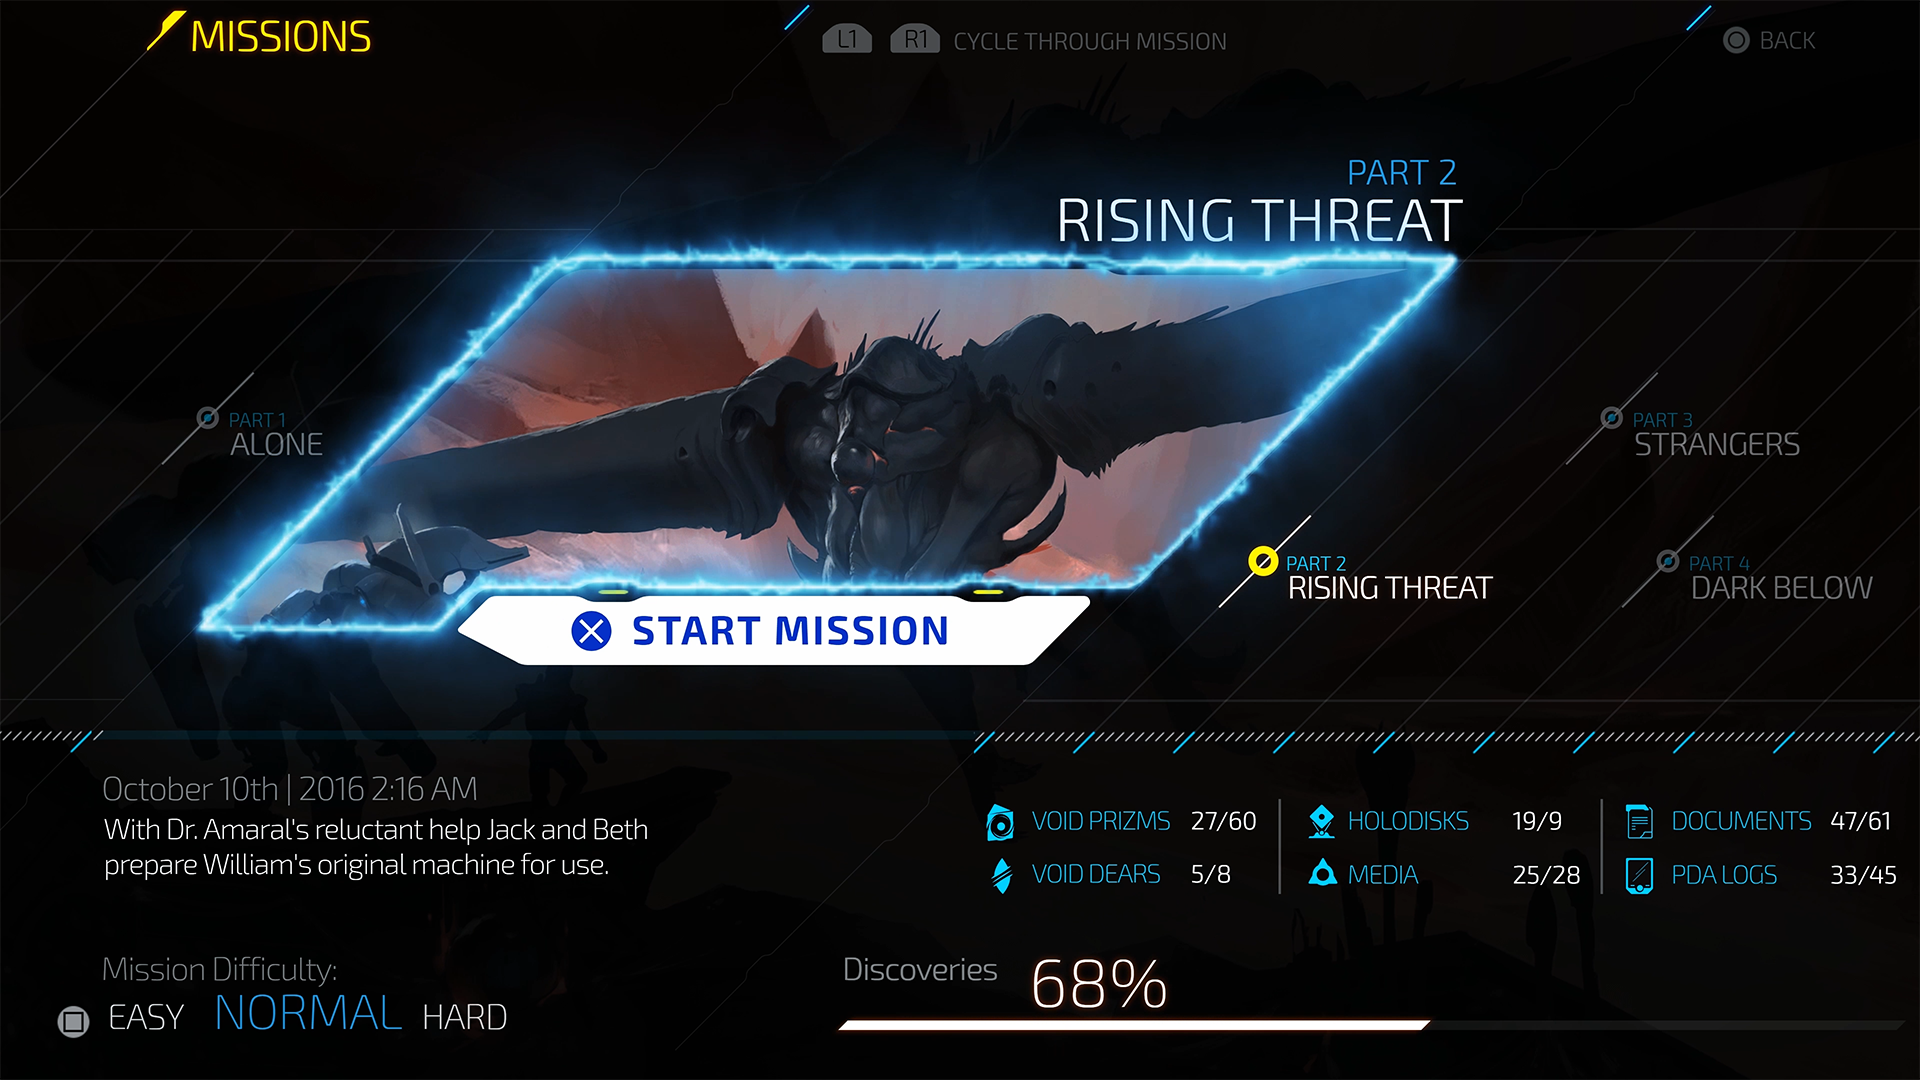
There are 3 Major steps:
1. FX authoring
2. Assets export
3. CSS animations
Please note that this tutorial assumes that you are at least intermediate user of the Adobe After Effects. If you are new to the product I recommend you check out the official getting started tutorials before continuing.
1. FX authoring
The first step is to create the actual effect. Wе’ll start with a png image with a transparent background which would give us the shape for the effect. One way to get it is to use auto-trace (Layer/Auto-trace) which automatically takes the outline of the layer and creates a mask from it.

Then you need to create a new solid layer and paste the mask. To copy the mask from layer to layer simply select the mask lane and press ctrl+c. Then select the other layer and press ctrl+v. (Tip: if you want to resize the mask you can activate the free transform from Layer/Mask and Shape path/Free transform points.
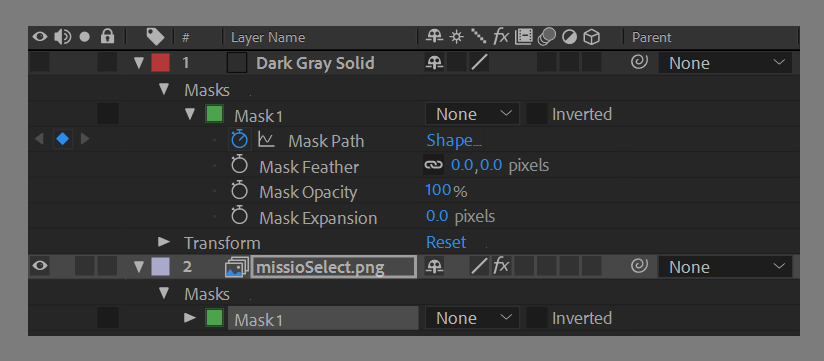
Now that we have the shape let’s add the actual effect. This could be done with the built-in tools of After Effects but it’s far easier with an awesome free plugin called Saber from videocopilot – After you’ve installed it just search for it in the effects panel and drag and drop it to the solid layer.
Saber settings A few important settings that need to be specified in the Effect controls panel:
customize core – core type – Layer masks (this makes the effect follow the shape of the mask that we previously created)
composite setting – transparent (this makes the actual transparent background)
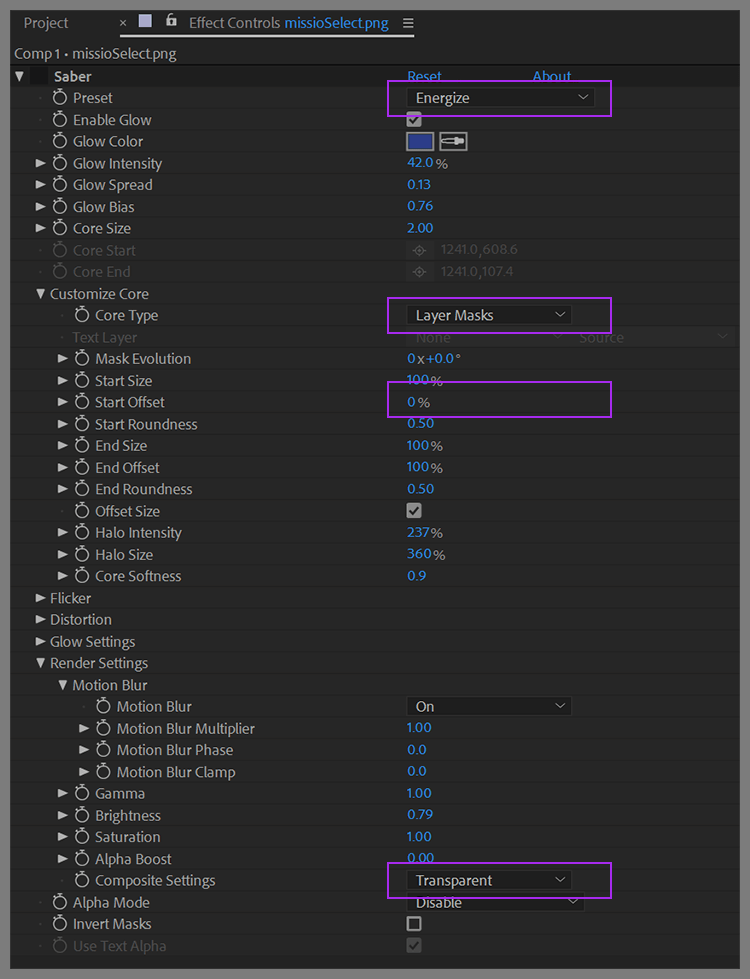
Then we can play with the rest of the settings to get the desired end effect. In this case, we are using the “energize” preset and animation of the Start offset setting. And here’s the finished effect!
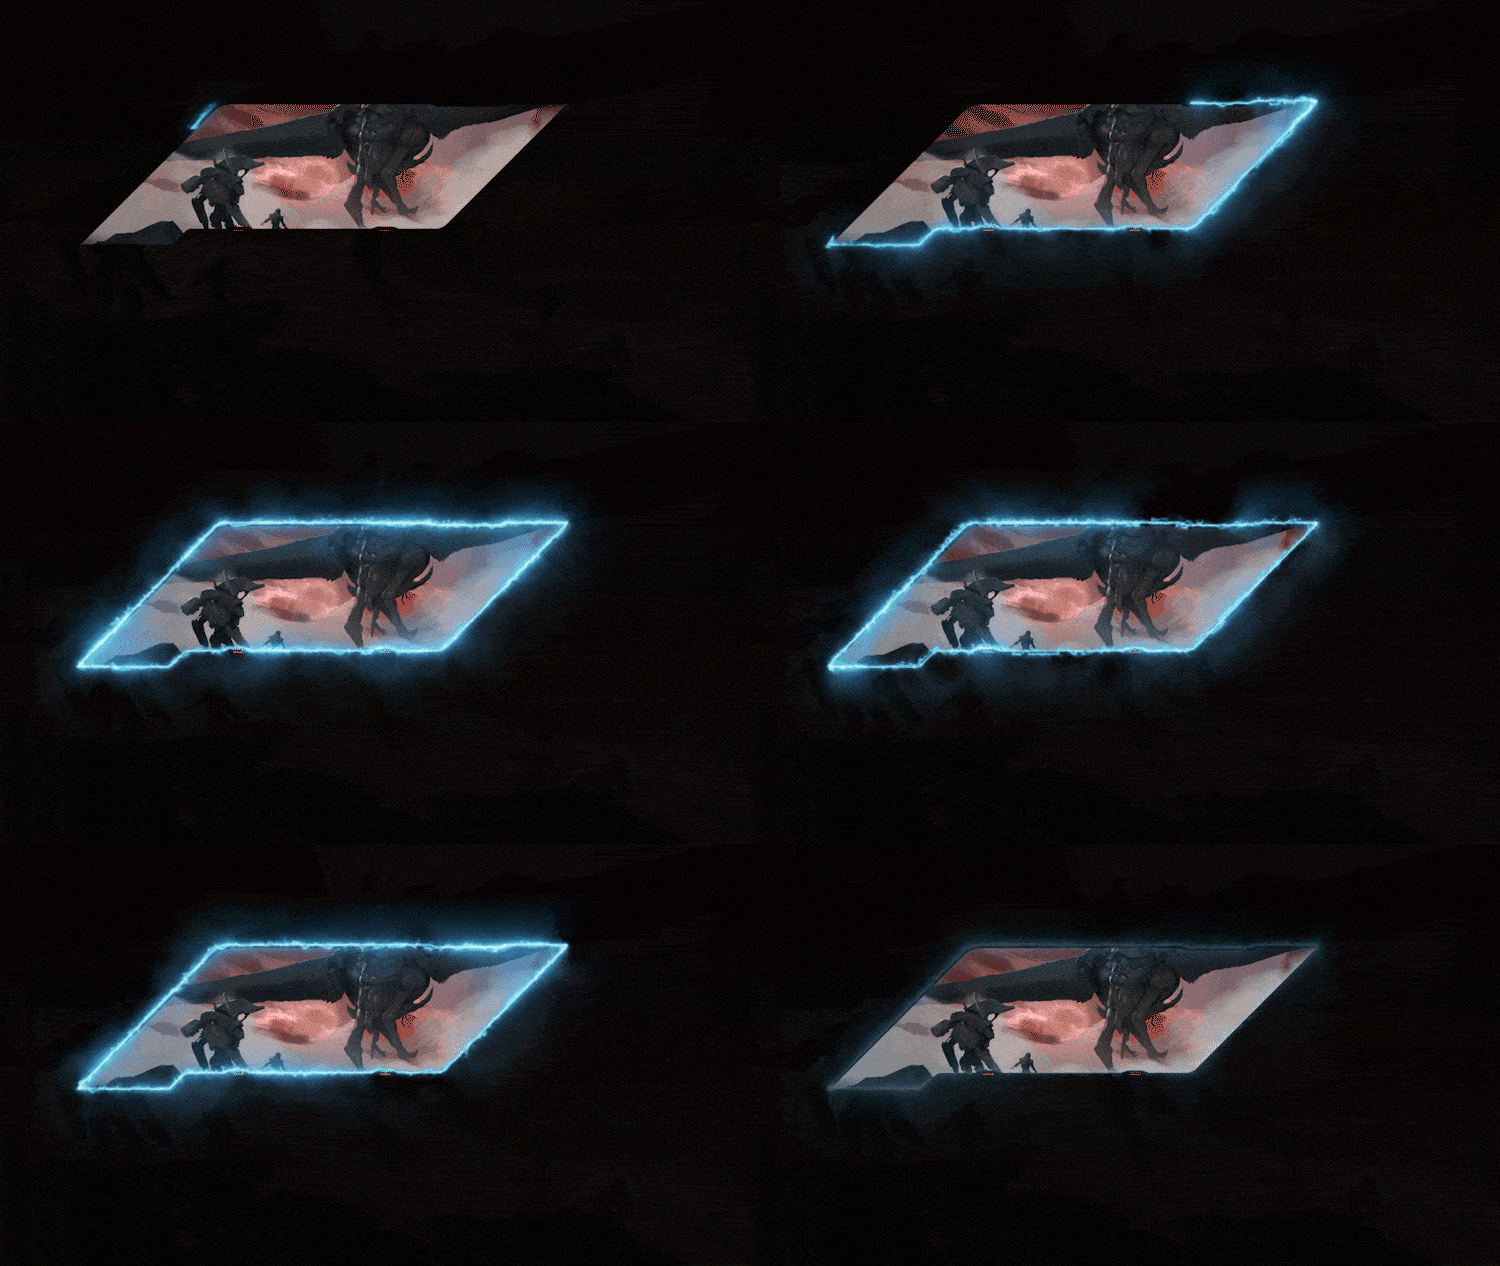
2. Assets export
Once we have completed the effect we need to export it from After Effects. There are two major options – spritesheet or transparent video. The video is pretty straightforward (here’s a tutorial just in case) so we’ll focus on the spritesheet. Basically, we would want to create a flipbook animation through the spritesheet in which each of the sprites is a frame of the effect. To get that we can either export the frames as a series of pngs and arrange them in Photoshop or used an a plugin called sheetah.
In both cases, the end result should be something like that – a single image with rows/columns of individual frames.
![]()
3. CSS animations
Now we just need to make the animation happen in the actual UI of the game. This part is typically carried out by UI developers but It’s actually quite simple. We can use the background-position CSS property to navigate along x/y axis of the spritesheet. Then we just need to add a steps animations so that the animation “snaps” from one position to another in the spritesheet. The number of steps depends on the number of frames in the columns/rows of the actual spritesheet.
Here’s the complete CSS (btw the spritesheet is also responsive)
|
1 2 3 4 5 6 7 8 9 10 11 12 13 14 15 16 17 |
.element { width: 100%; height: 100%; background-image: url("spritesheet.png"); background-size: 1200% 800%; animation: playX 0.504s steps(12) infinite, playY 4.032s steps(8) infinite; } @keyframes playX { 0% { background-position-x: 0%; } 100% { background-position-x: -1200%; } } @keyframes playY { 0% { background-position-y: 0%; } 100% { background-position-y: -800%; } } |
I hope you enjoyed this tutorial and you’ll use it to create a bunch of awesome special FX for you games! Tag us on Twitter so we can see your work or if yоu just want to chat!
Hristo
