12 principles of animation – Part 1 of 3

Disney’s Twelve Basic Principles of Animation were introduced by the Disney animators Ollie Johnston and Frank Thomas in their 1981 book The Illusion of Life: Disney Animation.
Though originally intended to apply to traditional, hand-drawn animation, the principles still have great relevance for today’s more prevalent computer animation and UI animation.
This tutorial is about understanding the principles and few techniques in Animate that allow us to represent it.
First Part will cover
1.Squash and Stretch
2.Anticipation
3.Staging
4.Straight Ahead Action and Pose to Pose
1. Squash and stretch

Squash and Stretch is what gives flexibility to objects. In this principle the animated object get longer or father to emphasize: Speed, momentum, weight and mass.
As the ball starts to fall and picks up speed, the ball will stretch out just before impact, and as the ball impacts the ground, it squashes, and as it takes off again it stretches.
Step 1 – Create scene
Create two layers with a ball and background.

Step 2 – Set Motion Tween
Insert Frame on the timeline where you want to be end of the animation. Let’s do second and a half.

Select layer with the ball and Create Motion Tween.

Then select 10f and move the ball like its drop on the floor.

Select 17f and move it up.

Do the same till the end of the animation.
 Select Convert anchor point tool and curve the path. That will make movement more natural.

So now we have bouncing ball, but let’s apply the principle of Squash and Stretch

Step 3 – Use Squash and Stretch principle.
Select the layer “ball” convert it to Frame-by-Frame animation.

Activate Onion Skin Outlines so we can see clearly every move of the ball, it will help change size of the ball properly.

Chose frame by frame and squash and stretch the ball where touch the ground.

Here is the result:

2. Anticipation

The principle of Anticipation helps to prepare the viewer for what’s about to happen. When applied, it helps to make the object’s action more realistic.
In this animation with anticipation I will use Motion tween and bone tool.
Step 1 – Create scene
Including 3 layers (Background, ball, pinch)

Step 2- Animate the ball
Set 2s to be the end of the animation.
 Create Motion tween on the Layer (ball)

Insert Keyframe on 17f then drag the ball to the center of the scene.
Insert Keyframe on 32f and move it up till its out of the scene.
So between 17f and 32f ball supposed to stay with no move.
 Note: Make sure the ball is a Symbol
Step 3 – Use Bone tool
It’s time to animate the pinch with the help of Bone tool.
Select Bone tool, create construction.

Then start animate the pinch every 2 seconds to grab the ball and take it.
 Frames before reach the ball you should open it and then close it by moving the bones we create earlier.
 The result:

3.Staging

Principle of Staging cover big area of animating and there is no formula. Most of the time it’s more about composition and controlling the eyes of the viewer. Through composition, zooming or avoid overlapping. Simply put: keep the focus on what’s important, and keep everything else of non-importance to a minimum.
In this animation we will use the princip when we just change one of the colors.
Step 1- Create a scene
On layer first is “background”
Second “blue ball” (laiter we will duplicate few times)
And the third (on top) our focal point, a red ball

Create Motion tween on both balls and make them bounce out of the stage.
 Then duplicate layer with the blue ball few times. Then move them on different directions.

Move them on different directions.

And the end we have example of staging by changing one of the ball with different color, we are making the eye of the viewer follow the red ball.

5. Straight Ahead Action and Pose to Pose

This terms describe two methods to use animating drawings. Straight Ahead Action and Pose to Pose.
Straight ahead action involves drawing Frame-by-frame from start-to-finish. Basically is animating as you go.
With the Pose to Pose technique, you draw the beginning frame, the end frame, and a few key frames in between. Then you go back and complete the rest. Using this technique gives you a bit more control within the scene and allows you to increase the dramatic effect.
Step 1: Create a scene
Create two layers “cup” and “water”
Draw a cup on layer “cup”

Step 2 – Animating
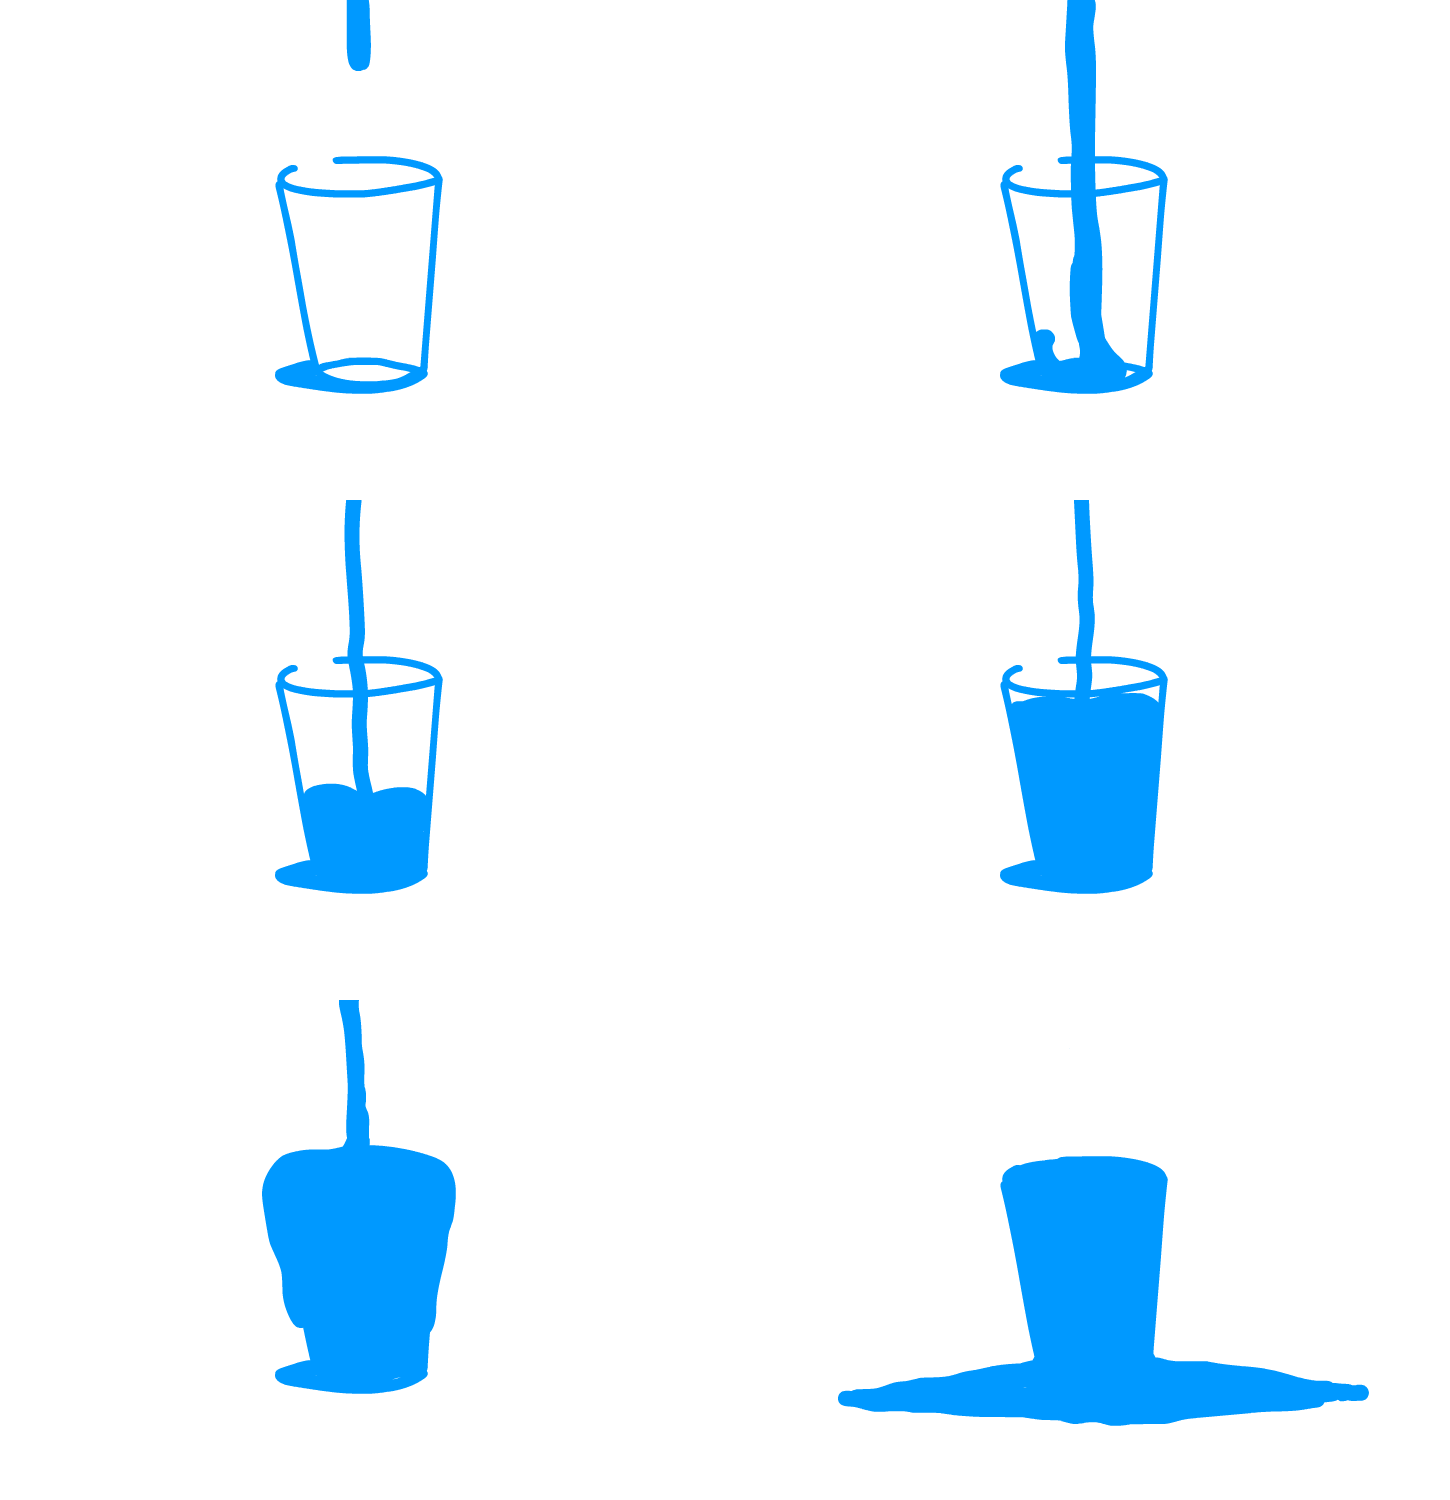
Make 1s, Frame-by-Frame animation on layer “water”.
 Here are frames:

It’s a bit fast so I Insert frame after every existing frame to make the animation looks more realistic.

Here is the result

This tutorial explains the first 4 principles of 12 principles of animation by Ollie Johnston and Frank Thomas. In next part of the tutorial we are going to show you next 4 principles: Follow through and overlapping action, Slow in and slow out, Arc, Secondary action.
