
Create animated game HUD with Adobe Edge Animate and Coherent UI (Part 2)
Hey everybody,
In part two of the Creating animated HUD with Adobe Edge and Coherent UI tutorial we will take a look at some more advanced topics such as triggers, events, symbols, structure of the Edge project, binding with Coherent UI and making the UI responsive.
Part one is available HERE.

1. Edge Triggers, Events and Actions
1.1 Triggers
Triggers are properties of the timeline that can be set in a specific time. To each trigger we can add JavaScript code. During playtime when the specific time is reached, the trigger is executed along with the predefined JavaScript. So let’s add trigger to timeline of the “radiation scanner” that we created in part 1 of the tutorial.
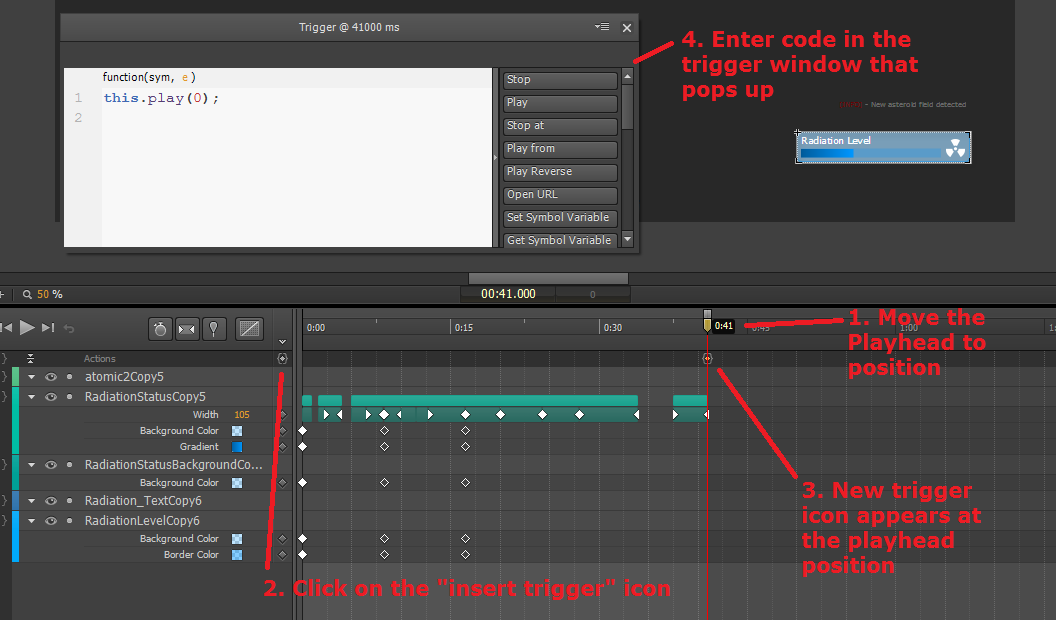
First we select it and move the playhead position to the time that we want the trigger to be activated. Then we click on the “insert trigger” icon and enter the JavaScript code that we want to be executed when the trigger is reached. In this case we enter `this.play(0)`. This will make the animation play from the beginning when the end is reached. This way the animation will loop.
The same way we add triggers for the rest of the objects of the UI that need code to be executed in a specific moment.
1.2 Еvents and Actions
Triggers are useful when we want to execute code when a specific moment in time is reached. However if we want to execute code when a specific event (such as mouse-click,touch, etc.) occurs we should use actions.
In the game over screen of the game we have a “Main menu” button that we want take us to the Main menu of the game. So, we will use the click event to execute the needed code for this.
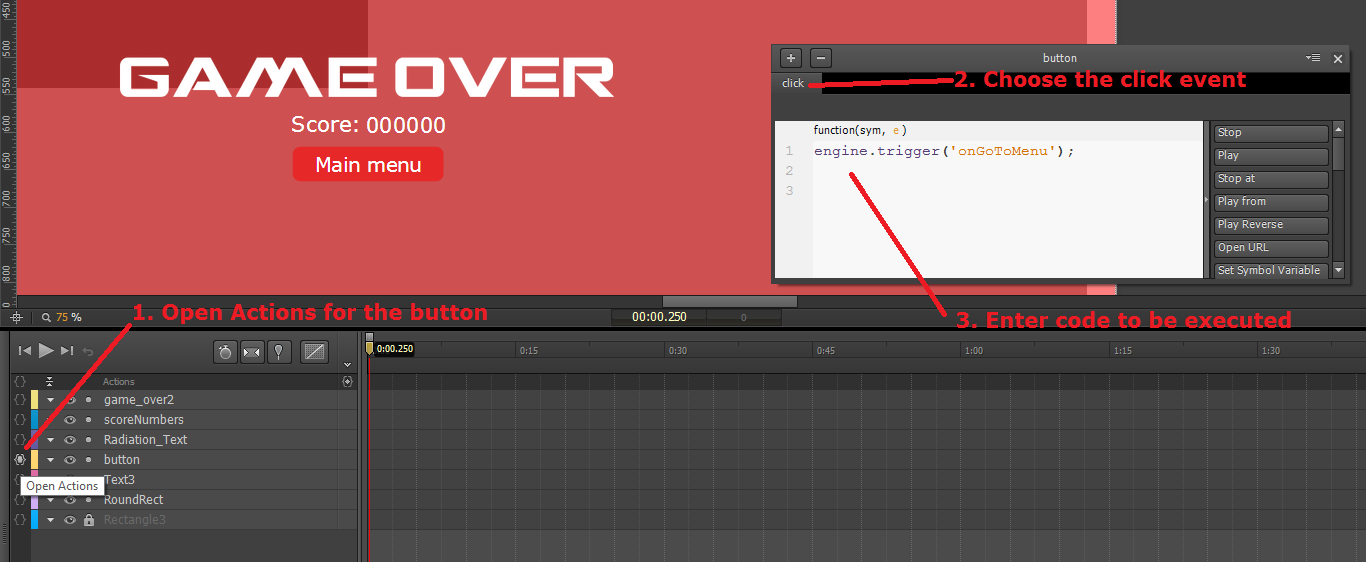
To do this we click on “Open actions” icon for the button. From the list of event we select “click” from the list of events. In the text window we enter the code to be executed – `engine.trigger(‘onGoToMenu’);` Note that the code is described later in the binding section of this tutorial.
The same way we add actions for the rest of the objects of the UI that need code to be executed on specific event.
2. Symbols and the structure of an Edge project
As the Adobe Edge documentation says: “The Edge Runtime is organized around the concept of Symbols. A symbol is a set of self-contained behaviors, timelines, and graphics. The stage is a Symbol and there is always a single root stage in every Edge composition.The stage and other Symbol instances are “attached” to an element in the DOM. The child elements of a Symbol instance are owned by that symbol and are referred to as Actors.Symbols are extensible. You can define Actions, Bind events to Actions, or otherwise change Symbols “on the fly”.”
In other words symbols are just a group of objects (or even a single object) that have their own timeline and properties. We can use them for 3 main things: to create reusable content, create embedded animations and organize the objects in the scene better.
2.1 Create reusable content
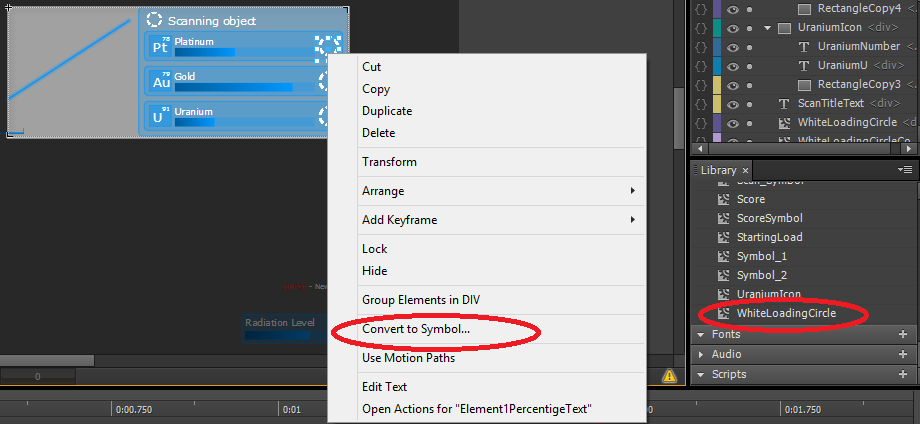
For the “Scanning window” we will need 3 white circles that are rotating. To do this we will just create one, set its properties and create its animation. Once the circle is ready we will create a symbol from it. To do this just right click on the circle and from the menu select “Convert to symbol”. The new symbol will appear in the library under symbols. By dragging the symbol from the library to the stage we can create as many copies as we like. Because all those copies are actually instances of the same symbol we can make changes to the symbol that will be reflected in all the copies.
2.2 Create embedded animations
Now we have the white circle symbol and its instances but we want to animate the whole “scanning” screen while the circles are rotating. To do this we will create embedded animation with embedded symbols. We first select the white circles and the rest of the objects of the “scanning” screen and convert them to symbol. Now the new symbol (“Scan_symbol”) contains the instances of the Circle symbols. However, since both are symbols each of them has its own timeline and this allows us to embed one animation inside another. We can see that the symbols are embedded in the top left corner of the stage. The circle symbol is under the scan symbol.
2.3 The structure of an Edge project

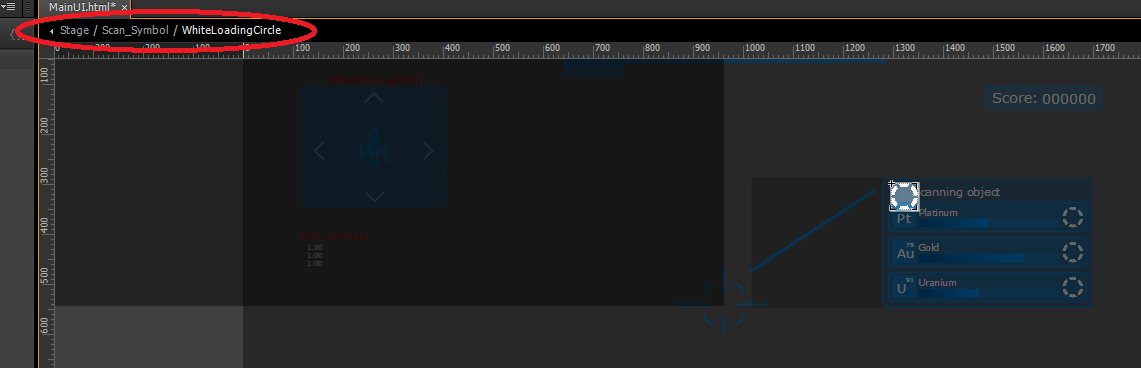
We know now how to embed a symbol in another symbol. However if we look again the screenshot above we will see that the scan symbol is actually under “Stage”. That is so because the stage itself is a symbol. Essentially the whole Edge composition consists of a hierarchy of embedded symbols and by grouping objects in symbols we can keep our projects better organized. As we can see from the image above the stage contains symbols for all the main elements in the composition and the ScanSymbol itself contains the the instances of of the white circle.
3. Controlling the HTML content of the Edge project from JavaScript
We already know how to bootstrap the composition from part 1 of the tutorial:
var comp;
AdobeEdge.bootstrapCallback(function(compId) {
  comp = AdobeEdge.getComposition(compId);
});
To control the HTML content of the Edge project from JavaScript we just have to locate the needed symbol and change its CSS property. If for example we want to change CSS property of a circle in the “scan” symbol we need to go through the hierarchy of the composition with “getSymbol” and then select the element with the jQuery selector ($).
comp.getStage().getSymbol('Scan_Symbol').getSymbol('WhiteLoadingCircle').$('WhiteLoadingCircle1').css({'opacity' : '0.5'});
Then we use the CSS block to change the CSS properties. The first part of the CSS block is the name of the property and then the value.

Actually, if we look at the code in relation to the hierarchy path we will see how easy is to navigate to the needed symbol and element. The same way we can change properties for each of the elements in the UI.
4. Binding with Coherent UI
Now that we know how to control the Edge HTML content from JavaScript we can bind it to the game with Coherent UI.
4.1 Game –> Coherent UI –> UI
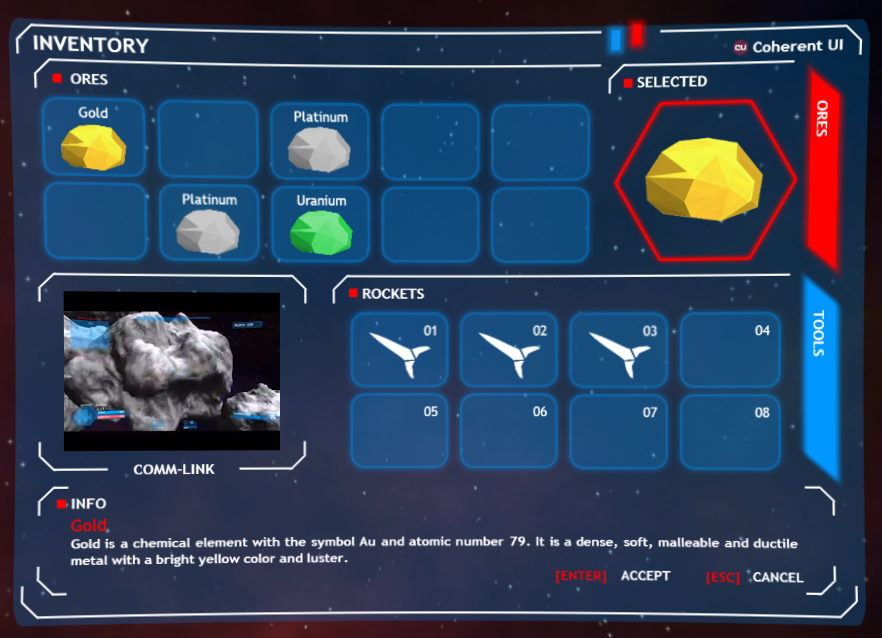
To update the content of the UI from the game engine we use the standard procedure for Coherent UI binding – we trigger event from the game engine with `view.TriggerEvent`, and we “listen” for it in the JavaScript with `engine.on`. So in our game we want to open an inventory of our space ship when the “I” keyboard key is pressed. To do this in the game engine, we create a `showInventory` function which triggers `showInventory` event to JavaScript. We have event listener registered with `engine.on (‘showInventory’, showInventory);` which triggers the execution of the showInventory function in JavaScript.
function showInventory(){
	comp.$("Inventory").css({display : 'block'});
	comp.getSymbol('Inventory').play(0);
	hideCrosshair();
}
It changes the CSS display properties, so that the inventory is visible and plays the symbol from starting position.
Of course we can also send parameters.
To update the game score bar in our UI we register for event in JavaScript with `engine.on(‘setScore’, setScore);`. Then when the function in the game engine triggers the event with parameter, the value goes directly to the JavaScript function which uses it to change the HTML content.
function setScore(value){
	var temp = value.toPrecision(6);
	comp.getSymbol('ScoreSymbol').$('Score_numbers').html(value);
}
4.2 UI –> Coherent UI –> Game
We can also make the UI trigger events in the game engine. In the game over screen of the game we have a “Main menu” button that we want take us to the Main menu of the game.
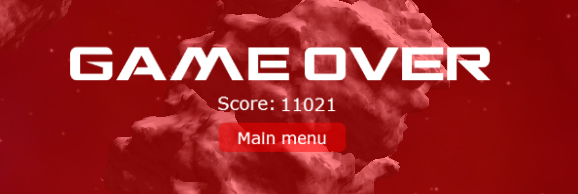
To do this In the `on click` event in Edge of the “Main menu” button we add `engine.trigger(‘onGoToMenu’);`. Now when the button is clicked it will call the `onGoToMenu` function in the game engine and the player will see the “Main menu” scene.
Using the same binding techniques we create binding for the rest of the UI. For more information about Coherent UI you can have a look at the Binding sample project that comes with Coherent UI.
5. Make the UI responsive to various screen sizes
Once the UI for the game is created, animated and bound, it is essential that we make it responsive. That way it will look good on any screen resolution. In Adobe Edge 3 there is a new option feature for the stage called “responsive scaling”. It will scale the whole scene depending on the size of the screen.
If you are using older version of Adobe Edge you can use the script below from this link http://sarahjustine.com/2013/04/08/create-scale-to-fit-projects-with-adobe-edge-animate/ . You need to put in compositionReady action of the Stage.
function scaleStage() {
var stage = sym.$('Stage'); // Set a reusable variable to reference the stage
var parent = sym.$('Stage').parent(); // Set a reusable variable to reference the parent container of the stage
var parentWidth = stage.parent().width(); // Get the parent of the stage width
var parentHeight = $(window).height(); // Get the browser window height
var stageWidth = stage.width(); // Get the stage width
var stageHeight = stage.height(); // Get the stage height
var desiredWidth = Math.round(parentWidth * 1); // Set the new width of the stage as it scales
var desiredHeight = Math.round(parentHeight * 1); // Set the new height of the stage as it scales
var rescaleWidth = (desiredWidth / stageWidth); // Set a variable to calculate the new width of the stage as it scales
var rescaleHeight = (desiredHeight / stageHeight); // Set a variable to calculate the new height of the stage as it scales
var rescale = rescaleWidth;
if (stageHeight * rescale > desiredHeight) // Do not scale larger than the height of the browser window
rescale = rescaleHeight;
sym.setVariable("globalRescale", rescale);

// Rescale the stage!

stage.css('transform', 'scale(' + rescale + ')');
stage.css( '-o-transform', 'scale(' + rescale + ')');
stage.css('-ms-transform', 'scale(' + rescale + ')');
stage.css('-webkit-transform', 'scale(' + rescale + ')');
stage.css('-moz-transform', 'scale(' + rescale + ')');
stage.css('-o-transform', 'scale(' + rescale + ')');
parent.height(stageHeight * rescale); // Reset the height of the parent container so the objects below it will reflow as the height adjusts

}

// Make it happen when the browser resizes
$(window).on('resize', function(){
scaleStage();
});

// Make it happen when the page first loads
$(document).ready(function(){
scaleStage();
});
Now the game UI will scale depending on the screen resolution.
I hope you enjoy this tutorial and find it useful 🙂 If you have any questions or comments please post them in our forum.
Hristo