
Live game views for Unreal Engine 4

We’re happy to introduce you to our latest feature for Unreal Engine 4 – Live game views (a.k.a. Picture-in-Picture)! We’ve had this feature in our core product for a while now and the time for an UE4 implementaion came with version 2.2.
Let’s go back a little and explain what a “live view” actually is, for anyone who doesn’t know. Simply put, it’s a high performance way to transfer image data from your game engine into a HTML canvas in your UI. You can read more about this feature in this blog post.
Getting right to the point – how can you use live views in Unreal Engine 4? We tried to make the integration extremely simple so here’s what you need to do:
- Add a Coherent UI component
- Add a Coherent UI Live View component (it depends on the Coherent UI component)
- Set up the UTexture that is going to be transferred to the HTML UI
- Add code in your HTML page that will render the image data into a canvas
- Done!
This is all very easy so let’s go through a practical example – we’ll set up a secondary camera that renders the scene to a texture and we’ll send that texture to Coherent UI. We’ll start with the Blueprint Third Person template and the Coherent UI plugin added to it. Next, we need a secondary camera that renders to a texture target. Grab the “Screen Capture 2D” and place it somewhere in your scene so it displays something interesting 🙂 .

Scene Capture 2D
After that, create a new “Render Target” and assign it as a “Target Texture” of the Screen Capture 2D actor.

Creating a new Render Target

Assigning a texture to the screen capture actor
Double click on the texture and disable the HDR check – it’s currently not supported for live views. You can optionally change the resolution.
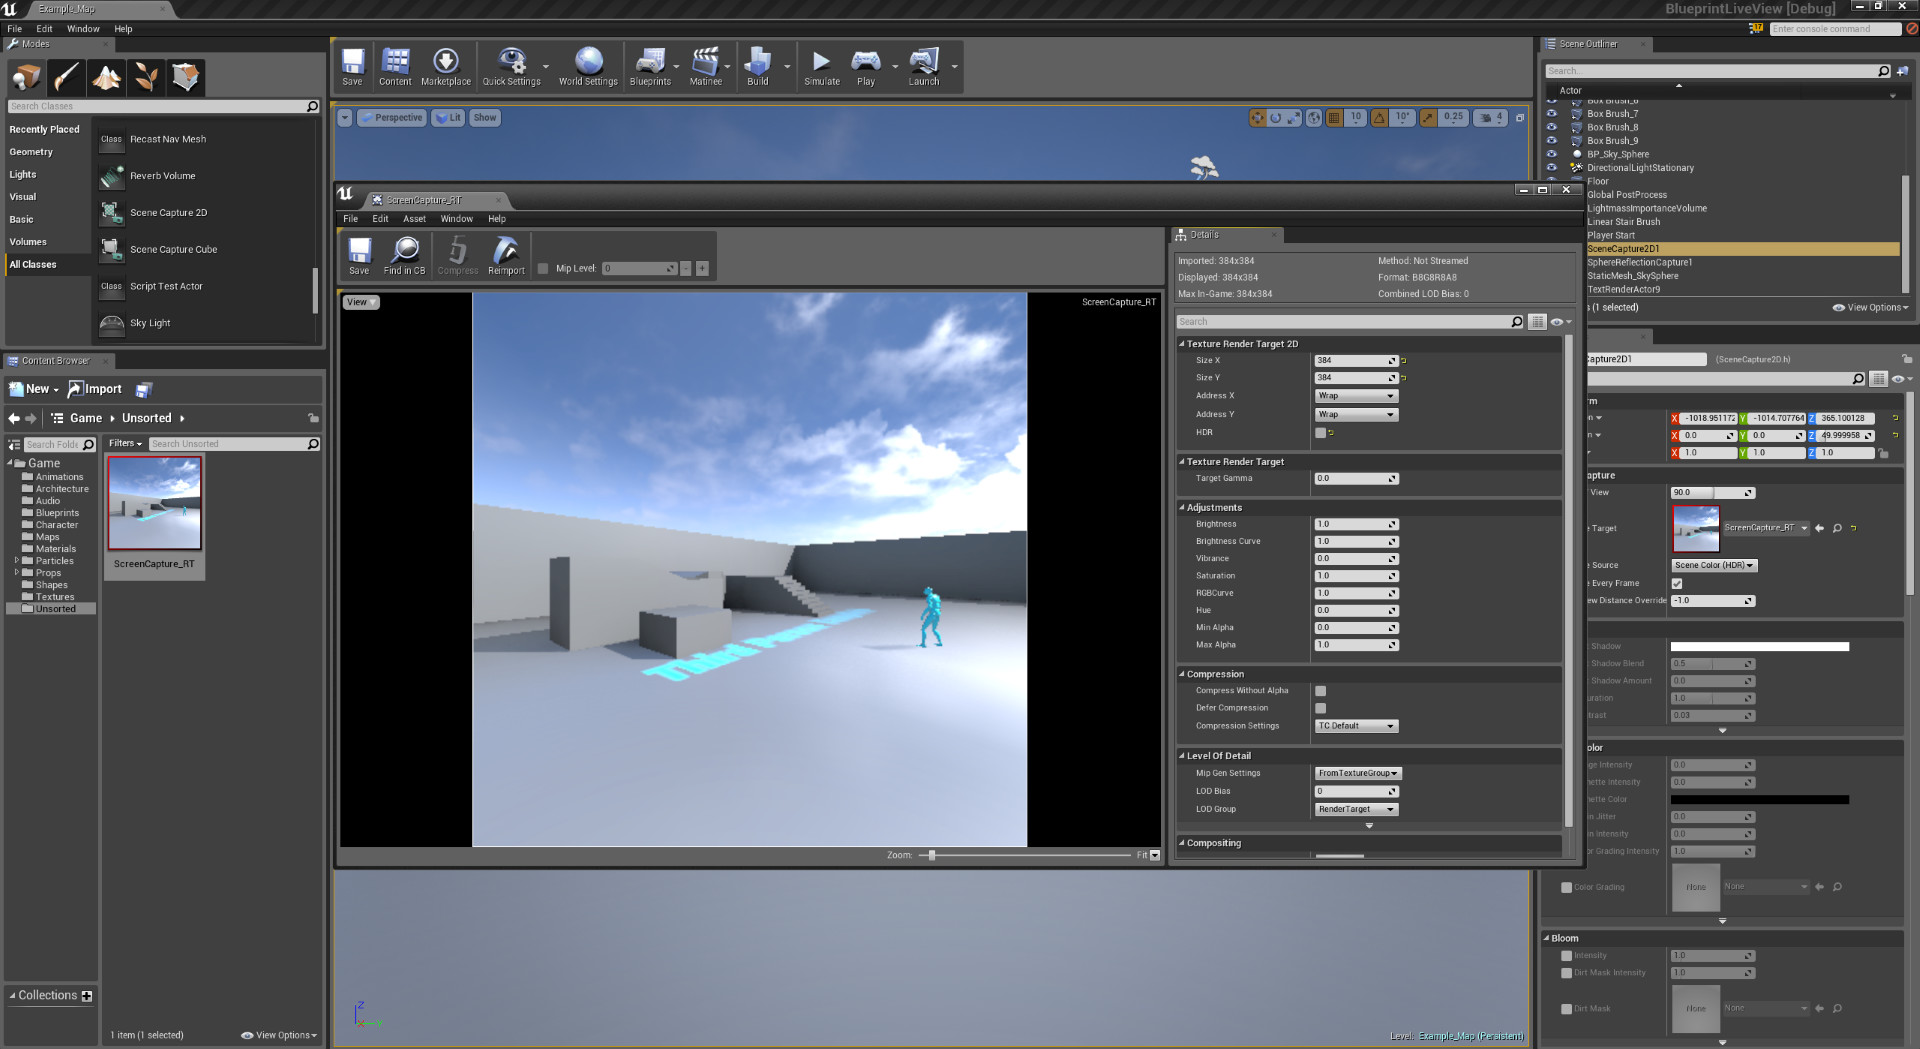
Texture properties
We’ll now create a Coherent UI HUD and display a page that renders the texture from the “Screen Capture 2D” . To do that, we need to make a blueprint for the HUD. First, select the CoherentUIGameHUD as a parent.
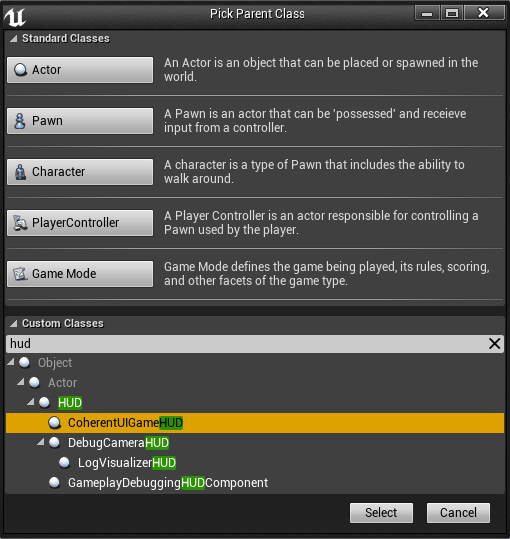
New blueprint with CoherentUIGameHUD parent
Open the blueprint for editing and add a Coherent UI Live View component, then set its Texture property to the “ScreenCapture_RT” texture. Leave the “Update every frame” checkbox ticked. This will send the texture to the UI every frame – otherwise you can do it manually. Note that the same steps can be applied on a 3D surface with Coherent UI (live views are not limited to HUDs).

Adding a Coherent UI Live View component

Setting Coherent UI Live View properties
That’s everything that’s needed for the configuration of the live view! Now, let’s set up our game to use the custom blueprint HUD we created. To do that, open the “World Settings” panel, create a new game mode and set it up like the picture below:
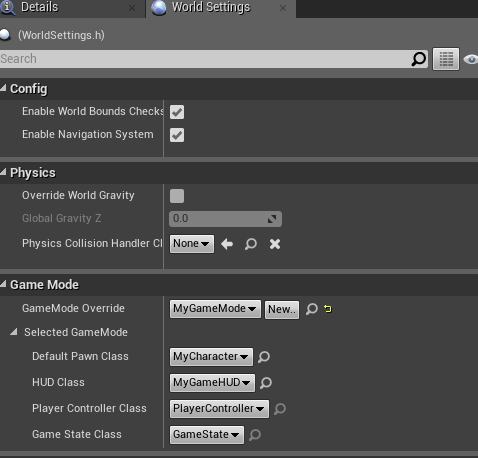
Using the custom HUD blueprint we made
All that’s left to do in UE4 is to make a Coherent UI HUD – here’s the blueprint I used:
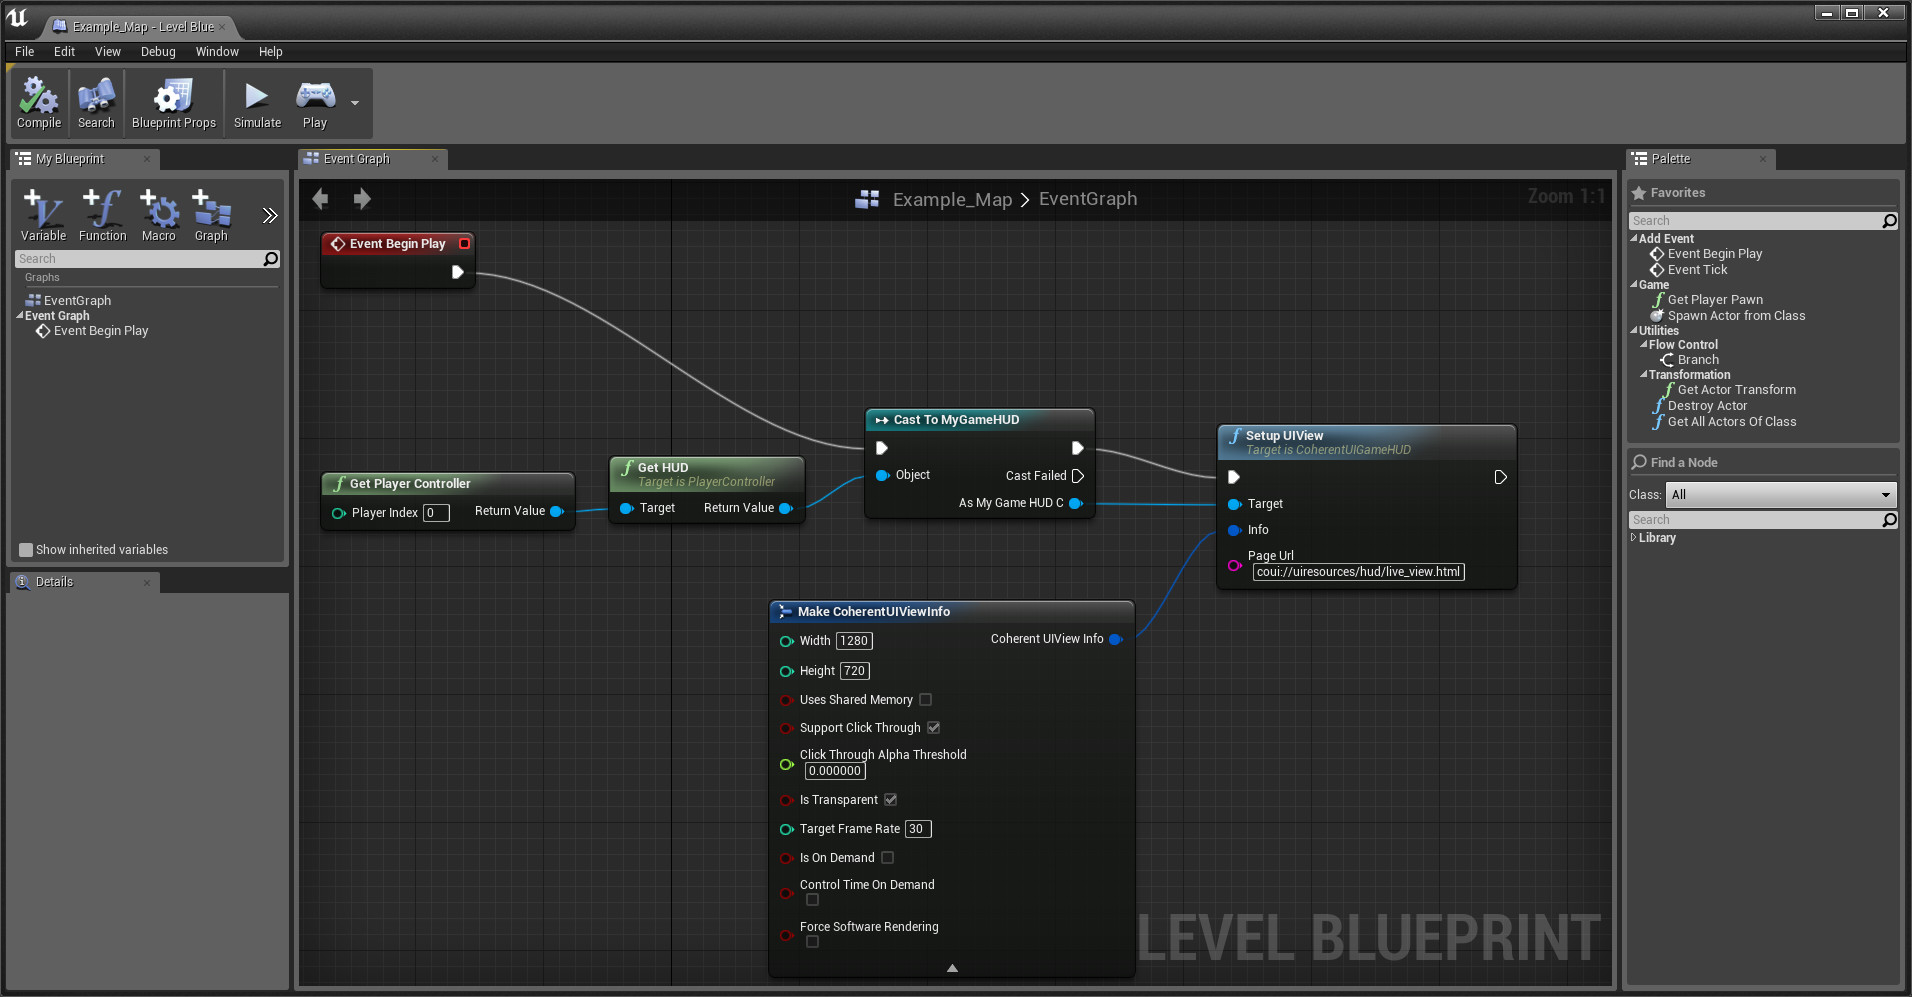
HUD blueprint
Here’s the final piece of the puzzle, the live_view.html:
|
1 2 3 4 5 6 7 8 9 10 11 12 13 14 15 16 17 18 19 20 21 22 23 24 25 26 27 28 29 30 31 32 33 34 35 36 37 38 39 40 41 42 43 44 45 46 47 48 |
<!DOCTYPE html> <html lang="en"> <head> <script type="text/javascript" src="js/jquery-2.0.3.min.js"></script> <script type="text/javascript" src="js/coherent.js"></script> <style> #live-view-container { position: absolute; left: 100px; bottom: 100px; -webkit-perspective: 500px; } #live-view-canvas { -webkit-transform: rotateY(30deg); } </style> </head> <body> <div id="live-view-container"> <canvas id="live-view-canvas" width="384" height="384" style="border:1px solid #d3d3d3; "> Your browser does not support the HTML5 canvas tag. </canvas> </div> <script type="text/javascript"> $(document).ready(function() { var c = document.getElementById("live-view-canvas"); c.onEngineImageDataUpdated = function (name, image) { // If you have more than 1 live view in your page, you'll need to check the name of the live view link var ctx = c.getContext("2d"); // Make the canvas semi-transparent var data = image.data; for(var i = 0, n = data.length; i < n; i += 4) { data[i + 3] = 120; } ctx.clearRect(0, 0, c.width, c.height); // It's important to clear the canvas before drawing ctx.putImageData(image, 0, 0); ctx.fillStyle = "orange"; ctx.font = "16pt Arial italic"; ctx.fillText("Text from JavaScript!", 10, 50); } }); </script> </body> </html> |
Basically, it’s just a <canvas> that’s as big as the texture we set up in UE4. The important function is the onEngineImageDataUpdated callback, which is called every frame in our case (remember the checkbox in the Coherent UI Live View component earlier?). The name argument is the name of the live view link that was set in the component and the image argument is an ImageData object that contains the pixels from the texture. In the sample implementation I changed the alpha value of the received ImageData to about 50% and added some text on top, just for kicks. I also added a CSS perspective for the whole canvas so it looks groovy 🙂 . And here’s the final result:
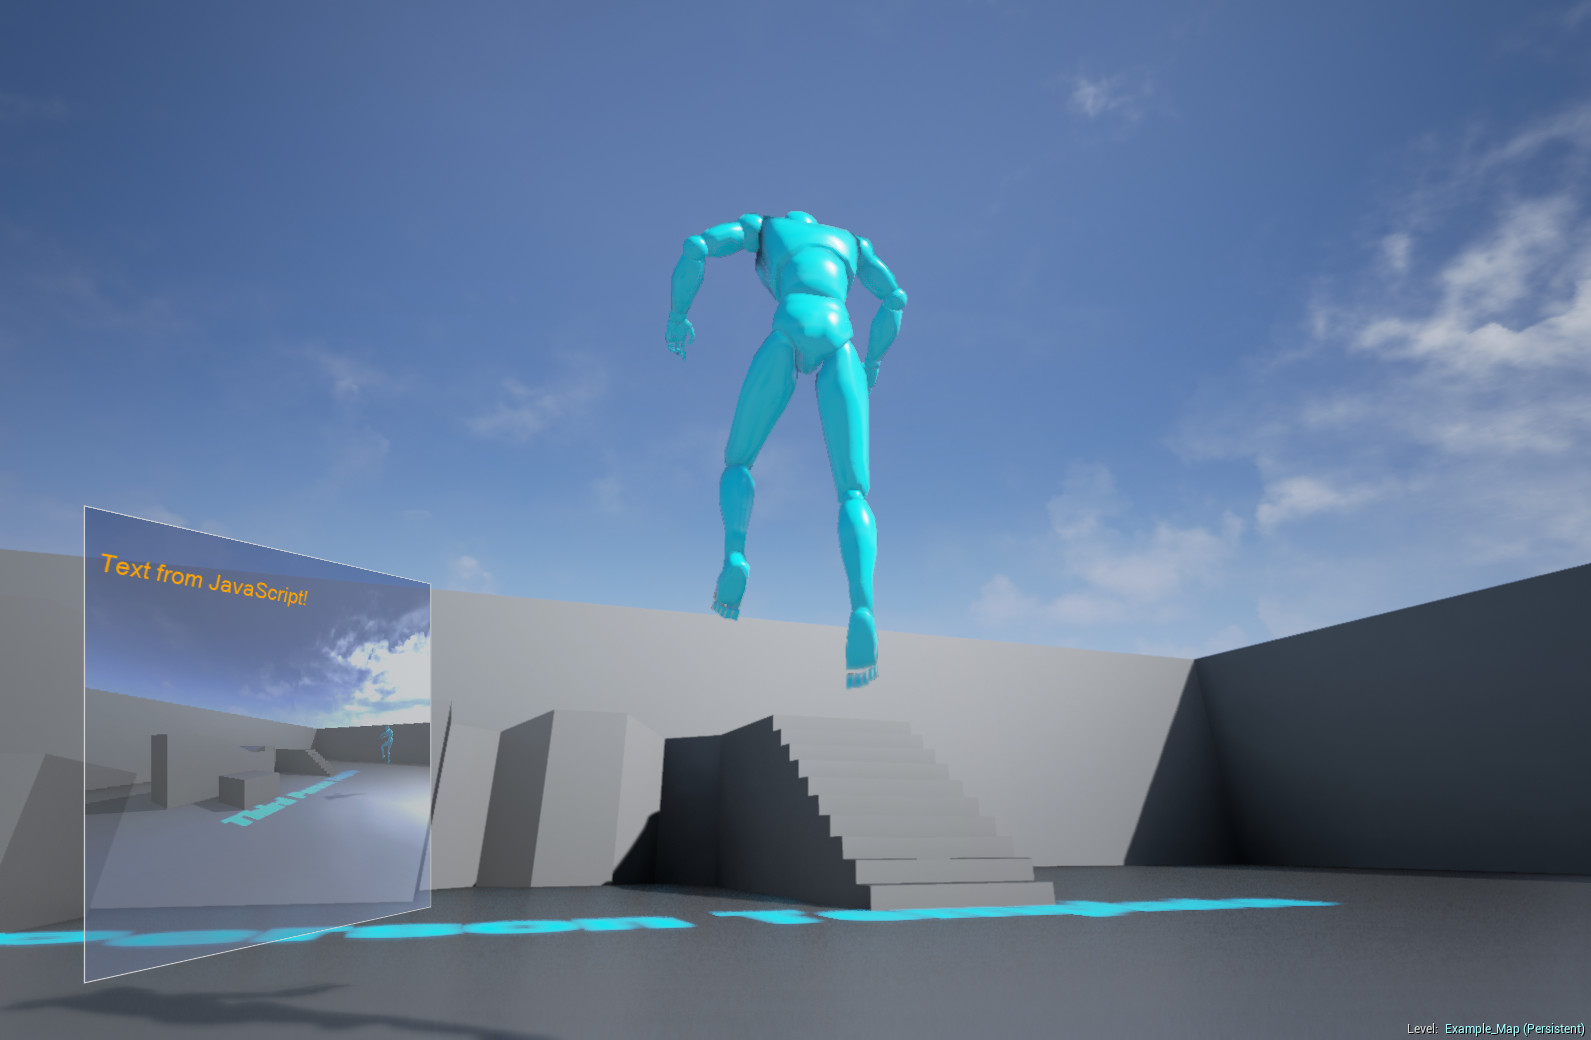
Final result
I hope you like our new feature which enables you to add minimaps, character portraits and much more in your UI. You can even do some post-processing on the canvas object if you feel like it. We’ll also be making a video tutorial out of this to see it in action so stay tuned!
Try Coherent UI and add picture-in-picture in your UE4 UI.