
3D hologram menu tutorial part 1 – 3ds Max and UE4
Hey everybody,
Recently we had a poll in our forum about which game’s UI you would like to see recreated and the upcoming game The Division by Ubisoft was voted number one. In this tutorial we’ll show you how you can create 3D hologram menu similar to the watch in The Division.
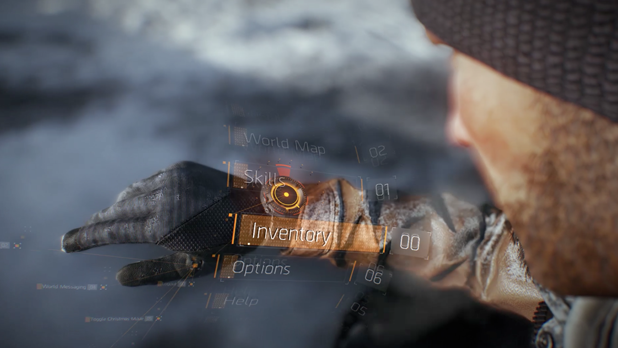
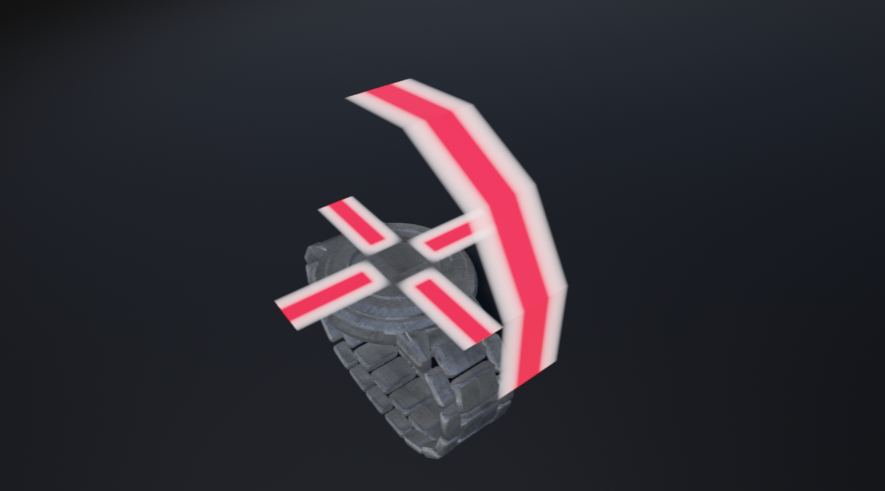
On the picture below you can see the finished menu. In part 1 of the tutorial we’ll have a look at the setup of the level in UE4 and we’ll create the needed 3D objects in 3ds Max. In part 2 we’ll create the HTML UI itself using Adobe Edge and the Coherent Labs animation framework.
1. The “anatomy” of the project
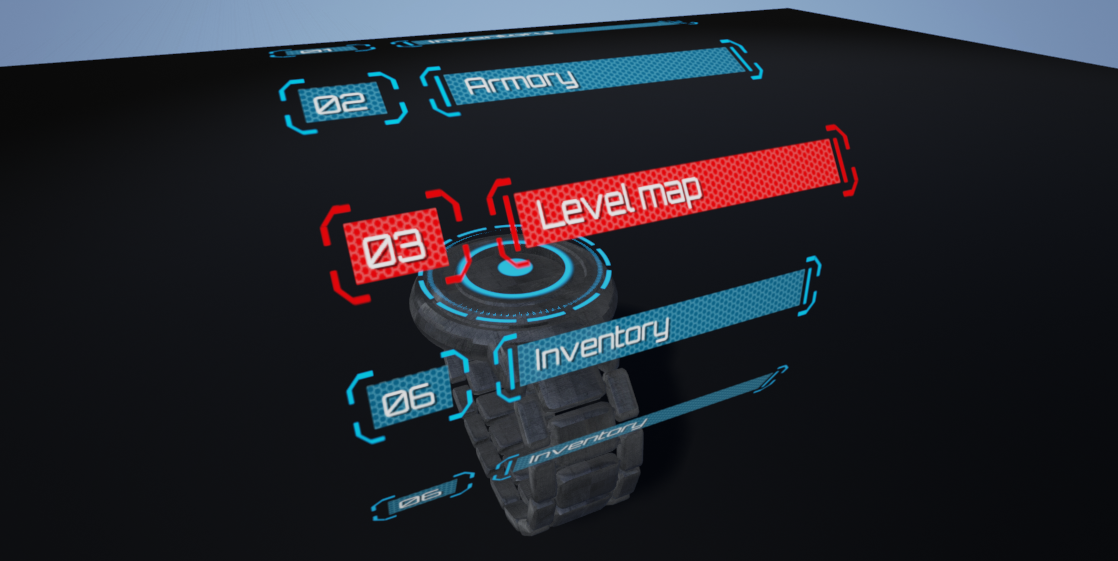
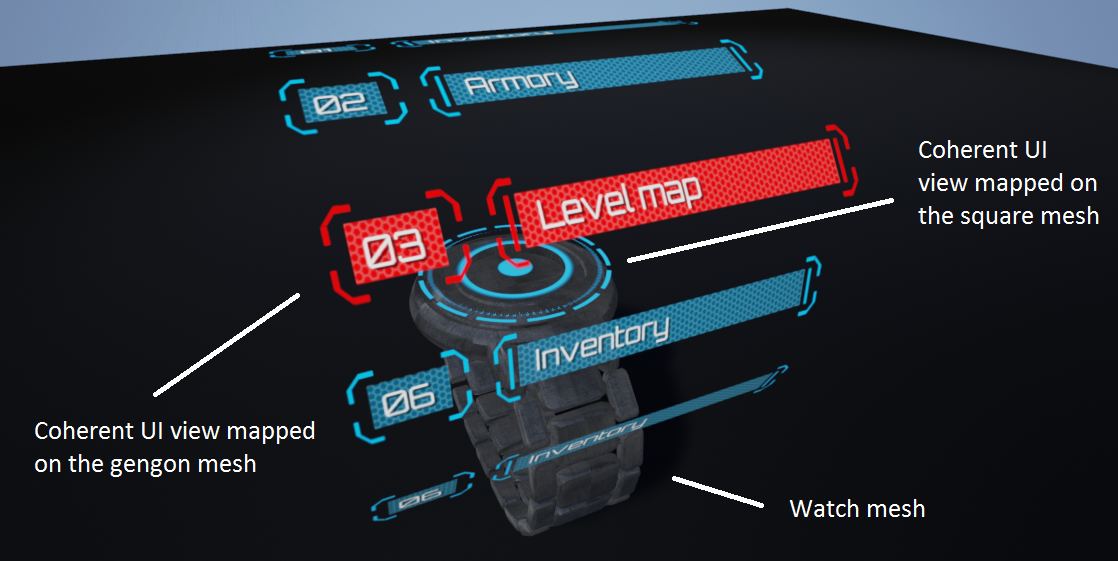
The finished project consists of three 3D meshes and two Coherent UI views. The first mesh is a gengon that we’ll use to map the menu on. There is square mesh for the UI above the watch and a mesh for the watch itself. The two Coherent UI views are mapped on the gengon and the square meshes.
2. Model the 3d objects in 3ds max
We’ll use Autodesk’s 3ds Max to model the needed 3D shapes but actually the models are quite simple so if you don’t have 3ds Max you can use free alternatives like Blender.
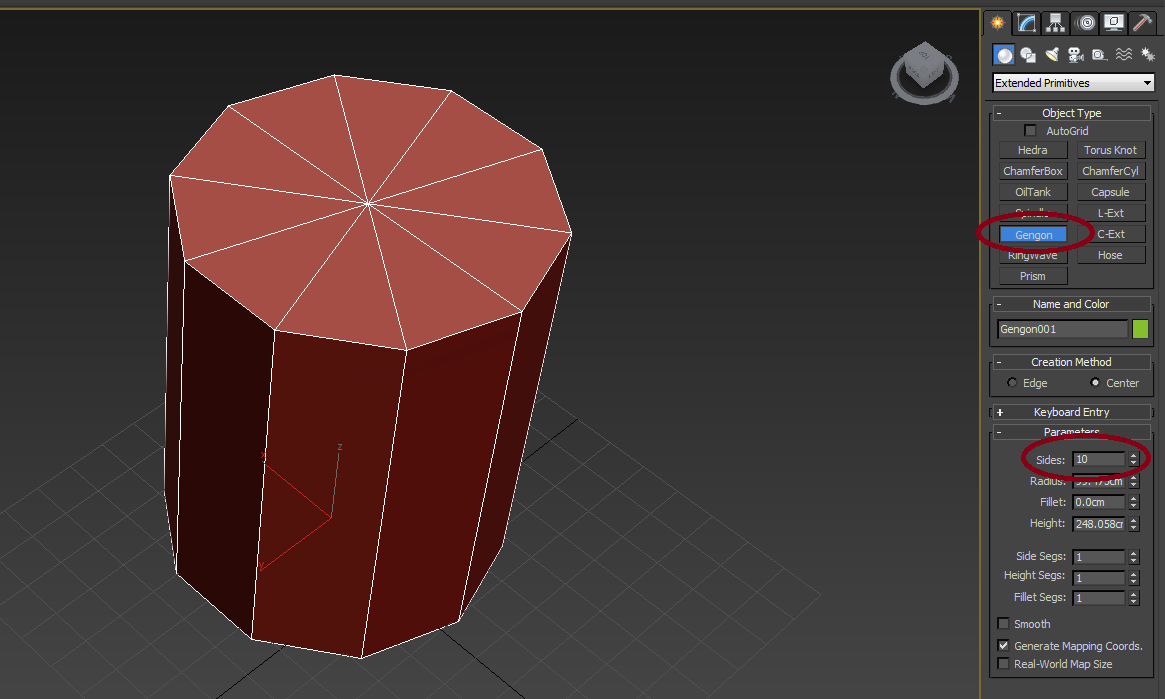
2.1 Gengon
First, we’ll create the gengon that will be used for the menu. To do this we’ll use the gengon tool (located under create/geometry/extended primitives) and it’s properties we’ll setup the size and number of sides.
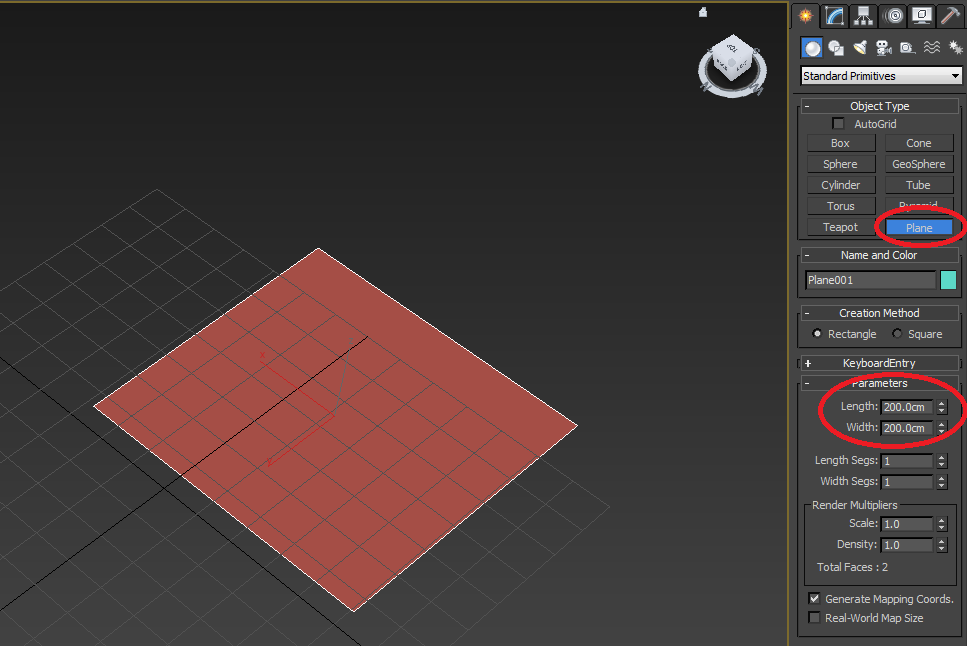
2.2 Square
Then we’ll create the square mesh using the plane tool (located under create/geometry/standard primitives) and set the length and width to the same value.
2.3 Watch
Then we’ll create the mesh for the watch. We’ll skip the details about it’s modelling as this is out of scope for this tutorial but you can download it from here along with the other meshes.

Once the meshes are ready we’ll just export them as FBX files using the file/export menu.
3. Setup the level in UE4
For this tutorial we’ll use Unreal engine 4 however, using roughly the same steps you can achieve this functionality in other engines such as Unity 3D.
3.1 Setup the Coherent Labs FPS sample game
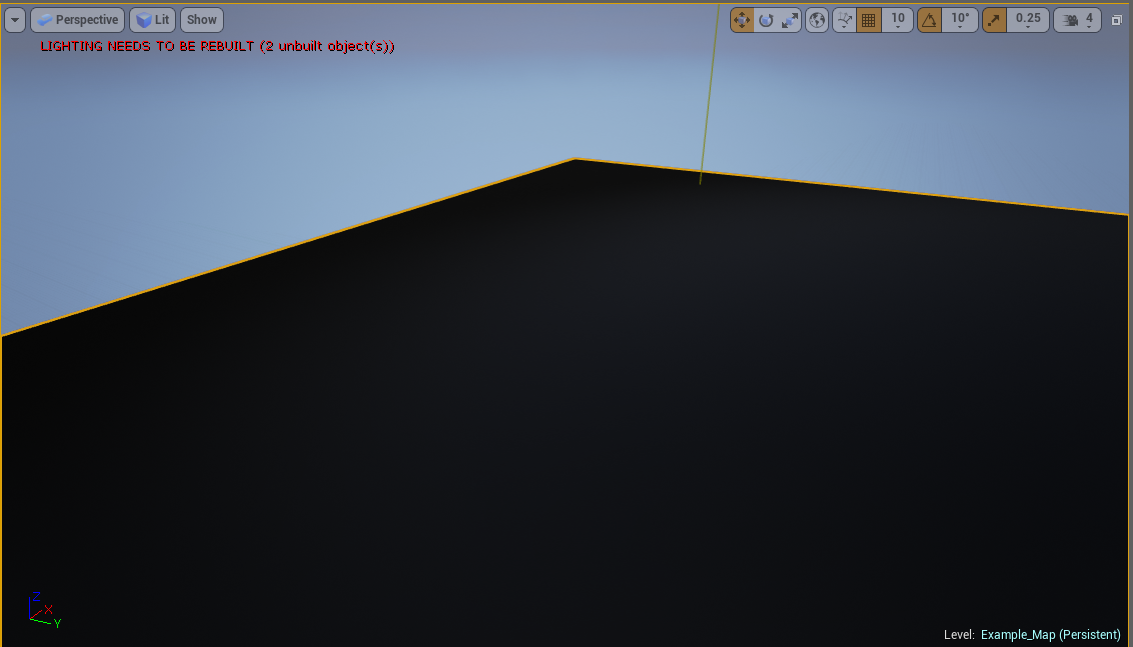
We’ll use the Coherent Labs FPS sample game as a base for our Unreal project. First, we’ll remove all the objects but the floor as we don’t really need them.
3.2 Import the mesh files
Then we’ll import the FBX files for the meshes by dragging them to the Content browser window.

3.3 Create the material and add the Coherent UI component
The next step is to create the material and add the Coherent UI component to the meshes of the gengon and the square.
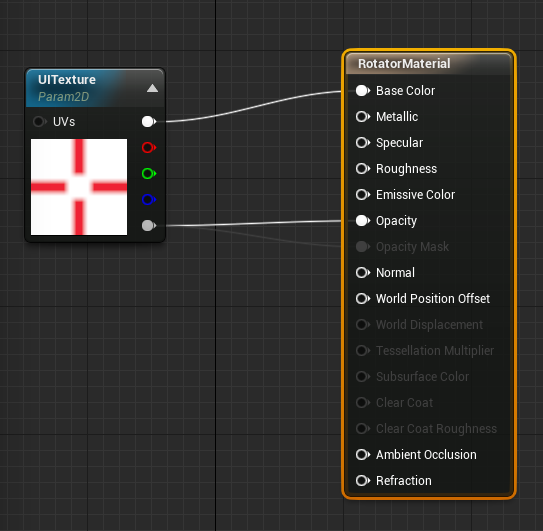
To create the material, right click in the content browser and choose new material. Edit it, add a Texture Object, convert this into a Texture Sample, convert it into a Parameter, rename it to “UITexture”, and connect it to the Material’s “Base Color”. Also, make sure that the opacity of the texture is connected to the opacity of the material. Create an instance of the material.
Once the material is ready we need to add the Coherent UI component. To do this, right-click on the gengon in the content browser and choose “Create blueprint using”. In components, panel adds the Coherent UI component and set the mesh to use the newly created material instance. Using the same methods we create a blueprint for the square mesh as well.

3.4 Add the blueprints and the watch to the level map
Now that we have the blueprints ready we drag and drop them from the content browser to the level map along with the watch mesh.

Then using the move and scale tools of the UE4 editor we’ll position the meshes and we have our level setup!
Stay tuned for part 2 of the tutorial where we’ll create the HTML UI itself using Adobe Edge and the Coherent Labs animation framework.