Data-Binding Common Game UI – Part I


This two-part blog post gives a short overview of Coherent’s declarative JavaScript data-binding and explains key moments in creating 8 data-bound common UI objects. The first part will be an introduction to our data-binding system and will, therefore, include examples which are slightly easier to follow.
The topics covered in this post will be the following.
- Data-binding overview
- Small data-binding example
- Overview of the Linear Progress Bar element
- Overview of the Button Toggle element
- Overview of the Masked Element
- Overview of the Tabs element
Notes:
- Every example with text uses a font from the Exo font-family
- All elements are data-bound using Coherent’s declarative binding
- All components include the coherent.js library which makes data-binding possible
- To be able to preview the following examples you have to add the -forfeitui flag to GTPlayer by editing the GTPlayerLauncher.bat
- Notice the {{model.property}} syntax which is used for evaluating properties of a data-binding model.
Data-Binding Overview
Coherent’s declarative data-binding is a way to synchronize the appearance of the UI with the logic of the game. This means that we can add or remove classes, have a different number of elements available and even change scenes when a certain event happens in the game flow.
Data-binding is done by first creating an object, we will call it a model, which holds the data used by both the UI and the back-end of the game. When needed, the game updates the model and instructs the UI to sync its appearance according to the current data.
The model’s logic usually resides in the game code, but we have JavaScript binding available, which essentially makes it possible to create a mocking JS model(object) full of simulated game data, that the HTML uses. Furthermore, by using this way to bind we can create a complete UI without having the actual game code.
We include the coherent.js library in our code, which uses the engine module for the bulk of the communication between the game and the JavaScript. Additionally, the engine needs some time to get ready so we use the engine.on(‘Ready’, handler) method, that executes the handler function when the ‘Ready’ event is received. In addition, this event tells us that that engine can now create models, update values, and others.
After we create a model, we need to apply data-binding attributes to the HTML that will select the properties which will be changed.

What is more, we can also add structural data-binding attributes, which control the number of elements that are displayed.
Furthermore, when the data changes and elements need to be repainted, we can mark certain properties as dirty, meaning that they are scheduled for redrawing. In JavaScript, we have the
|
1 |
engine.updateWholeModel(modelName); |
function available, which dirtifies all of the properties of the model.
Note: While this works, updating the whole model marks even the properties which haven’t changed and that can hinder performance. However, we can achieve finer control with C++.
After we have marked certain elements as dirty, we call the synchronize function which actually repaints the UI.
|
1 |
engine.synchronizeModels(); |
With this two-step process, we can do costly repaints at convenient times and increase our game performance, however, in the examples to come we will be synchronizing as soon as we update our models since the components are pretty small.
Small Data-Binding Example
Create these files and run them in GTPlayer.
|
1 2 3 4 5 6 |
<!-- some_file.html --> <body> <p data-bind-value='{{myModel.text}}'></p> <script src='coherent.js'></script> <script src='some_other_file.js'></script> </body> |
|
1 2 3 4 5 6 |
// some_other_file.js engine.on('Ready', function() { engine.createJSModel('myModel', { text: 'Sample text', }); }); |

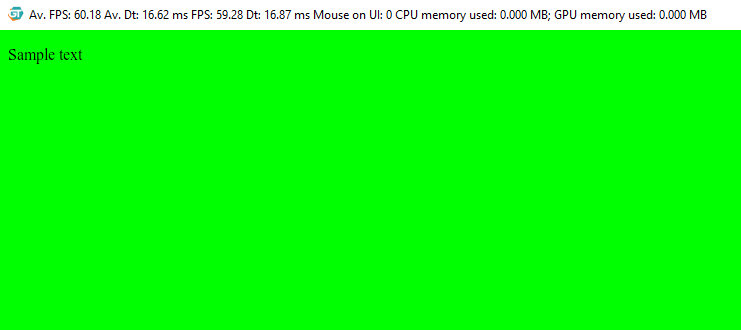
Firstly, the JavaScript code in some_other_file.js creates a global object, named myModel, to which the data-bind-value attribute is linked. Furthermore, every time that the update and synchronize functions are called or when the files are initially loaded, the text content of the paragraph tag will be changed to the value of the string in the model.
|
1 2 3 4 5 6 7 8 9 10 |
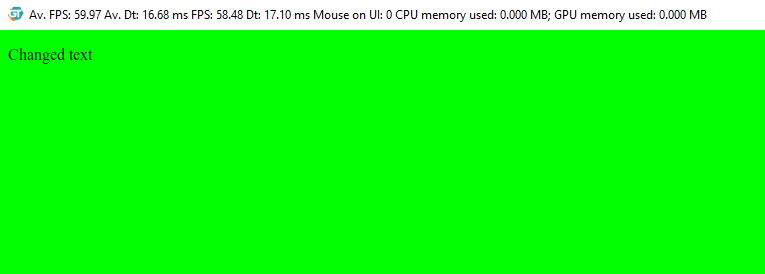
// some_other_file.js - extended engine.on('Ready', function() { engine.createJSModel('myModel', { text: 'Sample text', }); myModel.text = 'Changed text'; engine.updateWholeModel(myModel); engine.synchronizeModels(); }); |

Linear Progress Bar
The first component is a linear bar which commonly represents progress points like experience, quest completion, etc. The currently acquired progress will be visualized as the width of the orange element.


|
1 2 3 4 5 6 7 8 9 10 11 12 |
<body> <div class="progress-bar-container"> <div class="progress-bar-background"> <!--Outlines code--> <div class="progress" data-bind-style-width="{{linearBar.progress}}"> <div class="progress-line"></div> </div> </div> </div> <script src='js/coherent.js'></script> <script src="js/linear_progress_bar.js"></script> </body> |
|
1 2 3 4 5 6 |
.progress { background-color: #e38d27; height: 100%; position: relative; transition: width .25s ease-in-out; } |
The progress bar has a data-bind-style-width attribute which changes the width of the element to the value in the model. If the value is a number, pixels will be the assumed unit of measurement, if the supplied value is a string, however, the unit of measurement will be read from it.
|
1 2 3 4 5 6 7 8 9 10 11 12 13 14 |
engine.on('Ready', function () { engine.createJSModel('linearBar', { progress: "50%", init: function () { setInterval(function () { linearBar.progress = Math.floor(Math.random() * (101)) + '%'; engine.updateWholeModel(linearBar); engine.synchronizeModels(); }, 300); } }); linearBar.init(); }); |
In our case, the JS model for the linear progress bar contains a string in the format <number>%. Its values are changed by generating a random whole number between 0 and 100 and adding a percent sign to it before updating the UI. Lastly, when the linearBar.init() function is called, the model starts registering changes made to the model, which simulates changes coming from a game.
Button Toggle
The second component is a button that has two states and can switch between them. Since it is a general purpose button, its use cases are many, for example, it can hold data about whether the sound is on or off, whether the game is in full screen or in windowed mode, etc.


|
1 2 3 4 5 6 7 8 9 10 11 12 |
<body> <div class='button-container'> <div id='button-slider' class='button-toggle-bar'> <div data-bind-class-toggle='button-slider-on:{{buttonToggle.buttonState}} === "ON";' class='button-slider'></div> </div> <div data-bind-value='{{buttonToggle.buttonState}}' class='toggle-text'></div> <div class='text-separator'></div> <div data-bind-value='{{buttonToggle.buttonPurpose}}' class='button-text'></div> </div> <script src='js/coherent.js'></script> <script src='js/button_toggle.js'></script> </body> |
The data-bind-class-toggle attribute applies the button-slider-on class, if the condition after the colon is true, to slide the button forward and keep it active. When the condition becomes false, the class is removed and a transition returns the button to the starting position. What is more, the condition after the colon evaluates the code within the curly braces and after that checks if the result is strictly equal to “ON”. This goes to show that pretty much any time of JavaScript code can reside in the data-binding attributes. Furthermore, the button’s text values are bound to the data-bind-value attribute, therefore, the button can have a different meaning in different context.
|
1 2 3 4 5 6 7 8 9 10 11 12 |
.button-slider { background-color: rgba(255, 255, 255, .7); height: 100%; transform: rotateX(0deg); transition: background-color .15s linear, transform .15s linear; width: 50%; } .button-slider-on { background-color: rgba(227, 141, 39, 1); transform: rotateX(0deg) translateX(100%); } |
|
1 2 3 4 5 6 7 8 9 10 11 12 13 14 |
engine.on('Ready', function () { engine.createJSModel('buttonToggle', { buttonPurpose: 'TOGGLE SOUND', buttonState: 'OFF', init: function () { document.getElementById('button-slider').addEventListener('click', function () { buttonToggle.buttonState = buttonToggle.buttonState === 'ON' ? 'OFF' : 'ON'; engine.updateWholeModel(buttonToggle); engine.synchronizeModels(); }); } }); buttonToggle.init(); }); |
The style of our button is driven by the logic of the game because the button-slider-on class is applied when the state of the model changes. Suppose that the button’s model reflects whether the hero in our game is armed or not. Furthermore, let’s say that they are armed and that they enter a zone that prohibits weapons. The game will disarm the hero by changing the state of the button to off and our UI will automatically have the appropriate styles applied.
Masked Element
The third element is a progress bar with an odd shape that can be used in UI’s as a general purpose bar that keeps track of stats like health, mana, etc. The shape is achieved via a mask and the data-binding model is similar to the one of the linear progress bar.


|
1 2 3 4 5 6 7 8 9 10 11 12 13 14 15 |
<body> <div class='masked-element-container'> <div class='masked-bar-container'> <div data-bind-style-width='{{maskedBar.value}} + "%"' class='masked-bar'> <div class='masked-line'></div> </div> </div> <div data-bind-class-toggle='beat:{{maskedBar.isBeating}}' class='values'> <img class='bar-image' src='img/masked_element_heart.png'> <div class='bar-value' data-bind-value='{{maskedBar.value}}'>58</div> </div> </div> <script src='js/coherent.js'></script> <script src='js/masked_element.js'></script> </body> |
The data-bind-style-width attribute firstly evaluates maskedBar.value and applies the % afterwards. This technique is used, because the value of the model is also used as text content by the data-bind-value attribute. Furthermore, the beat class is added to the values when maskedBar.isBeating is true.
|
1 2 3 4 5 6 7 8 9 10 11 12 13 14 15 16 17 18 |
.masked-bar-container { width: 21.042vw; height: 3.334vw; -webkit-mask-image: url(../img/masked_element_inner_mask.png); -webkit-mask-size: 100% 100%; border-left: 1px solid rgba(255, 255, 255, .3); border-right: 1px solid rgba(255, 255, 255, .3); box-sizing: border-box; background-color: #252525; } .masked-bar { width: 58%; position: relative; height: 100%; background-color: #c43345; transition: width .1s linear; } |
Here a mask is applied to cover the whole width and height of the .masked-bar-container. The mask image crops the red bar so that only the content over the white part of the mask is visible. While that produces the curved effect, a transition applied to the width of the bar animates the movement of the bar.
|
1 2 3 4 5 6 7 8 9 10 11 12 13 14 15 16 17 18 19 20 |
@keyframes heartbeat { 0% { opacity: 1; transform: scale(1); } 50% { opacity: 0.8; transform: scale(0.8); } 100% { opacity: 1; transform: scale(1); } } .beat { animation-name: heartbeat; animation-duration: .2s; animation-iteration-count: infinite; } |
|
1 2 3 4 5 6 7 8 9 10 11 12 13 14 15 16 17 18 19 20 21 22 23 24 25 26 27 28 29 30 31 32 33 34 35 36 37 38 39 40 41 42 43 |
engine.on('Ready', function () { engine.createJSModel('maskedBar', { value: 58, isBeating: false, updateValues: function (value, flag) { if (value !== undefined) { maskedBar.value = value; } if (flag !== maskedBar.isBeating) { maskedBar.isBeating = flag; } engine.updateWholeModel(maskedBar); engine.synchronizeModels(); }, init: function () { setInterval(function () { var option = Math.floor(Math.random() * 3); switch (option) { case 0: maskedBar.updateValues(Math.floor(Math.random() * 101), true); setTimeout(function () { maskedBar.updateValues(Math.floor(Math.random() * 101), true); setTimeout(function () { maskedBar.updateValues(Math.floor(Math.random() * 101), true); setTimeout(function () { maskedBar.updateValues(undefined, false); }, 150); }, 150); }, 150); break; default: maskedBar.updateValues(Math.floor(Math.random() * 101), true); setTimeout(function () { maskedBar.updateValues(undefined, false); }, 150); break; } }, 550); } }); maskedBar.init(); }); |
Here, the init function either makes a single change to the model or three fast updates in a succession. Furthermore, the heartbeat animation has infinite iterations which are timed with the multiple quick changes. This behavior might be used in a shooter game, where you quickly lose and gain health. Lastly, the final update of the model will disable the isBeating flag which will stop the heartbeat animation.
Tabs
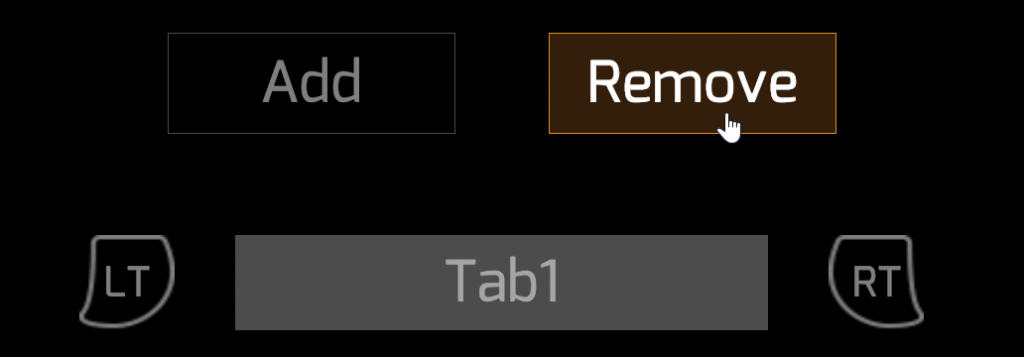
The last component is also a general purpose menu, but with tabs. It includes mocking buttons that dynamically add and remove tabs and utilizes a data-binding model that keeps track of the current number of tabs.


|
1 2 3 4 5 6 7 8 9 10 11 12 13 14 15 16 17 18 19 20 21 22 23 24 25 26 27 |
<body> <div class='force-wrap'> <div class='force-container'> <div class='force-button' id='force-add'>Add</div> </div> <div class='force-container'> <div class='force-button' id='force-remove'>Remove</div> </div> </div> <div class='tabs-wrap'> <div class='button-container'> <div class='left-button'>lt</div> </div> <div class='tabs-body'> <div class='tab-container' data-bind-for='iter:{{tabsModel.tabs}}'> <div class='tab' data-bind-value='"Tab" + {{iter}}'></div> </div> </div> <div class='button-container'> <div class='right-button'> <p class='inverted-button-text'>rt</p> </div> </div> </div> <script src='js/coherent.js'></script> <script src='js/tabs.js'></script> </body> |
On every model update the data-bind-for attribute in .tab-container iterates over all tabsModel.tabs and create as many tab containers as there are elements in the array. Furthermore, the text applied to the tabs with the data-bind-value attribute is in the format Tab<number>, where the number is tabsModel.tabs[iter].
|
1 2 3 4 5 6 7 8 9 10 11 12 |
.tabs-body { display: flex; flex-wrap: wrap; justify-content: center; max-width: 73.5vw; } .tab-container { height: 3.5vw; display: flex; align-items: center; } |
.tabs-body aligns the .tab-container elements in a line and wraps when they reach a max-width: 73.5vw;, while tab-container centers the .tab box.
|
1 2 3 4 5 6 7 8 9 10 11 12 13 14 15 16 17 18 19 20 21 22 23 24 25 26 |
engine.on('Ready', function () { engine.createJSModel('tabsModel', { tabs: [ 1, 2, ], updateModel: function () { engine.updateWholeModel(tabsModel); engine.synchronizeModels(); }, init: function () { document.getElementById('force-add').addEventListener('click', function () { var len = tabsModel.tabs.length; var lastNum = len === 0 ? 0 : tabsModel.tabs[len - 1]; tabsModel.tabs.push(lastNum + 1); tabsModel.updateModel(); }); document.getElementById('force-remove').addEventListener('click', function () { tabsModel.tabs.splice(-1, 1); tabsModel.updateModel(); }); } }); tabsModel.init(); }); |
Firstly, when the add button is clicked the appropriate number is inserted in tabsModel.tabs and the UI is repainted, therefore the data-bind-for will iterate over one more element and a new tab will appear. Secondly, when the remove button is clicked the last element of the tabsModel.tabs array is removed and the UI is again synced with the model.
That was all for this post, I hope you learned something new and interesting. Keep an eye out for the next part as it will be coming shortly.

