How to use GT Components and Animate

In this tutorial we will introduce you to GT Components and show you how to use them in Adobe Animate. The samples below demonstrate how we:
- Create a GT Component in Animate.
- Create a GT Component externally and include it in Animate’s scene.
- Include a GT Component created in Animate in other compositions.
GT Components overview
Before we start let’s get familiar with the GT Components system. You can think of GT Components as reusable user interface widgets, consisting of several separate technologies:
data-bind-model: An HTML attribute that works likeengine.attachToModel(DOMNode, exposedModel)on the DOM element on which it is applied. You can access the attached model properties with the keywordthis.data-bind-template-name: Creates a template. It represents an HTML attribute that is placed on a<script>tag with value the name of the template. A Component is registered with this name:
|
1 2 3 4 5 6 |
<!-- template.html --> <script type="text/html" data-bind-template-name="myComponent"> <div> <span>Hello, I am a GT Component!</span> </div> </script> |
The HTML template is registered with data-bind-template-name or engine.registerComponent(). data-bind-template and data-bind-model work correctly together.
Note: The <script> tag is required as otherwise the template will be parsed as a regular element.
data-bind-template: An HTML attribute that inserts a Component inside the DOM element on which it is applied. Its value is the registered template’s name:
|
1 2 3 4 |
<!-- main.html --> <div id="component-wrapper"> <div data-bind-template="myComponent"></div> </div> |
<link rel="import" href="folder/Name.html">: This<link rel="import">functionality parses the HTML file by a given URL and inserts all:- Other link imports from the file.
- Link style elements.
- Script tags.
- Style tags to the main HTML file.
Note: For now, you cannot use relative routes to resources in inline CSS because they won’t work. If you need to do this use absolute URLs or write all your CSS in a separated file.
- If you want the template to be registered as Component directly from the HTML you must add
data-bind-template-name="ComponentName"as an attribute to the script tag.
|
1 2 3 4 5 |
<script type="text/html" id="item-template" data-bind-template-name="ComponentName"> <div class="list-item"> <div class="item-name" data-bind-value="{{this.name}}" >Item Name</div> </div> </script> |
Note: Registered Components from the HTML don’t have callbacks for now.
- If you want to register the Component from the JavaScript, the
<script>tag must not containdata-bind-template-nameattribute. After the template has been defined, instantiate it and register the Component:
|
1 2 3 4 5 6 7 8 9 10 11 12 13 14 15 |
<script> function instantiateTemplate(selector) { var template = document.querySelector(selector), div = document.createElement('div'); div.innerHTML = template.textContent; return div; } var instance = instantiateTemplate('#item-template'); engine.registerComponent("listItem", { template: instance, create: function () { }, }); </script> |
The registerComponent() method has 3 arguments:
- The first one is the name of the Component (template). With this name, we call
data-bind-template="componentName"attribute. - The second one is a DOM element which would be inserted as a template.
- The third one is a callback function which is called on insertion of the template.
- After registering the Component, you can use it with
data-bind-templateattribute and the name you have given to the Component:
|
1 2 3 4 5 |
<div id="list-container"> <div data-bind-for="i:{{game.weapons}}"> <div data-bind-template="listItem" data-bind-model="{{i}}"></div> </div> </div> |
GT Components in Animate
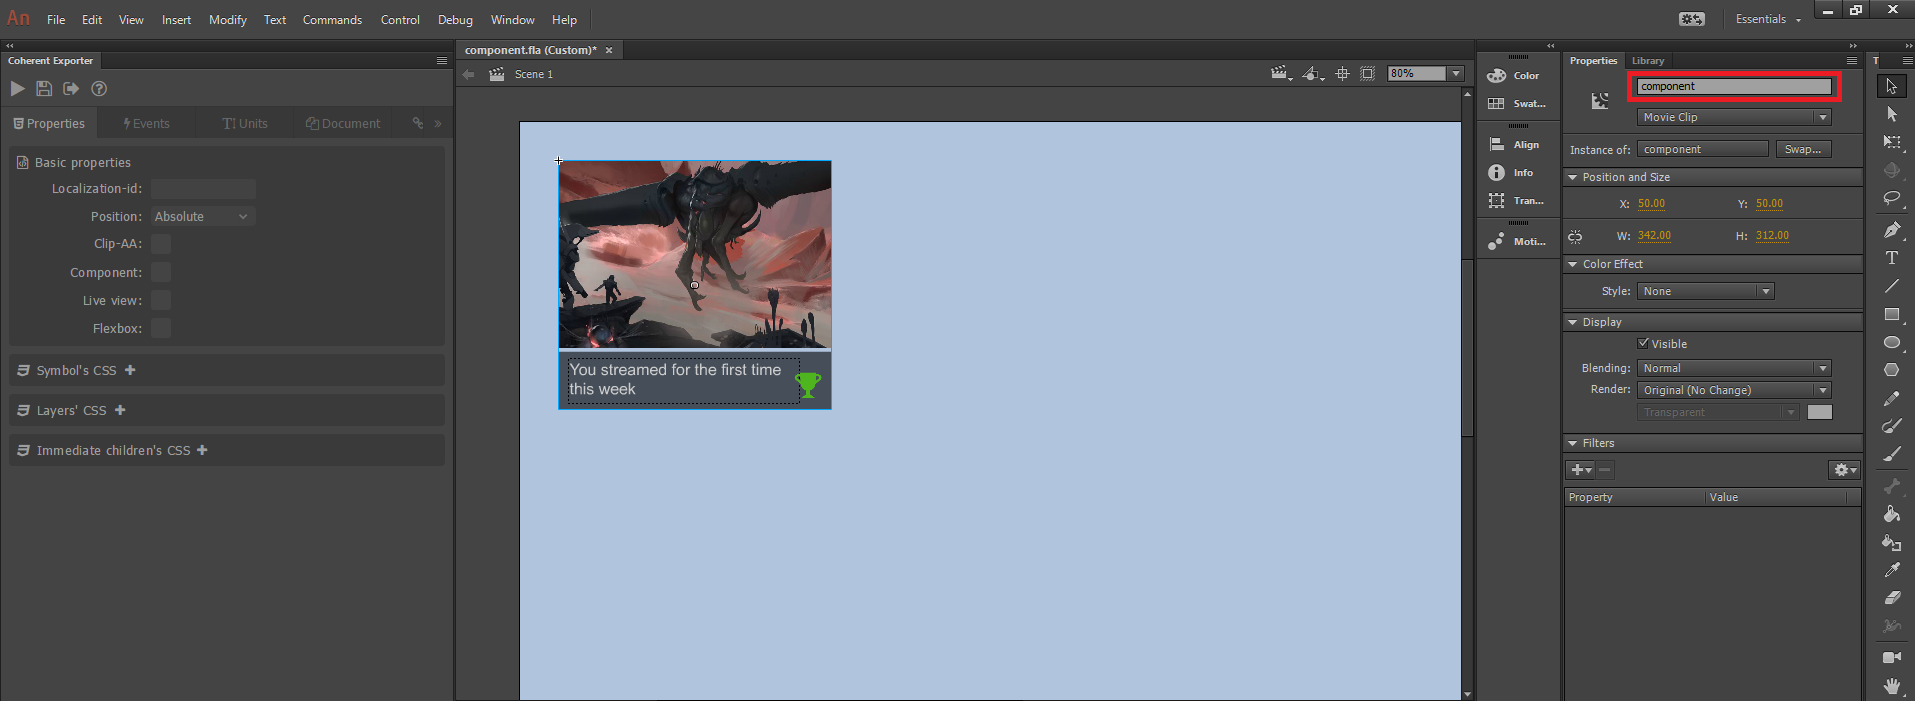
Craft a Tile with Adobe Animate’s tools, as in the reference image below, convert it to Symbol and give it an Instance name from Adobe’s Properties menu. After publishing the scene, the Instance name will represent the DOM element’s id, it also allows us adding Exporter’s functionalities:
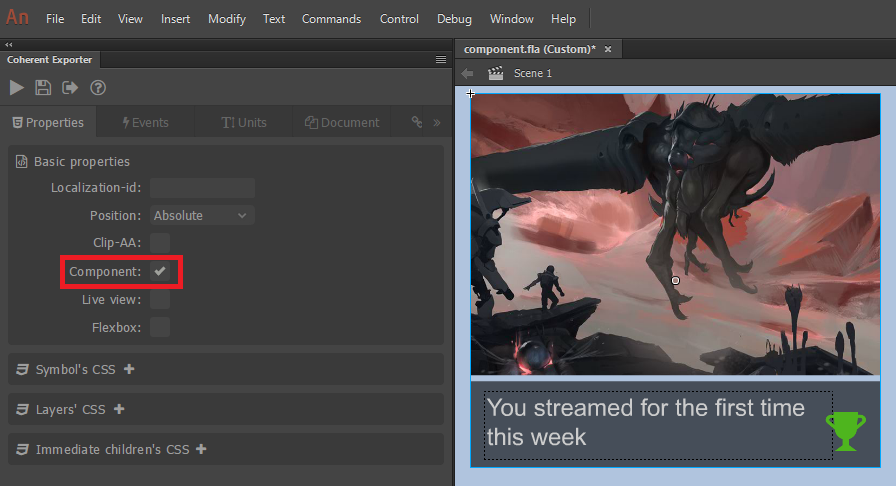
Select the Tile and add a tick to the Components checkbox from the Exporter’s Properties menu:
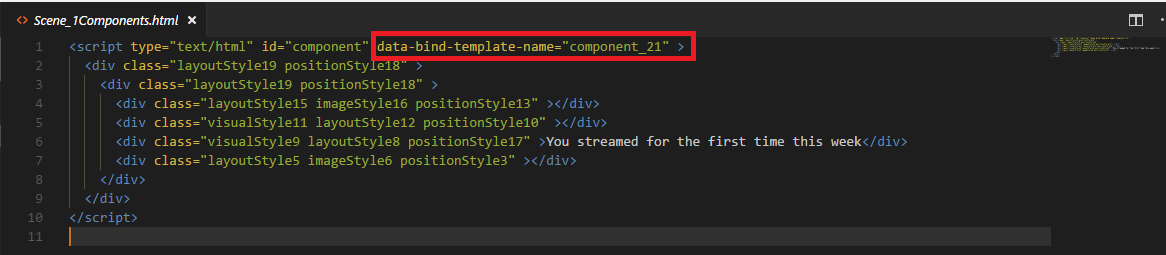
After publishing the scene, in your working directory, the Exporter will create a new folder named ‘components’ with the HTML file (Scene_1Components.html) that holds the Component’s template in a <script> tag. You can rename the scene, from the Animate’s Window drop-down menu, select Scene and type a name of your choice. All the corresponding files will include that name.
Taking a look at the exported Component’s markup, we can see that the Component is registered with data-bind-template-name attribute:
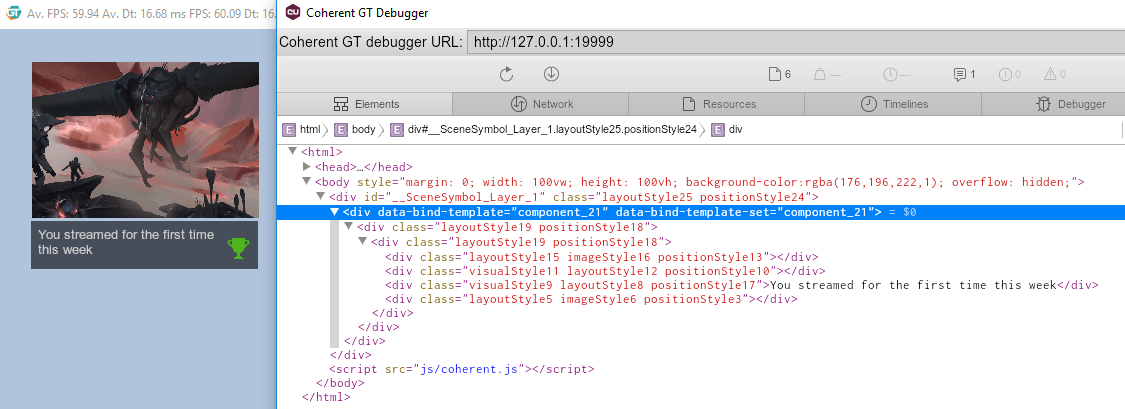
Now let’s take a look at the scene’s main HTML file – Scene_1.html. The Scene\_1Components.html file is included with <link rel="import" href="components/Scene_1Components.html"> and the Component is inserted in the DOM with data-bind-template attribute.

Let’s inspect the markup. The result should look like this:
Using external Components in Adobe Animate
The technologies that GT Components consist of, allow us to create an external Component in a separated HTML file and include it in Animate by adding data-bind-template attribute from Exporter’s Binding menu with a value the name we have given to our template.
In the ‘components’ folder create a new HTML file (externalComponent.html), that will hold our external Component’s template. We will register the Component directly in the HTML. The following is the code for our external template.
|
1 2 3 4 5 6 7 8 |
<script type="text/html" id="component" data-bind-template-name="myComponent"> <div style="font-family: Arial; width: 80vh; height: 10vh; background-color: #4B535D; border-top: 3px solid #3DA11B;"> <div style="color: #2B2B2B; position: relative; text-align: right; top: -20px;">Now Playing</div> <div style="font-size: 4.5vh; position: relative; top: -10px; left: 20px; color: #C2C2C2;">Menu Kit</div> <div style="position: relative; top: -10px; left: 20px; color: #C2C2C2;">Infiltrate and Extract</div> <div style="font-size: 4.5vh; color: #3DA11B; position: relative; top: -60px; text-align: right; right: 20px;">JOIN SESSION</div> </div> </script> |
Note: The inline styles are just for purpose of the sample. You can write your CSS in a separate file and link it to the Component’s HTML. For example:
|
1 2 3 |
<link rel="stylesheet" type="text/css" href="myComponent.css"> <script type="text/html" id="component" data-bind-template-name="myComponent"> ... |
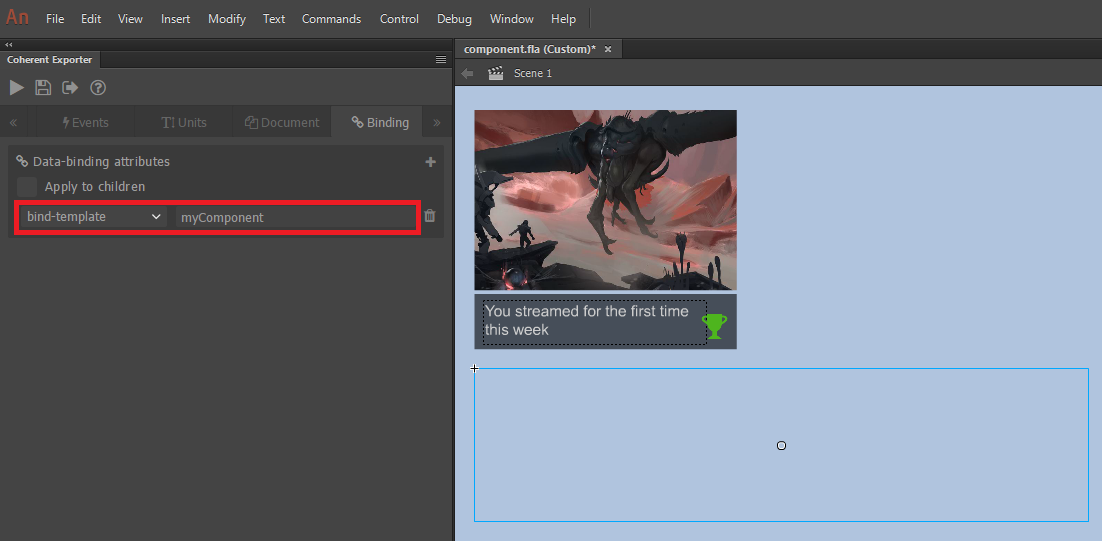
After we’ve created our Component (template), we can insert it in Animate by adding data-bind-template attribute. In the scene, create a transparent rectangle, convert it to Symbol and give an Instance name. This rectangle will be the DOM element to which we will attach our Component. Select the rectangle, from the Exporter’s Binding menu, add data-bind-template attribute with the name of the external Component:
Now we only have to include the external Component in the Scene_1.html:
|
1 |
<link rel="import" href="components/externalComponent.html"> |
Note: You have to add the <link> tag manually, because for now Exporter doesn’t have this functionality. At that point if you republish the scene, the Exporter will override the Scene_1.html file and the <link> won’t be included.
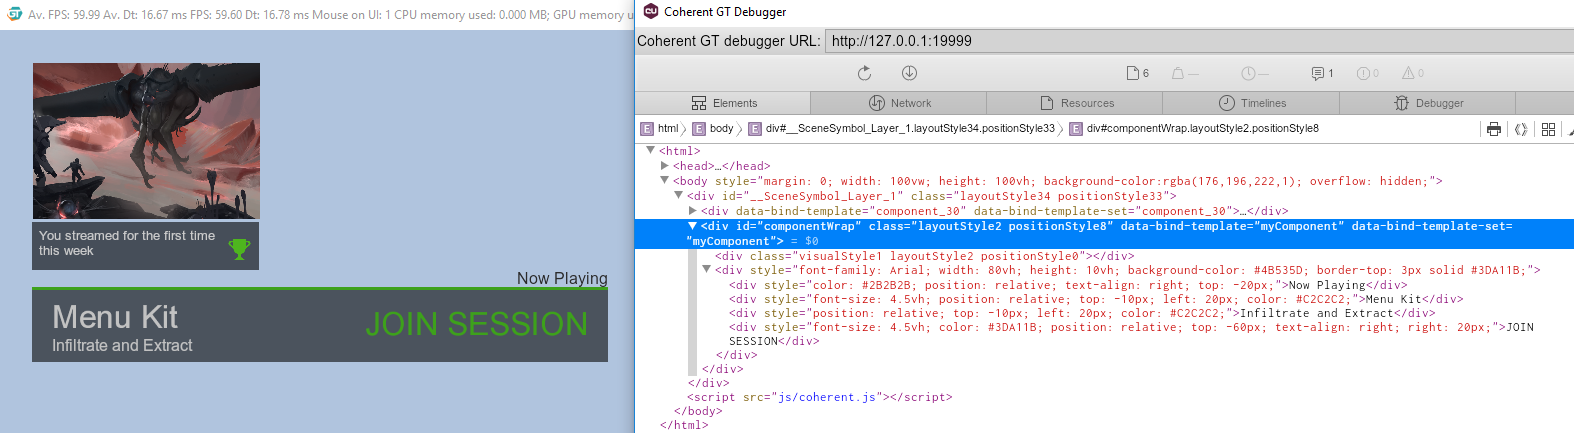
Open the file in GT Player without publishing, the result should look like this:
Animate Components in other compositions
After creating a GT Component in Animate, you can easily reuse it in other compositions. In this sample, we will show you how to integrate the Tile Component in our Menu Kit’s profile scene. In the project directory create a ‘components’ folder and copy/paste the Scene_1Components.html file there. In the main HTML file include the Component with:
|
1 |
<link rel="import" href="components/Scene_1Components.html"> |
Copy/paste the Scene_1.css file in the ‘css’ folder and include it in the main HTML file:
|
1 |
<link rel="stylesheet" type="text/css" class="styles" href="css/Scene_1.css"> |
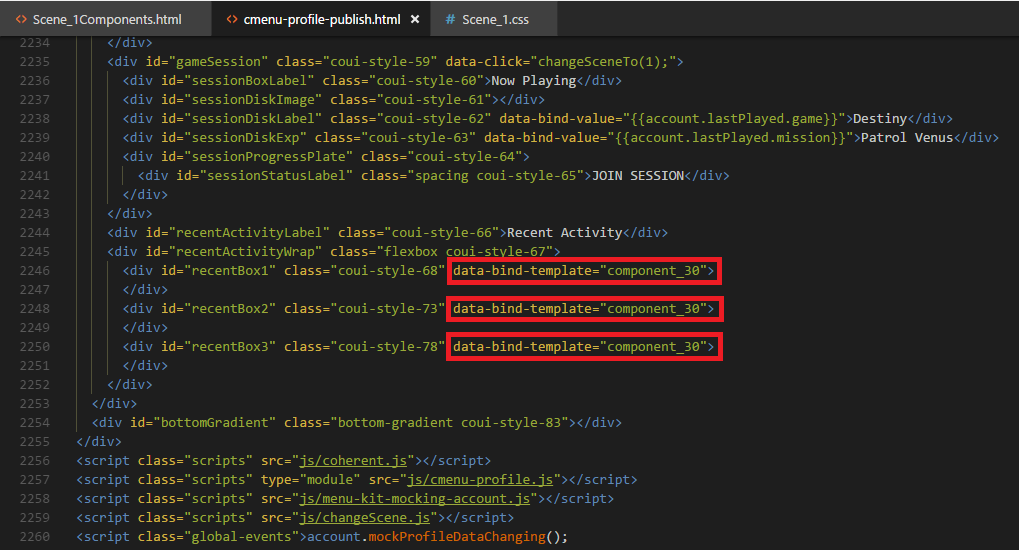
Create a new folder called ‘img’ and copy/paste the images that are part of the Component. Now you can add data-bind-template="name" inside the DOM element on which you want to insert the Component:
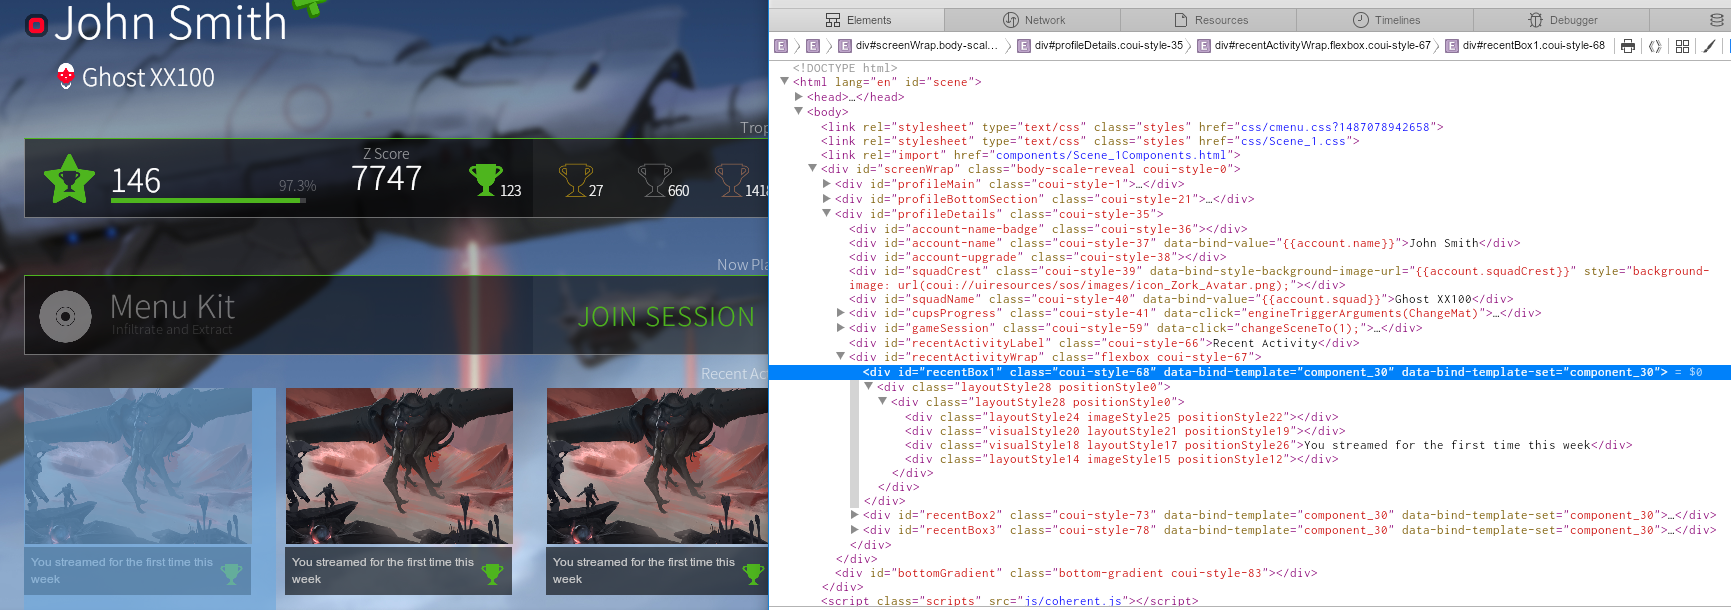
Inspect the scene, the result should look like this:
For more interesting information regarding GT Components and Animate follow @CoherentLabs on Twitter or start a discussion in our Forum. Also, give Daniela, the creator of the post, some love by tweeting her @DannaGeorgieva.