Creating a Healthbar using the Coherent Exporter – Part 2 Data-binding

This tutorial uses our previous post – Creating a Healthbar (Tutorial) as a starting point and describes in details how to add data-binding properties to a Healthbar FPS HUD Screen top/left position and width values.
In the previous tutorial, we created the symbol HealthBarWrapper that holds all the elements and published the scene as HTML. Now, we can continue with adding data-binding properties to the following elements: the text fields, the condition bar and the whole symbol. First of all, we have to convert each of these elements to symbols in order to add data-binding attributes to them.
Set the environment
Double click on HealthBarWrapper symbol and select the text field with the number 3 in it. Then, right click on the mouse so a drop down menu appears and select Convert to Symbol option:
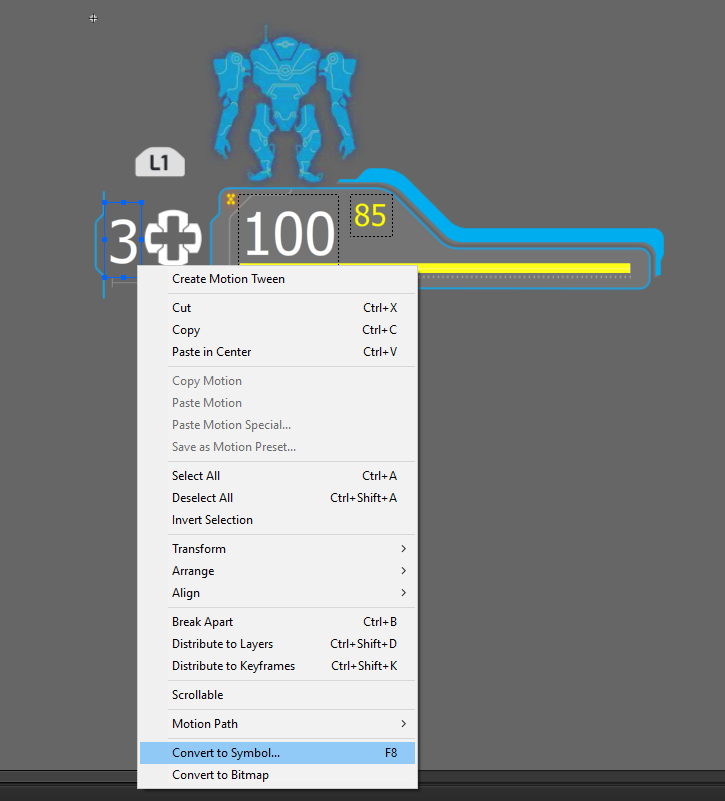
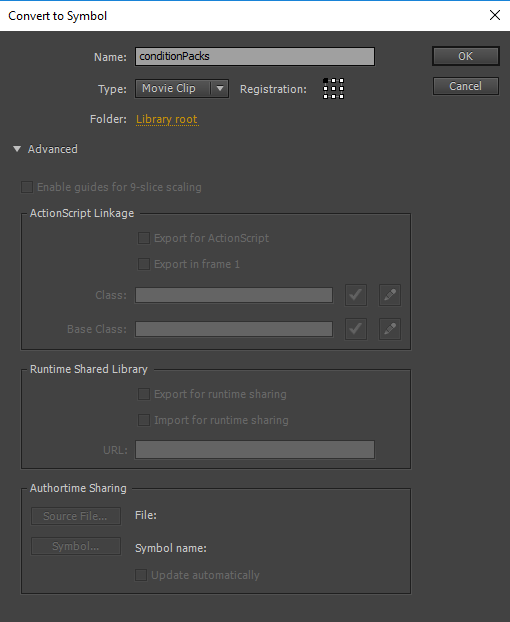
A window will appear, write the name of the symbol – conditionPacks:
Do the same for the rest of the elements and give them the following names:
- text field with number 100 in it – maxCondition
- text field with number 85 in it – conditionState
- yellow line – conditionBar
In your working directory, create a folder named ‘js’ and add the coherent.js library in it, then create a .js file and named it ‘data-model.js’. This file will hold the JavaScript data-model. Now we have to include these files in the Animate’s composition. In order to do that from Coherent Exporter panel, go to Document tab, JavaScript Files and click on the + sign and add the coherent.js and data-model.js files.
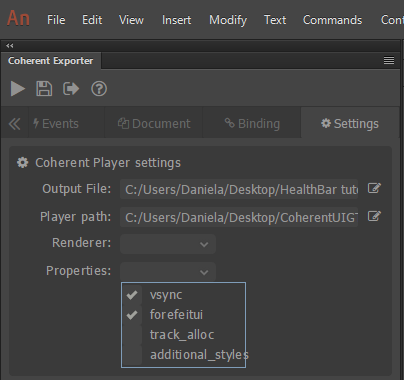
Then go to the Settings tab and navigate the Player path to your GTPlayer.exe, then from the properties drop down menu add a tick to forefeitui check box.
Lets check if everything is set correctly. From the icons at the top of the Coherent Exporter panel press Save as and Publish the HTML scene.
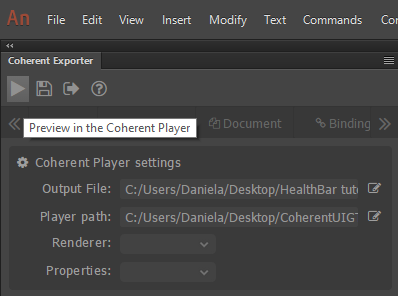
Then click on the play button. A preview in the Coherent Player will appear.
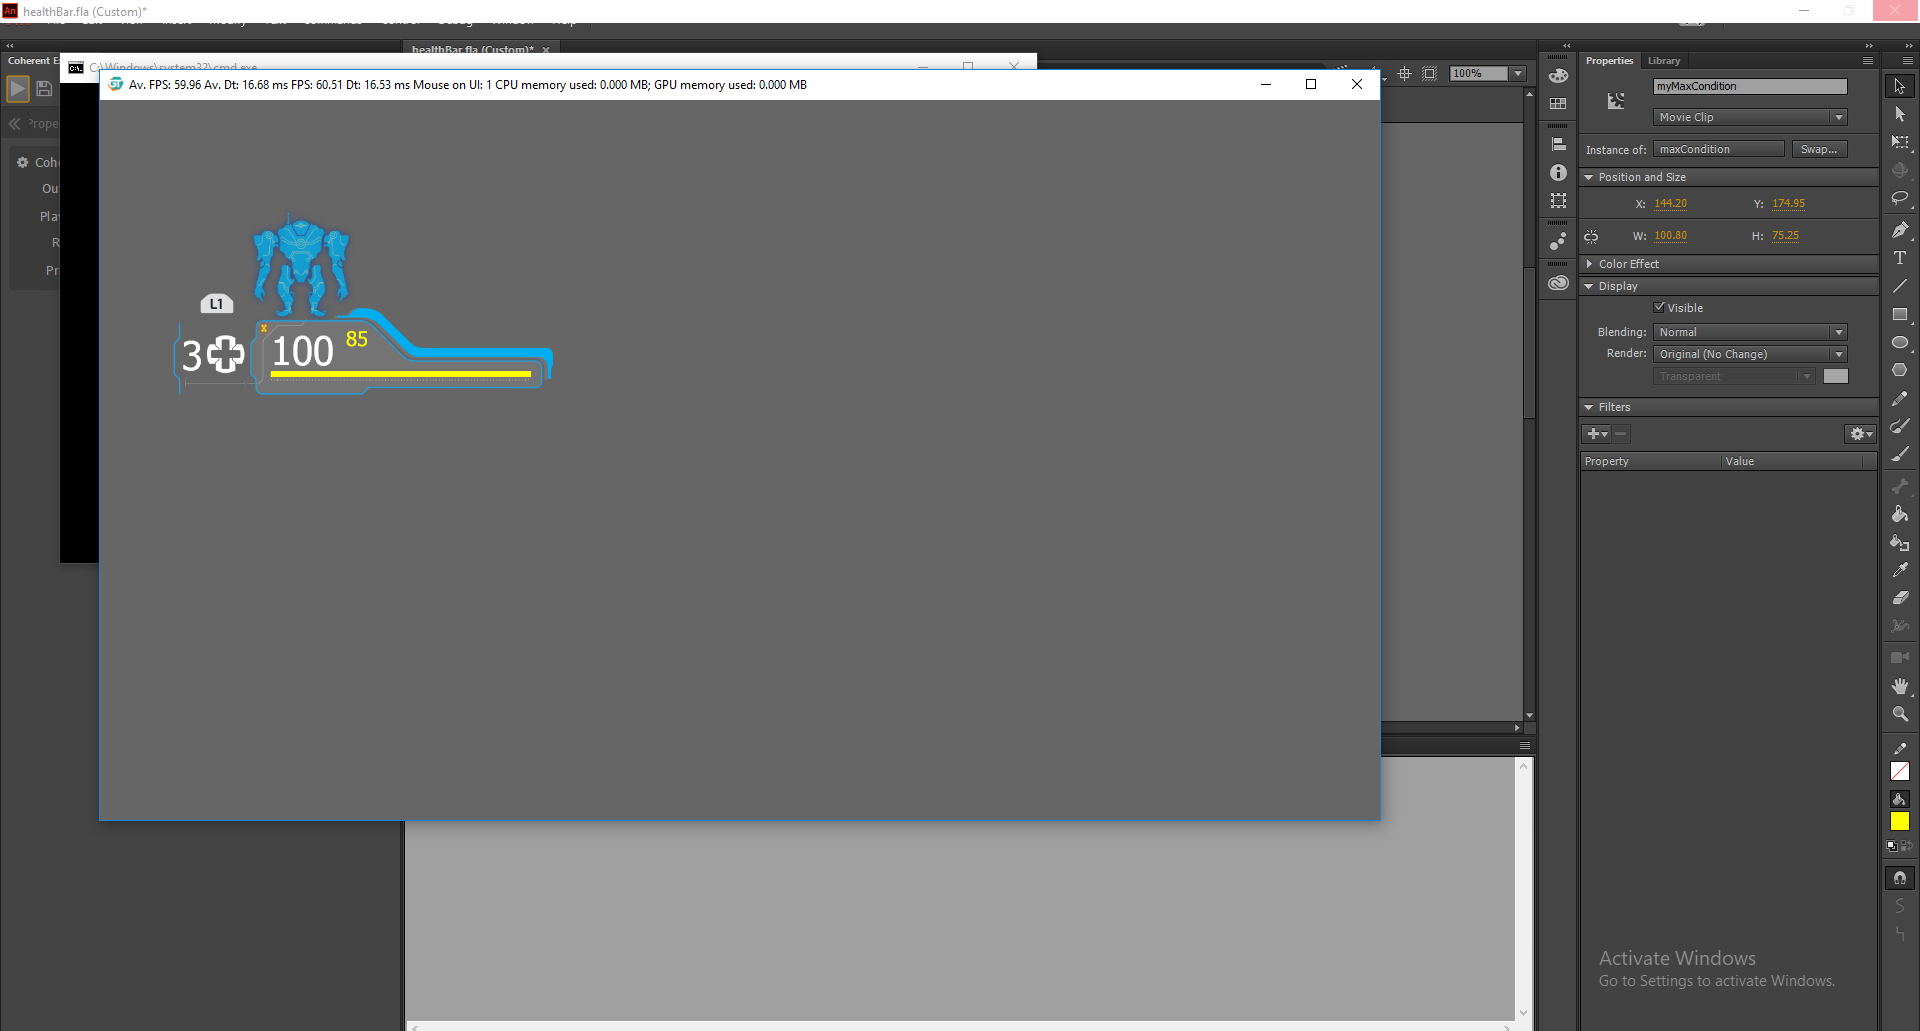
Note: you can also open the debugger.exe which will be synchronized with the Coherent Player.
Add data-binding attributes
We will add the following data-binding attributes:
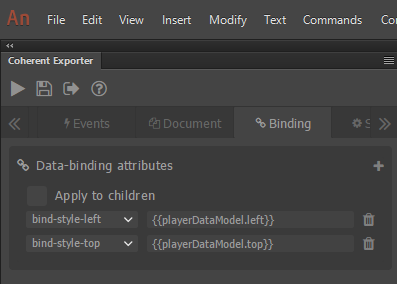
- to the whole symbol, add left and top attributes:
- to conditionPacks, add a value attribute:
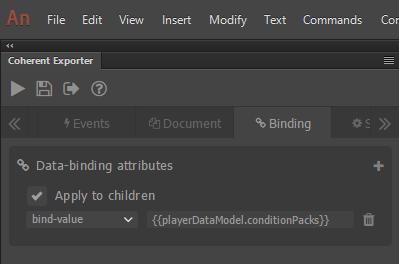
Note: add a tick on the Apply to children checkbox.
- to maxCondition, add a value attribute:
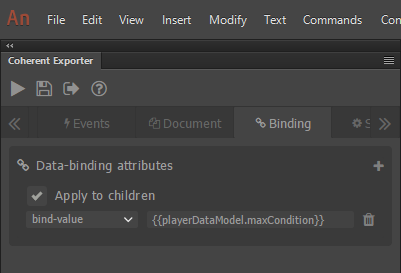
Note: add a tick on the Apply to children checkbox.
- to conditionState, add a value attribute:
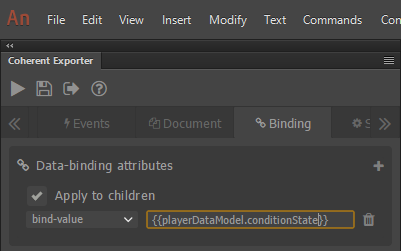
Note: add a tick on the Apply to children checkbox.
- to conditionBar, add a width attribute:
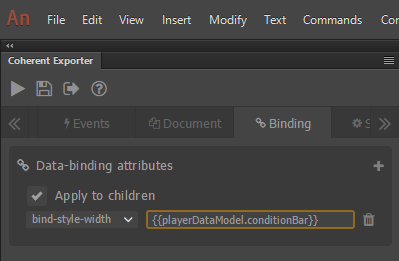
Note: add a tick on the Apply to children checkbox.
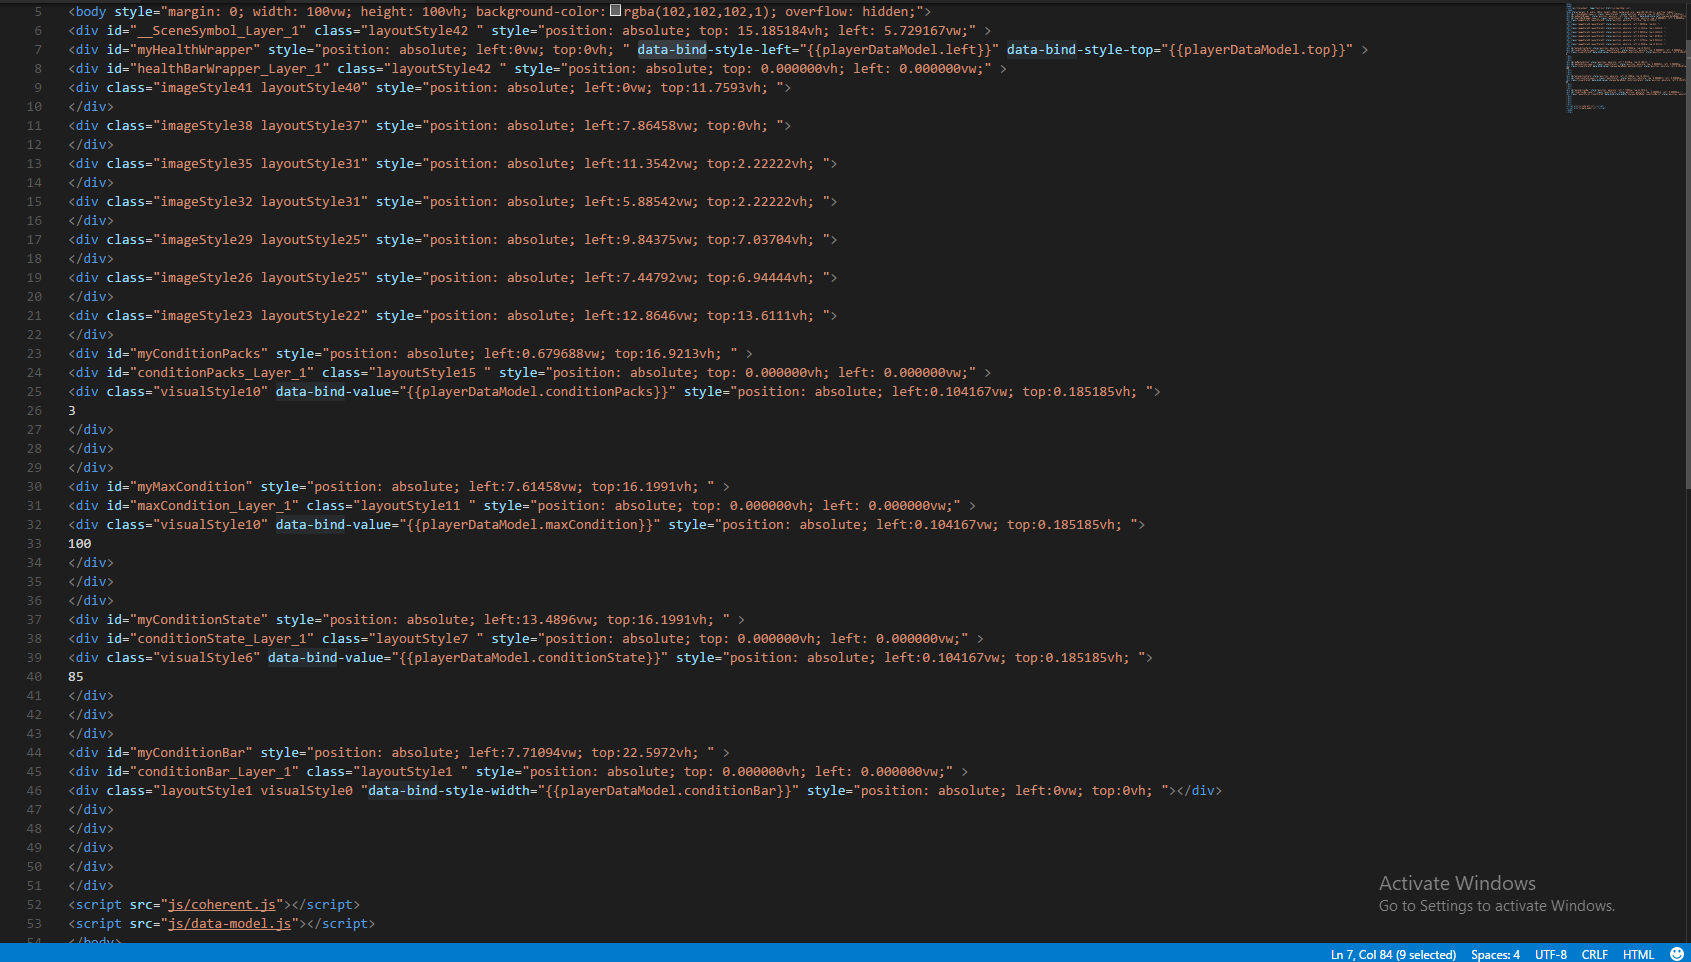
Save the project and look at your .html file. If everything went properly, all data-bind attributes will be added to the correct elements, nested correctly to the parent – HealthBarWrapper. Аt the end of the markup coherent.js and data-model.js have to be linked as shown:
Create mock model and updates
Before we start, get familiar with what is data-binding and the documentation about Data-binding for JavaScript.
Put all of the code below to your data-model.js file step by step. Let’s start by registering a JavaScript model by calling engine.createJSModel(modelName, model).
engine.createJSModel('playerDataModel', {
  top: 0,
  left: 0,
  nextLeft: true,
  nextTop: true,
  conditionPacks: 3,
  maxCondition: 100,
  conditionState: 85,
  conditionBar: 258,
  updateModel: function () {
    engine.updateWholeModel(playerDataModel);
    engine.synchronizeModels();
  }
});
To update the JavaScript models we use – engine.updateWholeModel(model). This function only tells GT that this model has changed. To force an update of the data-bound values (update the DOM), you must also call engine.synchronizeModels().
In order to make the whole symbol move through the screen we will manipulate the top and left position attributes with the following function:
function movement() {
  var curLeft = Math.abs(playerDataModel.left);
  var curTop = Math.abs(playerDataModel.top);

  if (playerDataModel.nextLeft) {
    playerDataModel.left += 2;
    if(curLeft >= 600) {
      playerDataModel.nextLeft = false;
    }
  } else {
    playerDataModel.left -= 2;
    if (curLeft <= 0) {
      playerDataModel.nextLeft = true;
    }
  }

  if (playerDataModel.nextTop) {
    playerDataModel.top += 2;
    if (curTop >= 300) {
      playerDataModel.nextTop = false;
    }
  } else {
    playerDataModel.top -= 2;
    if (curTop <= 0) {
      playerDataModel.nextTop = true;
    }
  }

  playerDataModel.updateModel();
  requestAnimationFrame(movement);
}

movement();
Save the code and Play the preview in GT from the Coherent Exporter. The symbol must float through the screen.
In order to make the numbers change from time to time we will add some additional functions to our playerDataModel:
engine.createJSModel('playerDataModel', {
  top: 0,
  left: 0,
  nextLeft: true,
  nextTop: true,
  conditionPacks: 3,
  maxCondition: 100,
  conditionState: 85,
  conditionBar: 258,
  getRandomInt: function (min, max) {
    return Math.floor(Math.random() * (max - min + 1)) + min;
  },
  toggle: function () {
    if (playerDataModel.maxCondition === 100 && playerDataModel.conditionBar === 258) {
      playerDataModel.maxCondition = 25;
      playerDataModel.conditionBar = 64;
    } else {
      playerDataModel.maxCondition = 100;
      playerDataModel.conditionBar = 258;
    }
  },
  updateModel: function () {
    engine.updateWholeModel(playerDataModel);
    engine.synchronizeModels();
  }
});
At the bottom of the data-model.js file, call set interval method to invoke the following functions:
setInterval(function () {
  playerDataModel.conditionPacks = playerDataModel.getRandomInt(0, 9);
  playerDataModel.conditionState = playerDataModel.getRandomInt(0, 100);
  playerDataModel.toggle();
  playerDataModel.updateModel();
}, 800);
That is it! Now we have a mock model with mock updates. Click on the Play button in the Coherent Exporter panel to preview the final result.