Create an Angry Birds style UI with Hummingbird

Hummingbird, our solution for mobile game UI, is currently in BETA but I decided to give you a sneak peak of the SDK and share my experience building a mobile game UI with it. I believe the Angry Birds 2 user interface is a great example of modern, interactive mobile UI with smooth animations and fun effects. That is why I created a similar mobile game UI with Hummingbird. I worked entirely with the Hummingbird Visual Editor so you could see how the workflow for a UI designer looks like with our tool.
The Hummingbird visual editor is designed to enable UI designers to easily create a full mobile user interface without the need to write any code.
Step 1: UI asset creation in Photoshop
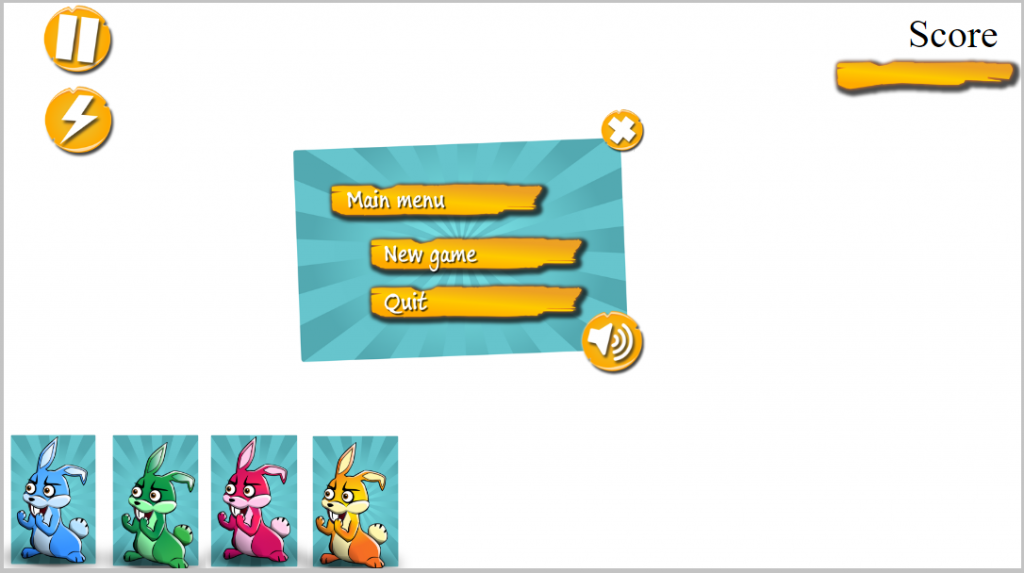
For this tutorial, I decided to create an Angry-birds style UI. I will have the following elements in the UI:
- Four animated cards with four different-colored rabbits
- Pause button that will call the Main Menu
- Restart button
- Sound button that will stop / play the sounds
- Scoreboard
- Score Field
- Main Menu consisting of New game and Quit
My favorite tool for UI design is Adobe Photoshop as it is user friendly and has an option to export a project as an HTML file. This option comes in handy since Hummingbird is powered by HTML. This means that you can prototype the whole UI in Adobe Photoshop and then directly import it in Hummingbird.
Start by creating all UI elements in Adobe Photoshop and then use the slice tool to define each of them as a slice. To export the file as an HTML file just use the save for web option in the File menu. An HTML page will be automatically generated.
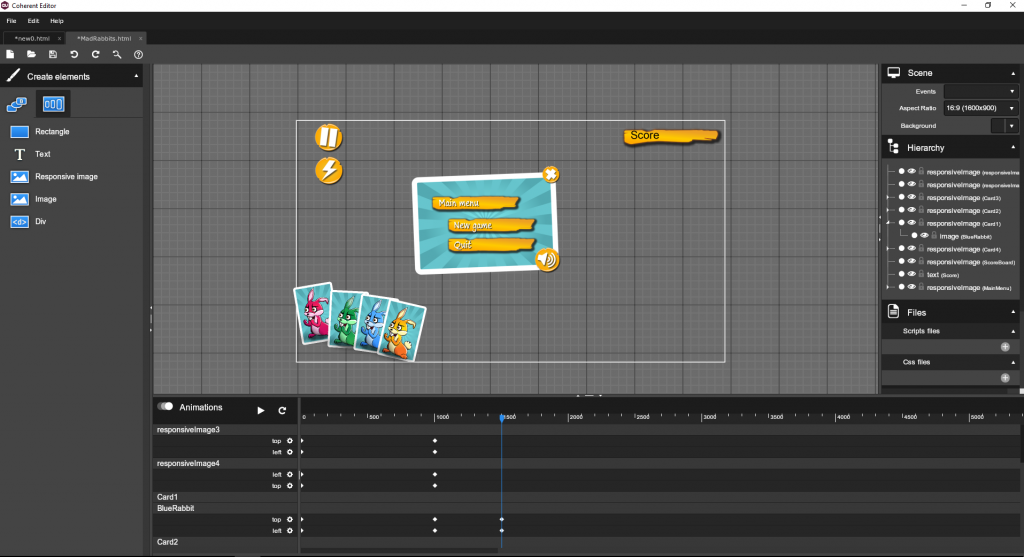
Step 2: Import UI elements in Hummingbird visual editor
Start the Hummingbird Editor from the Hummingbird package. Then, open the HTML file you exported earlier. The Hummingbird editor is tightly integrated with Adobe Photoshop so when a file is imported all elements keep their original place and size.
Tip: Exporting all UI elements at the same time from Adobe Photoshop and importing them in the editor is more convenient and faster than doing it one element at a time.
Step 3: Arrange the UI elements
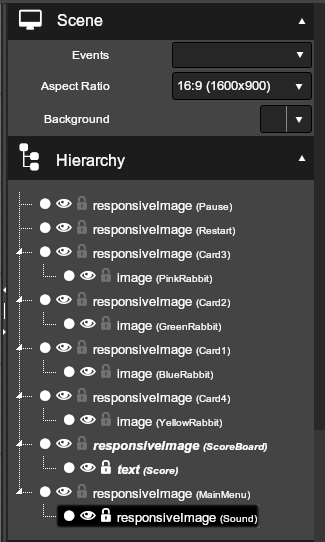
The next step is to arrange the hierarchy of the UI elements. My user interface is fairly simple, that is why I will only make a few elements a child of another element but in more complex mobile UI you will probably have a lot of parent and childr elements.
First, make each rabbit a child of each card. In this way, if you decide to move around the card, both elements will move together. Go to Hierarchy panel and drag and drop each rabbit over the responsive image for each card. Place all four cards in the left corner of the screen and use the padlock sign in the Hierarchy panel to lock them there.
Second, attach the sound button to the right, lower corner of the Main menu and lock it. Finally make the Score Field (text field) a child of the the Scoreboard. Place the text in the left corener of the Scoreboard and lock it there.
Step 4: Create high-performance animated mobile game UI
One of the things that really bothers me when I work with Unity UI is the creation of UI animations. The animation system in Unity was not created specifically for 2D assets, therefore very often adding animations hurts the performance.
In Hummingbird, UI designers can use CSS animations to create cool UI animations. Compared to other animation frameworks, CSS animations are lightweight, fast, and do not slow down the user interface.
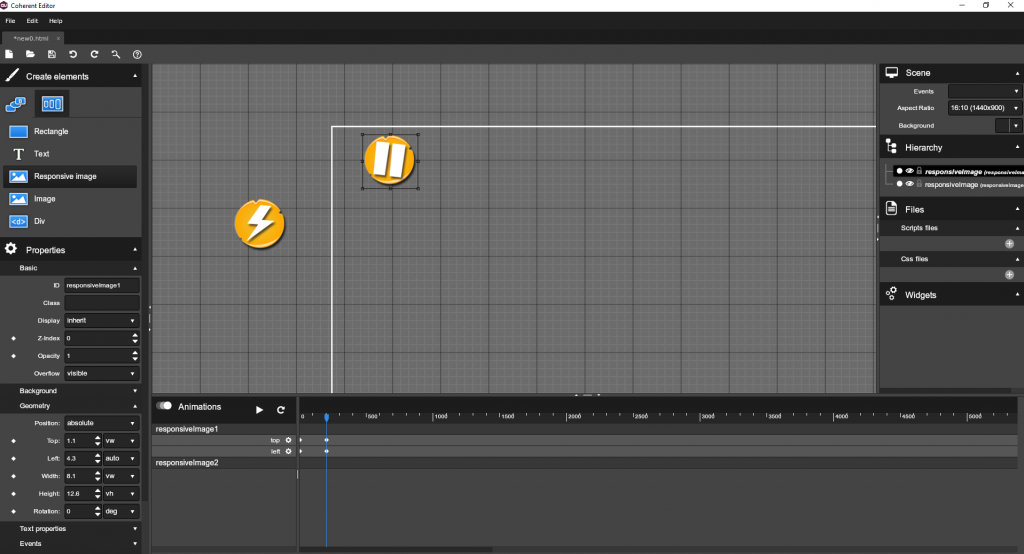
The Hummingbird editor has an animations timeline panel very similar to the one in After Effects. Even if you are not aware of this tool, it is very easy to get a hold of it. For this tutorial, I want each rabbit to jump above the card at the beginning of the game and return to its original position. All other UI elements are to smoothly enter the screen from left or right (depending on the position of the UI element).
Start with the rabbits. Select the blue rabbit, it should be placed right over its card at Time 0. Go to the Geometry menu and from there save a Top keyframe. Then, drag and drop the rabbit right above the card or simply edit the Top position in the Geometry menu. Move the blue line in the animation timeline to 1000ms and save a new Top keyframe. Return the rabbit in its original position, move the timeline to 1500ms and save another keyframe. Press Play to see the animation.
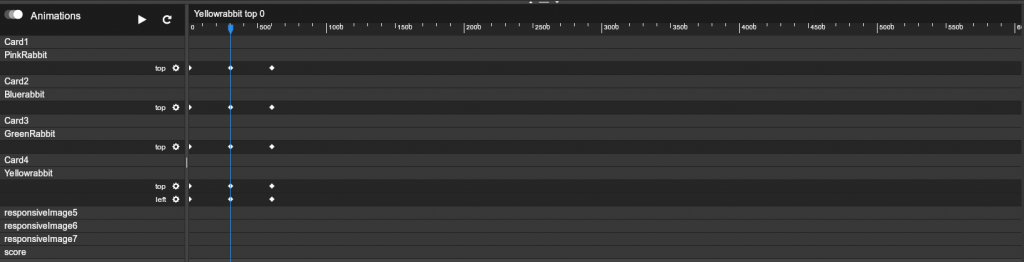
Repeat the same action for the rest of the rabbits.
Аnimate the rest of UI elements. As all elements will enter the screen in the beginning, place all of them outside of the screen at time 0 and save a keyframe for Top and Left.
For the Pause button save the Left keyframe (-14.4). Then, move the image to Left 4.3, keep the Top position the same and the timeline to 1000 ms. Save a new keyframe for each dimension.
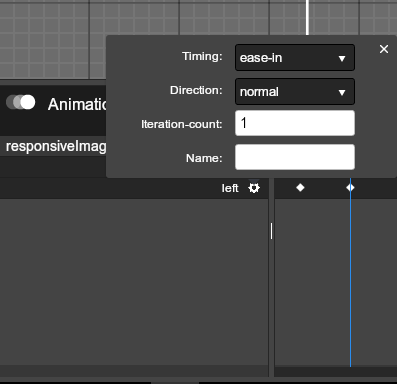
In order to make the UI look smooth, change the timing of the animation – click on the Settings icon of each keyframe and pick up an effect. In our case pick up ease-in.
Use the same steps to animate Score Field and the ScoreBoard. At this point, you do not need the Main menu, so place it outside of the UI scene.
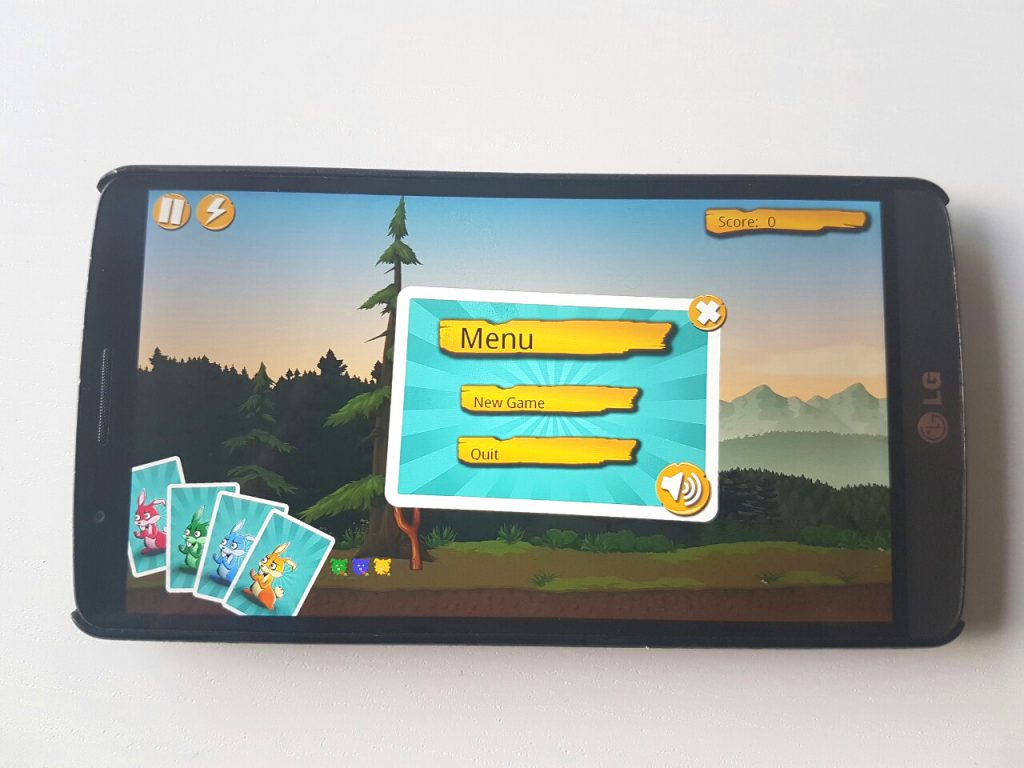
Here is how the final variant looks like. It took me less than 20 minutes to create this prototype in Hummingbird.
In the following months, we will add many useful functionalities to the editor which will enable UI designers to create complex and innovative mobile user interfaces. Let me know if there is a specific mobile game UI which you would like me to recreate in Hummingbird. If you are interested in Hummingbird, check all the features here and request a free demo.