Coherent GT Binding Tutorial for UE4 Part 1
This binding tutorial will show you how to setup communication between your game and UI.
Check out the video tutorial:
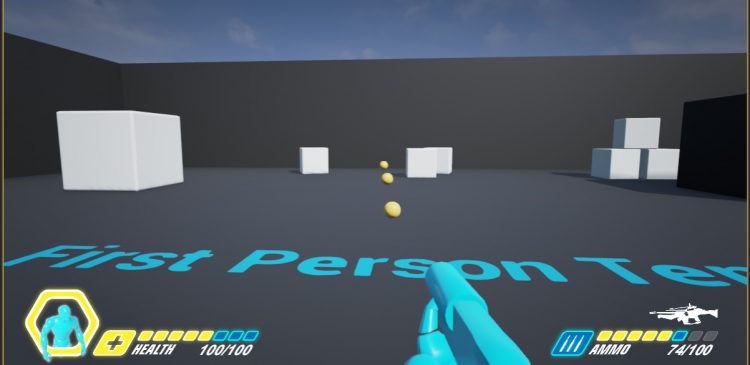
Find the “Spawn projectile” section and following the InputActionFire node, add a Branch node and connect the True to the Montage Play node. For the Branch
condition, Control drag in the Ammo variable and connect it to a > node (set to 0), then connect to the Condition.
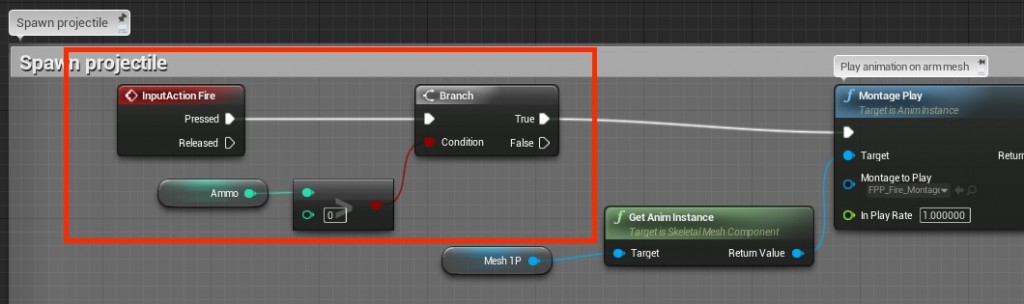
This will only allow the player to fire a projectile if their current ammo is greater than 0.
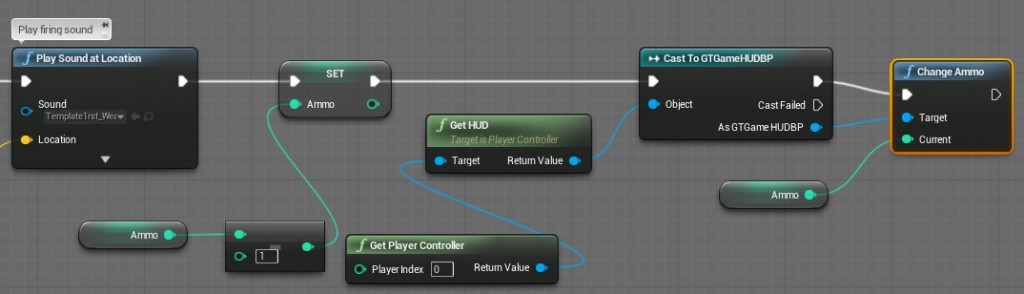
Also in “Spawn projectile”, at the end of the code following the Play Sound node, Set the Ammo to Ammo – 1.
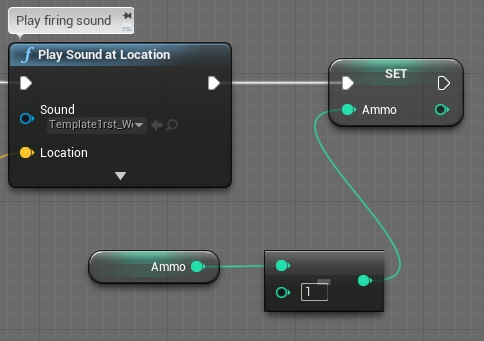
This will subtract one from our ammo each time a shot is fired, which we will convey through our HUD.
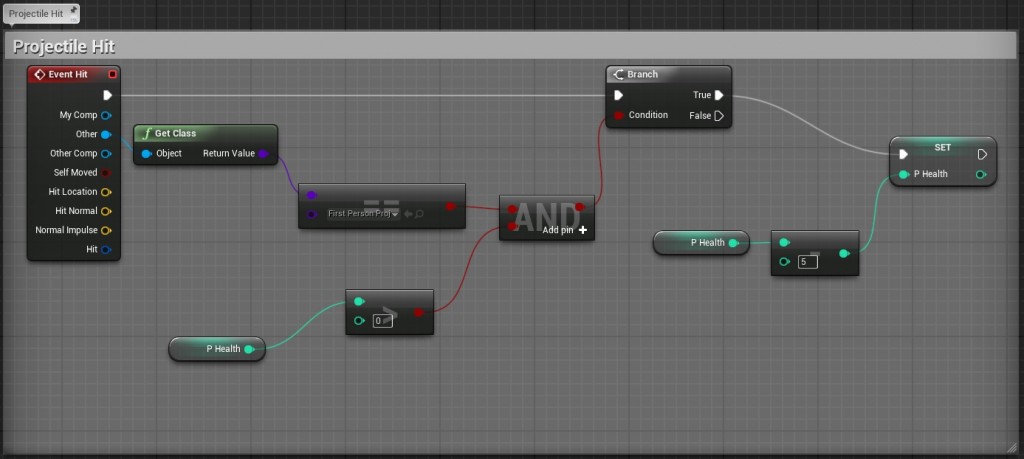
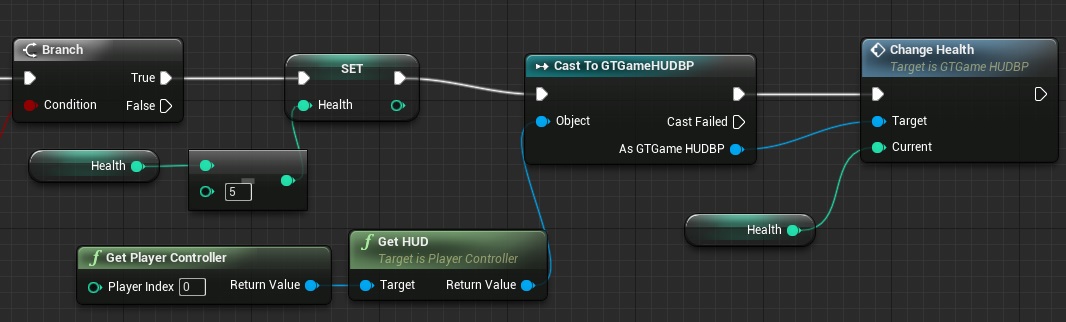
Create Event Hit node which will check if we were hit by a Projectile and Set the Health to Health – 5 until it reaches 0.
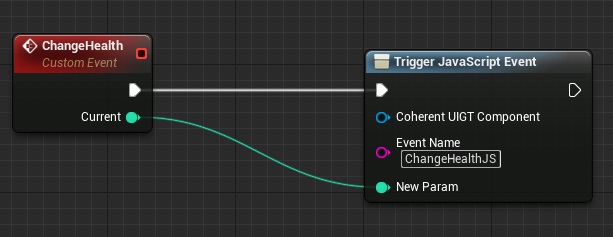
Last, drag the pin from
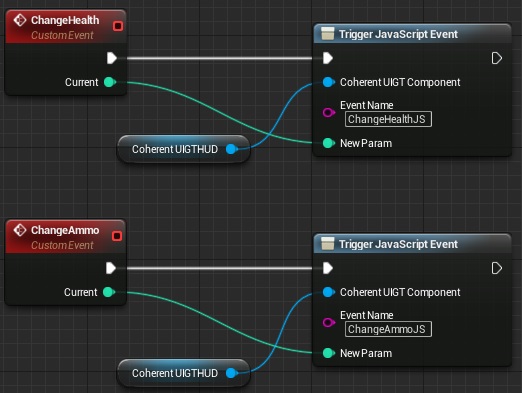
Now do the same thing, but change the name of the Custom Event to ChangeAmmo and the Event Name to ChangeAmmoJS.
This will be called from My Character blueprint and it will send an event to the UI to reflect changes in the UI.
We need to do this again when we subtract health after we have been hit. The only difference is that we call Change Health and give it Health variable.

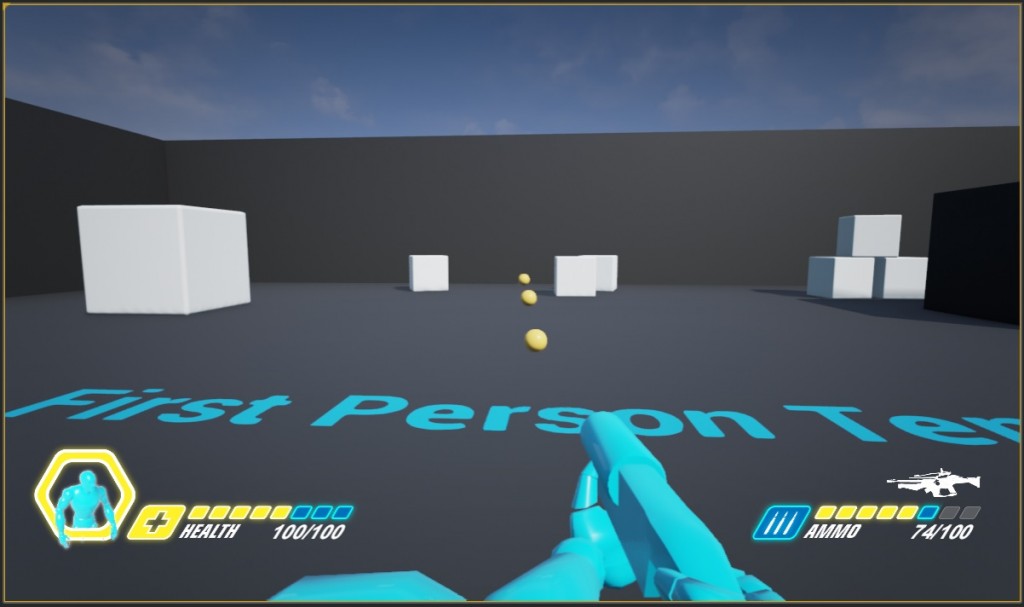
With all these steps covered, everything is ready. Here is how UI should look like:
Here are the steps how to achieve this:
Create New Blueprint FPS Game
Start by creating a new project using the Blueprint FPS Template. Enable Coherent GT Plugin for the game following the The Getting Started Tutorial.Add a HUD
From the Coherent GT menu, choose Add HUD. This will change the current GameMode’s HUD class toGTGameHUDBP and will initialize it. Also, it will add a hud.html page in /Content/UIResources/ directory, if not already present; then this page will be opened in your default browser. We’ll replace the empty hud.htm page with one that we’ve already created.
Download the resources from here.
As we previously mentioned, the HUD “Blueprint” has been pre-setup for you and is ready to use, so you do not need do any modifications to it, except for changing the view Page URL. Open GTGameHUDBP blueprint in the Blueprint Editor. Go to Setup UIGTView and change Page Url to coui://uiresources/MainUI.html.
Add Health and Ammo
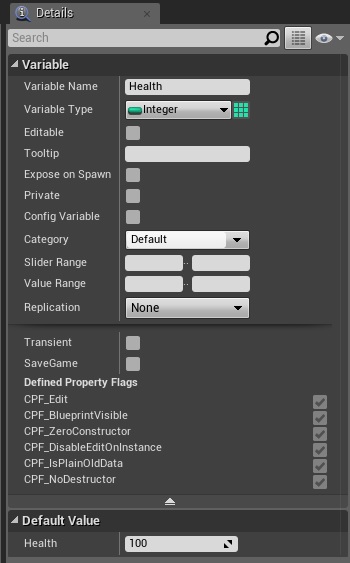
In the Game/Blueprints folder, open the MyCharacter Blueprint. Inside the MyBlueprint window, create two Int variables (Health, Ammo). Click Compile then in the Details panel, set the Default Value to 100 for both variables.


Add Events in UI
Open uiresources/Game.js file. There, add the following code: AdobeEdge.bootstrapCallback(function(compId) { comp = AdobeEdge.getComposition(compId).getStage(); engine.on(‘ChangeHealthJS’, updateHealth); engine.on(‘ChangeAmmoJS’, updateAmmo); }); These functions will be called from the Game HUD blueprint and will update the corresponding values.Add Events in HUD Blueprint
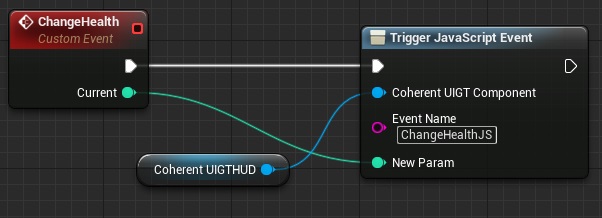
In the Game/ folder, open the GTGameHUDBP Blueprint. Create a Add a Custom Event node and change it’s name to ChangeHealth and add a Input pin with Integer value and name it current: Create aTrigger JavaScript Event node and connect it to our custom event. Change the Event Name to ChangeHealthJS. Add New input node to Trigger JavaScript Event node and connect it to the current variable from the custom event.

Coherent UIGT Component, and type Get Coherent UIGTHUD` which is a variable of the Blueprint. It should look like this:


Call Custom Events for changes in Health and Ammo
In the Game/Blueprints folder, open the MyCharacter Blueprint. In the “Spawn projectile” section after we subtract Ammo when firing we need to call our custom event ChangeAmmo from our HUD Blueprint. Create a Get Player Controller node and of it’s return value create Get HUD node.Connect the HUD return value to Cast to GTGameHUDBP node. Call ChangeAmmo on the result of the cast with the current value of the variable Ammo.

Tags: Coherent GT, tutorial