Getting Started with Coherent GT in Unreal Engine
This tutorial will show you how to add the Coherent GT plugin into a project and create two types of UI elements – a HUD and an in-world UI view . Below are the steps to achieve this.
1. Install the Coherent GT plugin
First, you need to install the Coherent GT plugin using the installer wizard. The installer auto-detects the UE4 engine versions that are available on this computer and gives you the options to install UI kits and a sample game
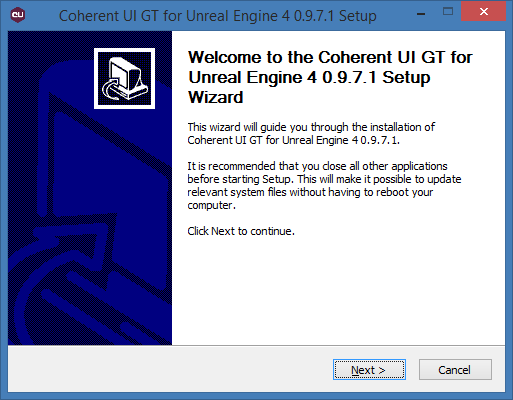
Install Coherent GT Plugin
Check out the video tutorial here!
2. Enable the plugin in your project
Start the Unreal Editor, and choose either an existing project or create a new one via New Project -> Blueprint -> Blank, and save it in a folder of your choice.
The first thing you have to do is to enable the Coherent GT plugin in the editor. From the main menu click Window -> Plugins, then navigate to the Coherent GT Plugin and click the checkbox Enable. A new pull-down menu will appear – Coherent GT.
Then create a new level and open the world settings. From the Game Mode section, click the + button to create a new GameMode override. Let us name it MyGameMode.
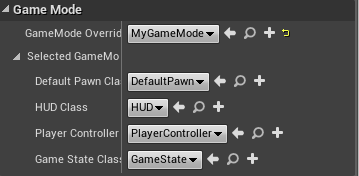
MyGameMode.
3. Add a HUD
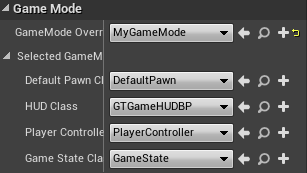
From the Coherent GT menu, choose Add HUD. This will change the current GameMode’s HUD class to GTGameHUDBP and will initialize it. Also, it will add a hud.html page in /Content/UIResources/ directory, if not already present; then this page will be opened in your default browser.
As we previously mentioned, the HUD has been pre-setup for you and is ready to use, so you don’t need to do any modifications to it, except for changing the view Page URL to
coui://uiresources/HUD/MainUI.html.
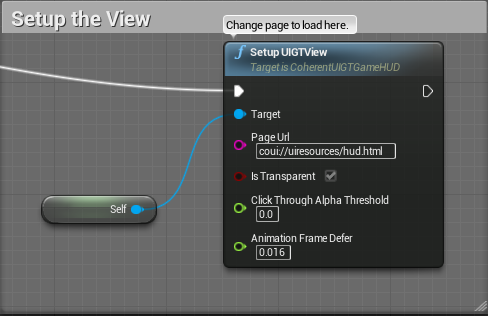
To see its content, open the GTGameHUDBP blueprint in the Blueprint Editor. Here’s a brief explanation of what happens:
- setting up the View – page, transparency, alpha threshold
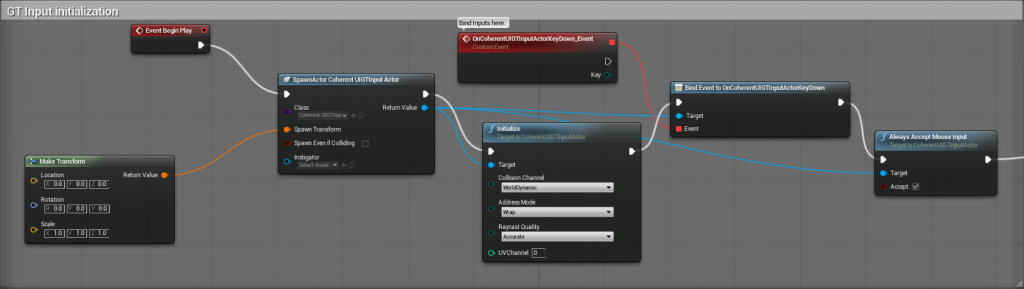
- the UI input is initialized – this involves spawning and initializing a
CoherentUIGTInputActor, and then setting “Accept mouse input” to true.
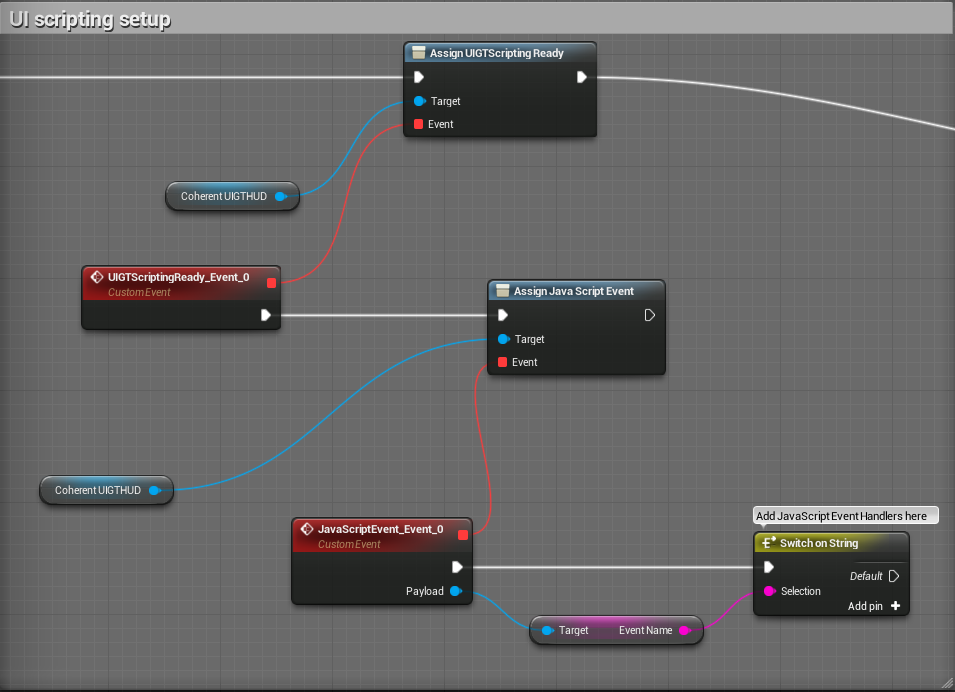
- setting up UI scripting (the two-way binding between JavaScript and Blueprints)
The page is set by default to coui://uiresources/hud.html, so the newly created page by Add HUD will be used if you do not changing it.
You can change it whenever you want to a local page, placed in the uiresources folder and use the coui:// scheme, or to a page hosted on the web and use a standard scheme such as http://.
Check out our video tutorial here!
4. Add in-world UI
Choose Coherent GT -> Add In-world UI this will add a GTPlane to your scene, just in front of the player. You can change its transform via the World Transform in the Details tab of the GTPlane.
Click Edit GTPlane from the same tab and its blueprint will open. As you can see, it has a CoherentUIGT component and the UIScripting already setup for this view.
Follow these steps to setup the view::
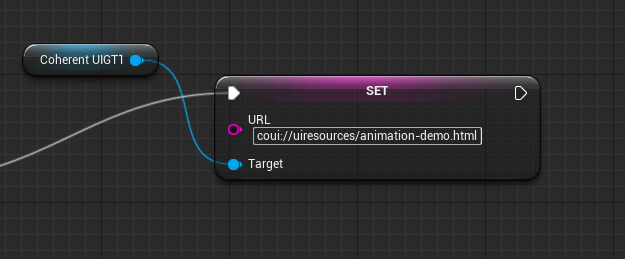
1. Get a reference to the CoherentUIGT component in the EventGraph of the GTPlane blueprint.
2. Drag a pin from the reference and create SetURL node and set the url to coui://uiresources/animation-demo.html
3. Add a Begin play and connect it with the url setter.
4. Now go to the editor and click Play.