Live UE4 Editing
In this tutorial we'll show you how you can use one of the coolest features of Prysm - Live Editing (aka Hot reloading) to improve your workflow when authoring content.
Initial setup
For this tutorial, we'll need the following prerequisites installed.
-
Coherent Prysm add-on for Animate
-
UE4 Prysm plugin
After that, the setup is very simple - it takes only 2 steps.
Live Editing in UE4
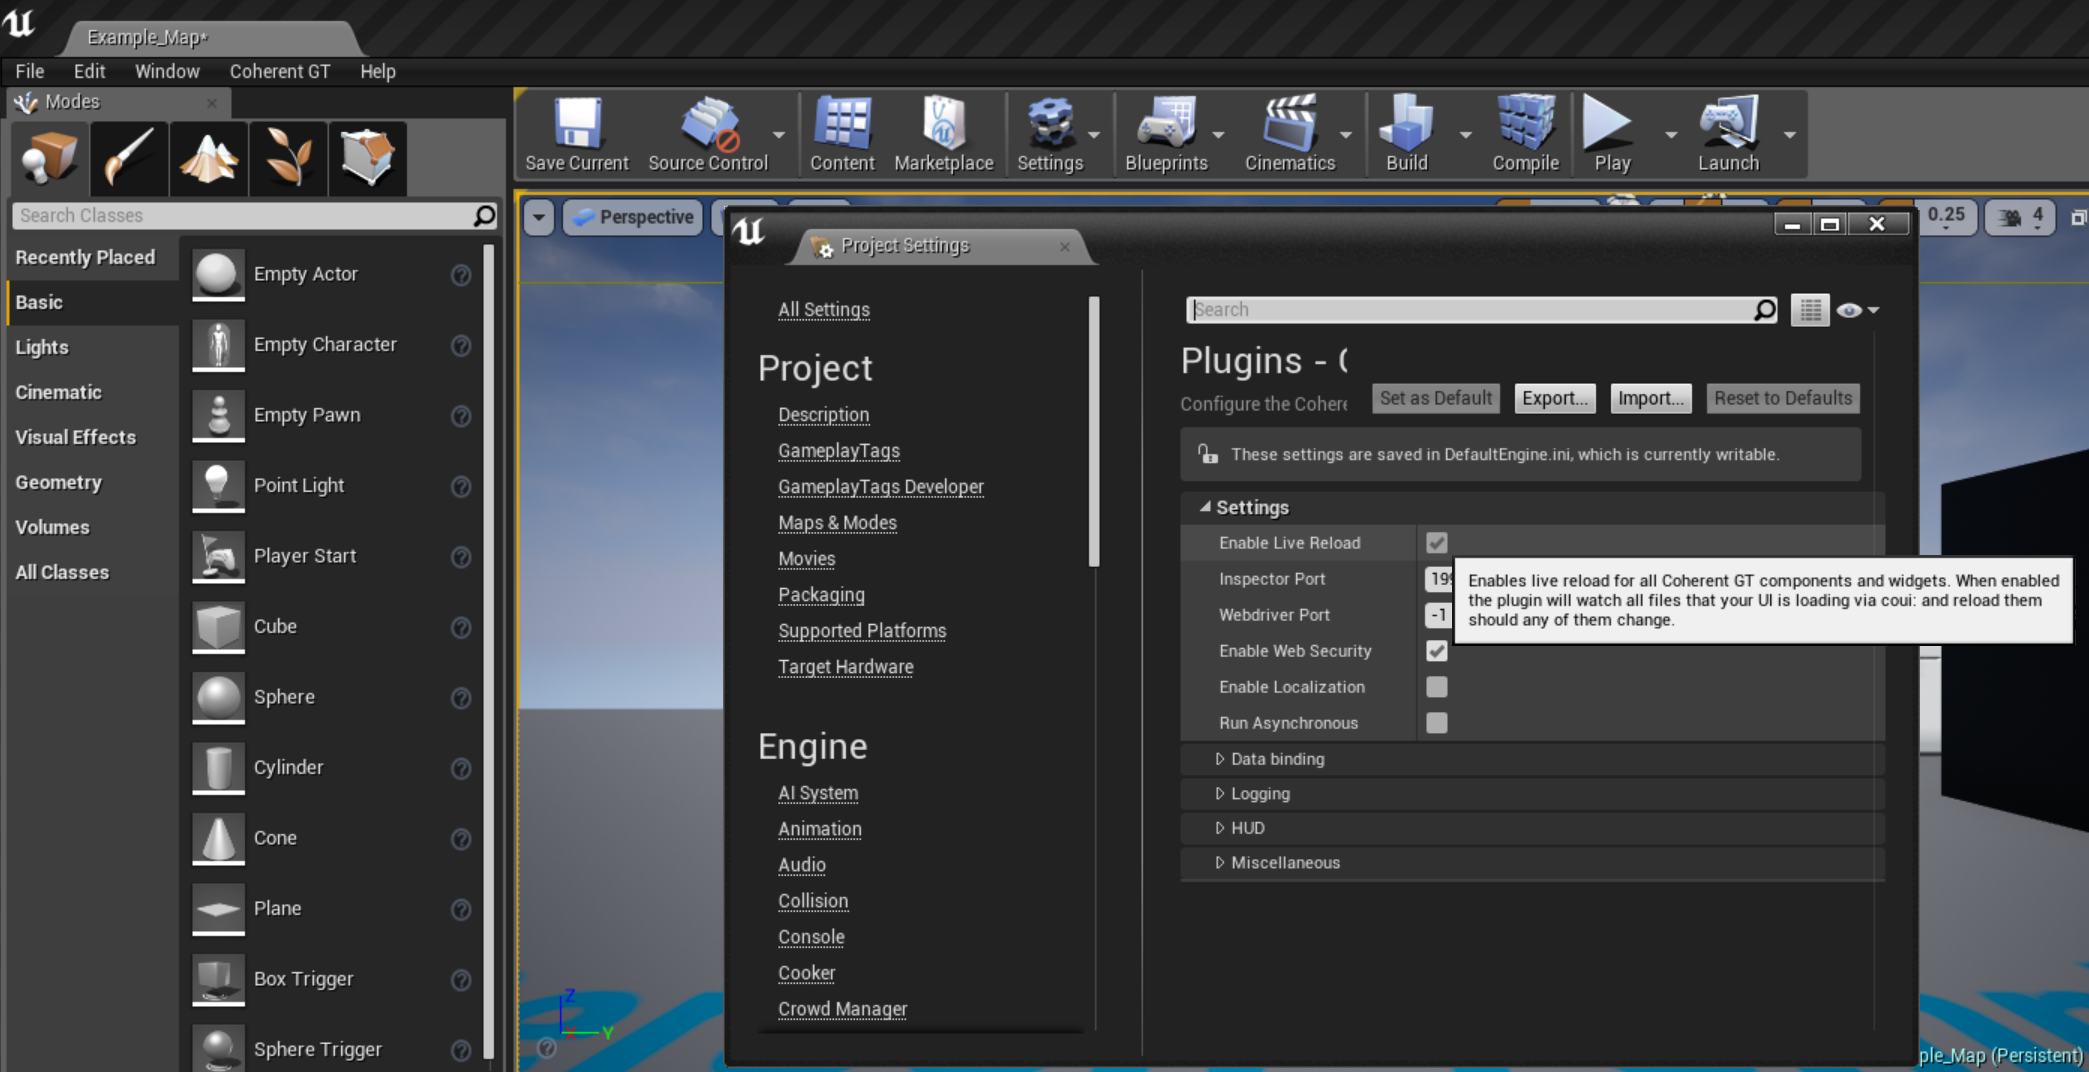
- Open the Coherent/Options menu in the UE4 Editor.
- Check the "Live Editing" checkbox.
Prysm Output Path
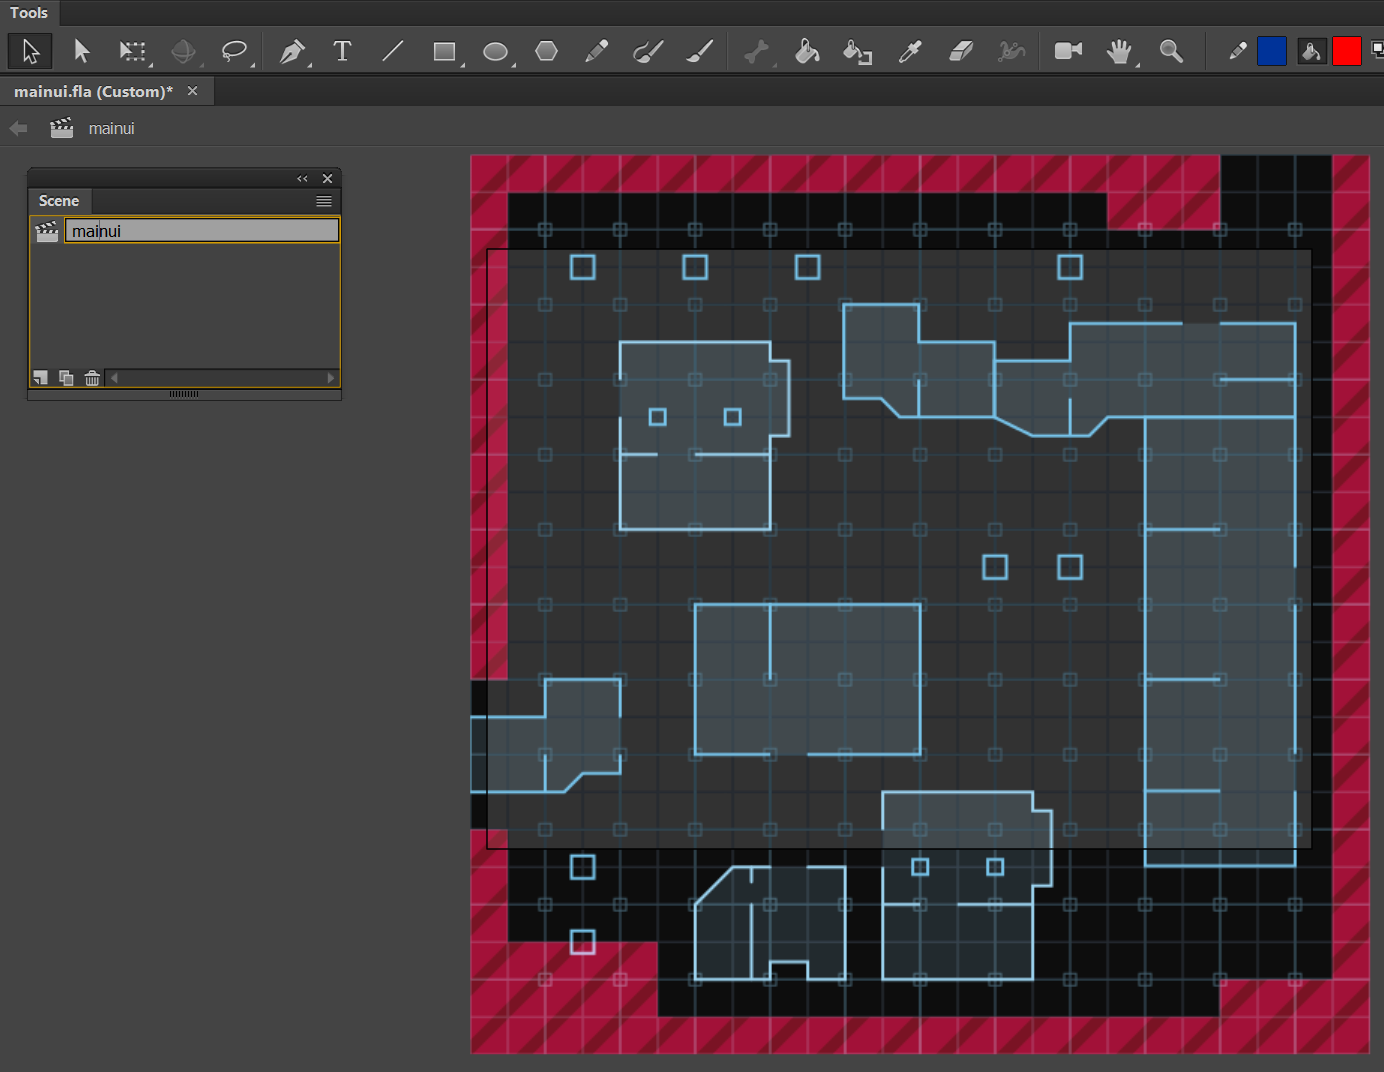
- Make sure that the name of the scene in Animate matches the name of the HTML file used in the UE4 scene currently open. In the default sample scene of our UE4 plugin the file is called mainui.html so the scene in Animate should be called mainui (note that the HTML extension is automatically added).
- If the name of the scene is different you can change it in Animate by going to the scene window and double-clicking on the scene.
- Next, we need to specify the output folder of the HTML file again depending on UE4 scene - in our default UE4 sample that would be CoPrysmTestFPS\Content\uiresources.
- Technically speaking uiresources\mainui.html is the file path set to the URL property of the Prysm view component attached to the main camera of the level. If you are not using the default sample scene(Example_Map) from our UE4 plugin you need to make sure to have the proper filename/folder setup accordingly.
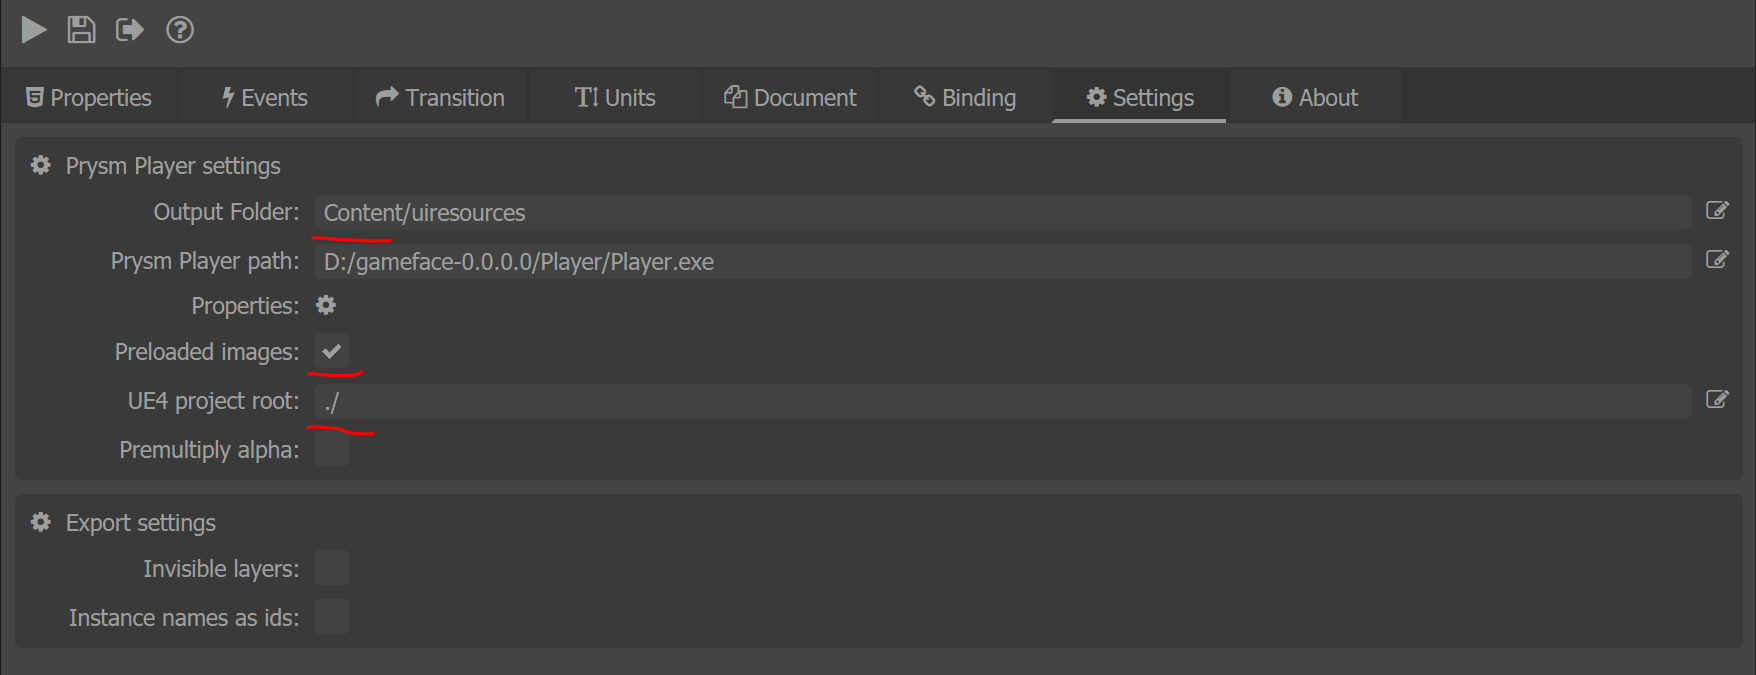
Preloaded Images
To enable preloaded images in Coherent Prysm you should:
- Check the checkbox in the Settings tab.
- Add a UE4 project root
- The directory where your .uproject file is located.
- Add an output folder
- The output folder should be
${UE4Root folder}/Content/uiresourcesfolder or any subfolder in it.
- The output folder should be
Live Editing In Action
Now that we have everything setup we can see the live editing in action!
This setup works best on workstations with 2 monitors, however, 1 large monitor can also suffice.
We need to set the Animate editor on one of the monitors (or one side if using 1 monitor) and the UE4 editor on another.
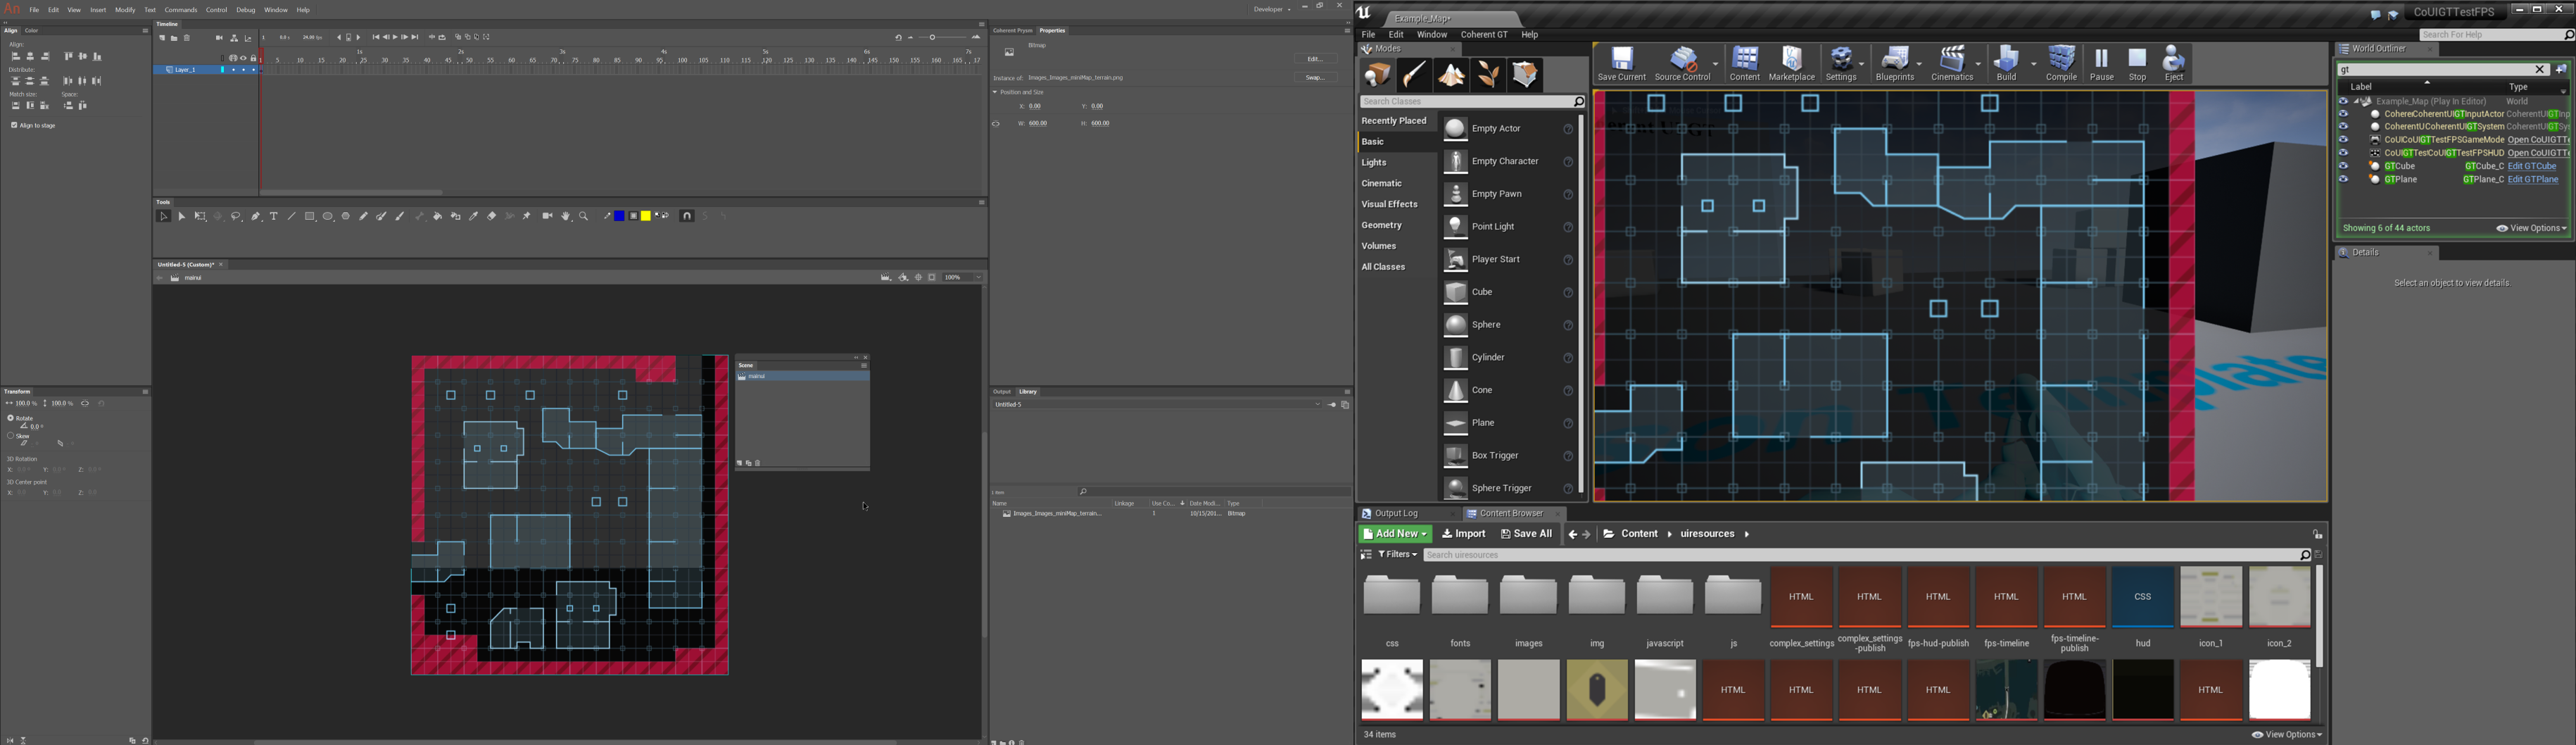
Then we need to click on the "Play" button in UE4 and leave the game running.
Now we can go back to Animate and start making changes and whenever we click the publish button the changes will be automatically reloaded in the scene in UE4 while the game is running.
This is a great way to iterate on the UI as you can see the effect of the changes in the context of the game itself - with all the 3D assets, lighting, post effects, and gameplay. Furthermore, there are no build steps or manual copying of resources which greatly improves iteration speed.
Other Game Engines
Although this tutorial uses UE4 a similar workflow can be achieved with any game engine. You just need to create a file watch for the HTML file that when changed calls the "reload" method of the coherent view attached to the camera. More information about Coherent views can be found in the relevant Prysm docs.