Data Binding
Data binding is a very powerful feature that allows developers to control the game UI through the game state. That eliminates a lot of boilerplate that would otherwise be needed.
Data binding basics
Detailed documentation about how the player works with data binding can be found here.
Data binding makes it possible to update UI elements in response to game state changes. Data binding requires a "model" that is created in the game and exposed to the UI. The UI elements' styles are then bound to the model and each time that the UI calls a synchronize method, all changes made in the game are applied to the UI.
The following example illustrates how to create a simple health bar through data binding.
Complete example
The example is a single HTML page that uses the cohtml.js script and the Coherent Prysm Player.
<!DOCTYPE html>
<html lang="en">

<head>
    <style>
        body {
            background-color: white;
        }

        .health-bar {
            position: relative;
            border: 5px solid black;
            border-radius: 15px;
            overflow: hidden;
            width: 300px;
        }

        .health-bar-value {
            background-color: rgb(0, 128, 0);
            height: 50px;
            transition: width 0.1s linear;
        }

        .dying {
            background-color: rgb(192, 32, 0);
        }
    </style>
</head>

<body>
    <div class="health-bar">
        <div class="health-bar-value"
            data-bind-class-toggle="dying:{{state.currentHealth}} < {{state.maxHealth}} / 2"
            data-bind-style-width="{{state.currentHealth}} / {{state.maxHealth}} * 100 + '%'">
        </div>
    </div>

    <script src="cohtml.js"></script>
    <script>
        const model = {
            maxHealth: 100,
            currentHealth: 50
        };

        engine.whenReady.then(() => {
            engine.createJSModel("state", model);
            engine.synchronizeModels();

            setInterval(() => {
                state.currentHealth = Math.random() * state.maxHealth;
                engine.updateWholeModel(state);
                engine.synchronizeModels();
            }, 1000);
        });
    </script>
</body>

</html>
Basic page
The starting HTML page looks like the following.
body {
    background-color: white;
}

.health-bar {
    position: relative;
    border: 5px solid black;
    border-radius: 15px;
    overflow: hidden;
    width: 300px;
}

.health-bar-value {
    background-color: rgb(0, 128, 0);
    height: 50px;
    transition: width 0.1s linear;
}

.dying {
    background-color: rgb(192, 32, 0);
}
<div class="health-bar">
    <div class="health-bar-value"></div>
</div>
| Style | Purpose |
|---|---|
| .health-bar | Creates a rectangular border that illustrates the total health of the player. |
| .health-bar-value | Creates the filled part of the rectangle that represents the current health as a percent of the total health. |
| .dying | Creates the style that applies danger. |
In order to setup the data binding and communicate with the game the cohtml.js script is included in the HTML page.
<script src="cohtml.js"></script>
Creating the model
The example uses a simple way to create the game state model - JavaScript mocking.
const model = {
    maxHealth: 100,
    currentHealth: 50
};

engine.whenReady.then(() => {
    engine.createJSModel("state", model);
    engine.synchronizeModels();
});
| Method | Purpose |
|---|---|
| engine.whenReady | Promise that is resolved when Coherent Prysm is ready to use data binding. |
| engine.createJSModel("state", model) | Creates a mock model named state from the simple JavaScript object that contains the currentHealth and the maxHealth variables. |
| engine.synchronizeModels() | Updates the UI with the game state. |
Applying data binding attributes
Data binding attributes are expressions added to the HTML that change a CSS property with the model's value.
<div class="health-bar">
    <div class="health-bar-value"
        data-bind-class-toggle="dying:{{state.currentHealth}} < {{state.maxHealth}} / 2"
        data-bind-style-width="{{state.currentHealth}} / {{state.maxHealth}} * 100 + '%'">
    </div>
</div>
| Data binding | Purpose |
|---|---|
| data-bind-style-width="{{state.currentHealth}} / {{state.maxHealth}} * 100 + '%'" | Sets the width of the filled part of the bar to a percent of the total health. |
| data-bind-class-toggle="dying:{{state.currentHealth}} < {{state.maxHealth}} / 2" | Applies the .dying style when the health drops below half. |
Updating the UI
The UI is updated when the state is updated. In the example this is done every 1000ms by updating the game state and then updating the UI.
setInterval(() => {
    state.currentHealth = Math.random() * state.maxHealth;
    engine.updateWholeModel(state);
    engine.synchronizeModels();
}, 1000);
| Method | Purpose |
|---|---|
| state.currentHealth = Math.random() * state.maxHealth; | Updates the currentHealth of the state to a new valid value. |
| engine.updateWholeModel(state); | Notifies Coherent Prysm that the mock model has changed. |
| engine.synchronizeModels(); | Updates the UI with the game state. |
Data binding in the Exporter
Prototyping UI with data binding depends on mock models that should be defined in a JavaScript file and added as external JavaScript files to the Coherent Prysm document.
When the prototyping stage is over the external files that define the models are removed and the game continues to work the same, but with the real models.
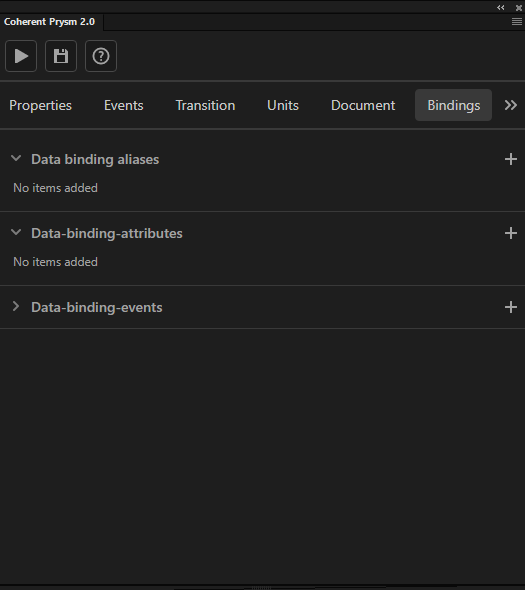
Data binding attributes and events are attached to the UI through the "Coherent Prysm 2.0" panel.
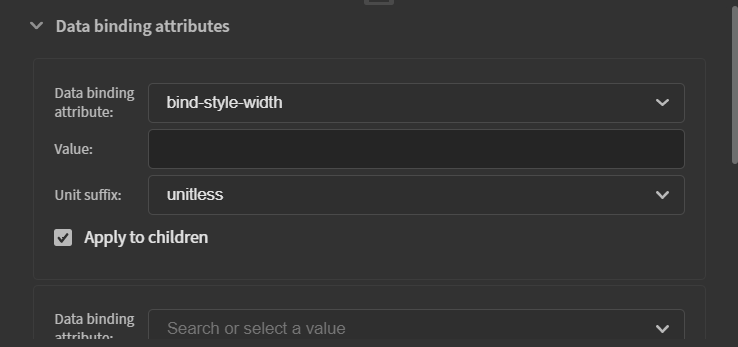
Data binding attributes in the Exporter
Data binding attributes are applied to elements through the Bindings tab.
The full list of data binding attributes can be found here.
| Interface | Purpose |
|---|---|
| Plus icon | Creates a new data binding attribute. |
| Apply to children checkbox | Checking this applies the data binding attributes to the children of the movie clip. |
| Data binding attribute dropdown | Sets the type of the data binding attribute. |
| Value input | Sets the value of the data binding attribute. |
| Trash bin icon | Removes the data binding attribute. |
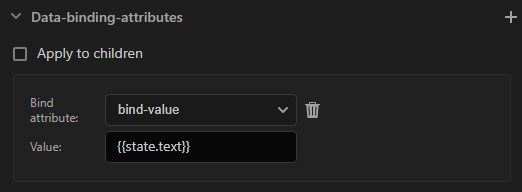
The following steps describe how to add a data binding attribute.
- Click the + icon next to the "Data binding attributes" accordion menu.
- Select a data binding attribute from the "Data binding attribute" dropdown.
- Write a value for the attribute in the "Value" input.
Units in data binding attributes
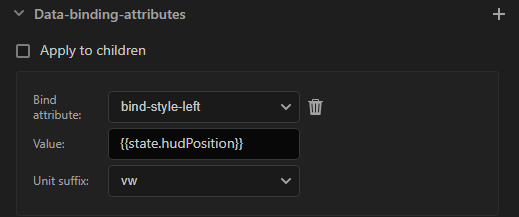
By default, the data binding system treats numbers as pixels. For convenience, a different unit can be selected for the following properties.
| Data binding property |
|---|
| data-bind-style-left |
| data-bind-style-top |
| data-bind-style-width |
| data-bind-style-height |
A unit type is selected through the "Unit suffix" dropdown.
Selecting a unit results in something like the following data-bind-style-left="({{state.hudPosition}}) + 'vw'" that transforms the data binding attribute value to a string and forces Coherent Prysm to use the unit.
The following table describes the units that the options set.
| Interface | Purpose |
|---|---|
| vw | Sets a vw unit. |
| vh | Sets a vh unit. |
| percent | Sets a % unit. |
| px | Sets a px unit. |
| unitless | Doesn't set a unit. |
Data binding events in the Exporter
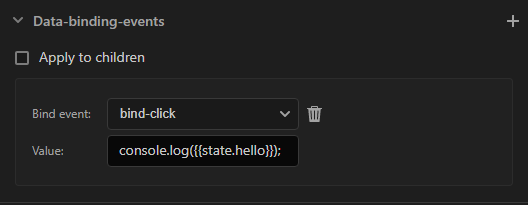
Data binding events are applied to elements through the Bindings tab.
The full list of data binding events can be found here.
| Interface | Purpose |
|---|---|
| Plus icon | Creates a new data binding event. |
| Apply to children checkbox | Checking this applies the data binding events to the children of the movie clip. |
| Data binding event dropdown | Sets the type of the data binding event. |
| Value input | Sets the value of the data binding event. |
| Trash bin icon | Removes the data binding event. |
The following steps describe how to add a data binding event.
- Click the + icon next to the "Data binding events" accordion menu.
- Select a data binding event from the "Data binding event" dropdown.
- Write a value for the event in the "Value" input.
The following variables can be used in the value of data binding events.
| Variable | Purpose |
|---|---|
| event | The JavaScript event object from the fired event. |
| this | The DOM element on which the event handler is registered. |
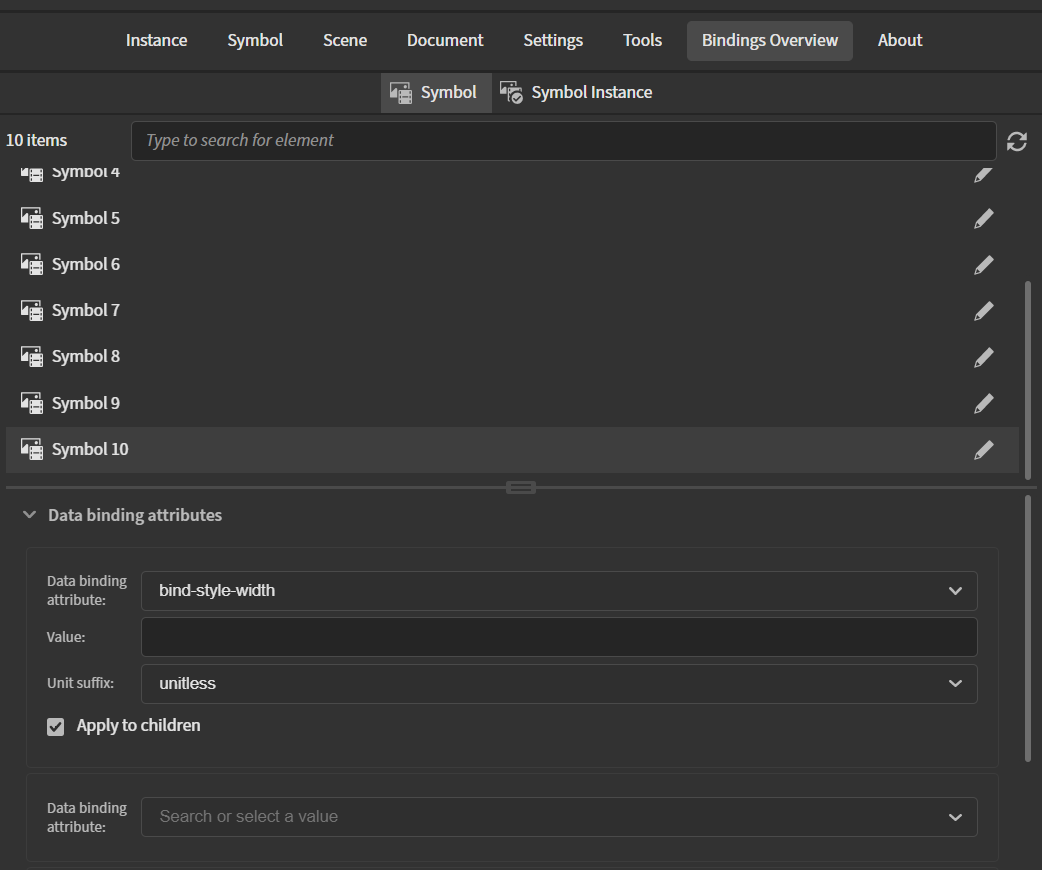
Data bindings overview panel
To preview all the data binding attributes or events used in a document is very convenient from the "Data bindings overview" panel. The "Data bindings overview" can be accessed from the Bindings overview tab.

When you open the tab you have two options:
- Preview bindings for symbols button - Will list all the symbols in the document library and their bindings.
- Preview bindings for symbol instances - Will list all the symbol instances on the scene that are using data binding.
The panel is split into two parts:
- Menu with elements.
- Preview container that will display the data bindings for the specific element selected from the elements menu.
Both are split with a divider that can be dragged up or down to resize the containers.
Elements menu
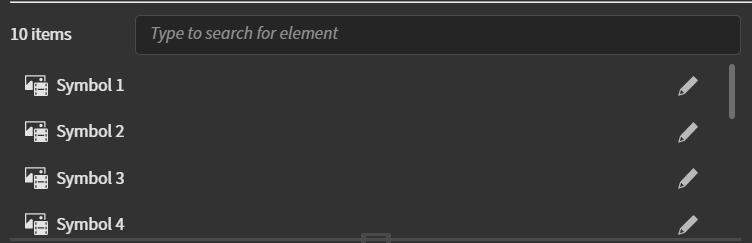
The elements menu will display all the available elements.
When the "Data bindings overview" is opened for all the:
- Symbols - The elements menu will display the symbol name.

- Symbols instances that are using data binding - The elements menu will display the symbol instance name if there is any and in which timeline this instance is used. If the instance has no name the "No instance name" text will be displayed.

Also for each element, there is a "Navigate to element" button that will select the element in Animate's editor. Note that if an element is placed on a locked layer the element is not selectable so navigation won't select it although will navigate to the timeline that element exists on!
Note that you can navigate to an element just if it is used somewhere on the scene. You are not able to navigate to an element that is not used on the scene. This note targets all the symbol library items because may not be instantiated on the scene and for now we can't access such elements for editing if are not used.

To find a specific element you can use the search at the top of the "Elements menu". It will search for symbol names when the panel is opened for symbols and symbol instance names when the panel is opened for symbol instances.

Data bindings preview container
The preview container will display all the data binding attributes and events in the same UI as in the "Bindings" tab. The displayed data in this container will be related just to the selected element from the Elements menu.
From the preview container, you can also directly edit all the bindings of the selected element without the need of selecting in on the scene.
Known issues
The "Data bindings overview" is not responding to dynamic changes such as deleting elements from the Animate's stage, changing the symbol or symbol instance name, or changing the frames, layers, or elements order in the Animate's current timeline.
This problem is making the "Data bindings overview" sometimes not display relevant information about the elements inside Animate's document that are using data binding. Also the "Navigate to element" button sometimes may not be able to navigate to the element because it may have a different name or timeline position, or it is just deleted.
For this purpose, we added a "Refresh button" at the top-right that can be used to detect new changes and update information inside the "Data bindings overview".

Auto-renew list
To workaround the mentioned issue above we added a checkbox that can enable auto-renewing of the "Data bindings overview".
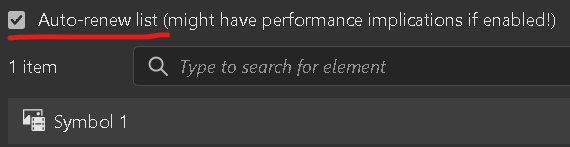
If the option is enabled then the panel will be renewed each time selection in Animate is changed. Like that the panel is going to be up-to-date with the latest document data. However, if you experience problems with not updating the panel properly you can use the "Refresh button" as well.
Note that if the option is enabled there might be some performance issues when the document is large and changing the active selection in it. The option is disabled by default if you are using another tab different than "Data bindings overview" in the Exporter panel to reduce the performance issues when not using that tab.