Responsive UI - Anchors
Overview
Anchors are used to define how an element will be positioned on different screen sizes. The feature is useful if you want to develop once a common game UI for all the wanted screen sizes.
Anchors in Prysm
In Prysm you can anchor a symbol to a scene or inside another symbol. When a symbol is anchored its position will be calculated based on its parent (the scene or the parent symbol).
Anchor symbol to scene
To anchor a symbol to scene you need to:
- Select the preferred symbol
- Navigate to the Symbol or Instance tab - The anchor option is available for both symbol and instance.
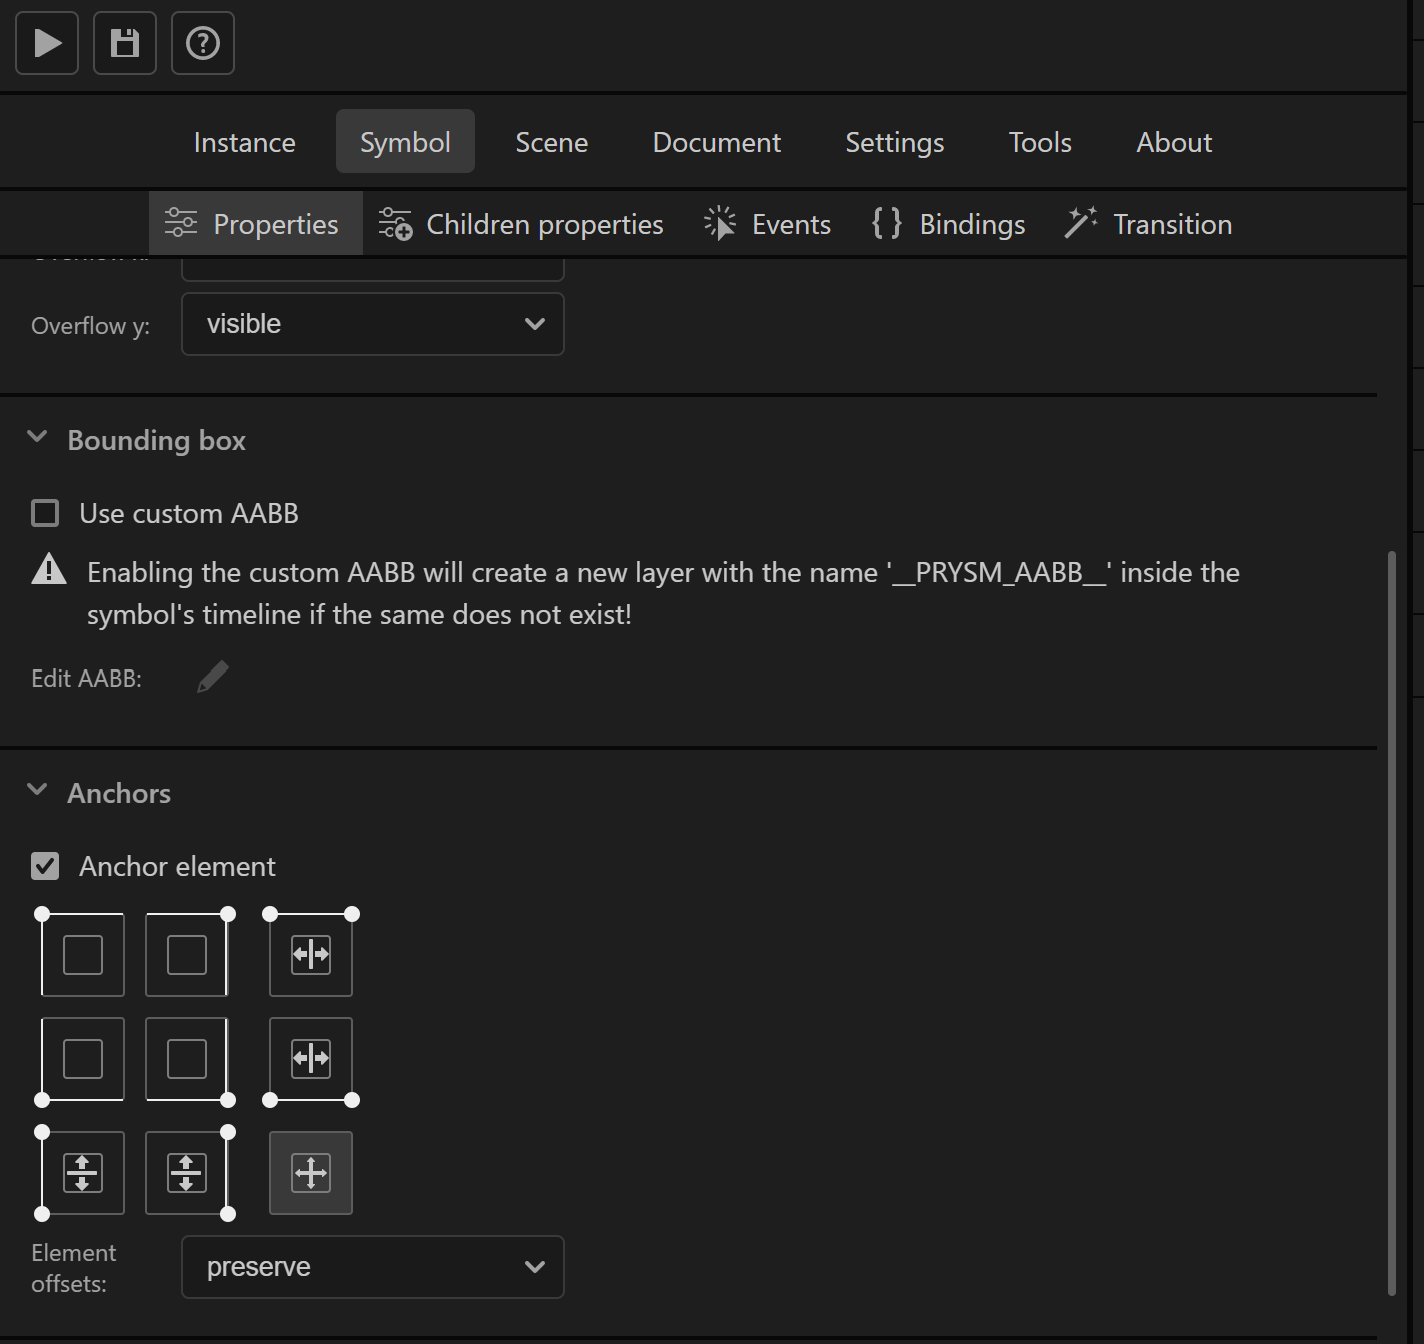
- Navigate to Properties subtab and open the Anchors accordion.
- Check that the element will be anchored by the "Anchor element" checkbox.
- Chose how the element should be positioned from the additional options.
Anchor symbol to parent symbol
To anchor a symbol to the parent symbol you need first to create a custom bounding box for the parent symbol. This step is required because Prysm needs the exact size of the parent so the child can be anchored properly. Custom bounding box feature defines the exact size of a symbol. Prysm needs the exact size because the size of a symbol grows with the size of the children elements inside it and in most cases, it is not fixed.
When the symbol has defined a custom bounding box then you can continue with the same steps described above.
When you anchor a symbol inside another symbol then its position will be calculated based on the parent's custom bounding box size.
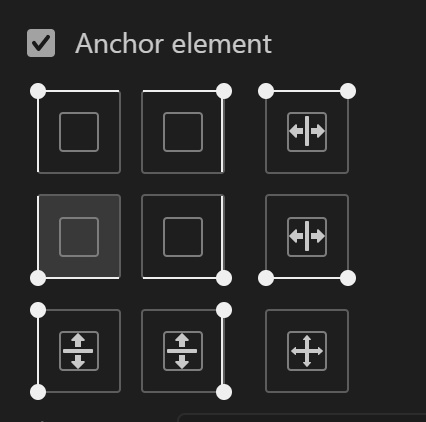
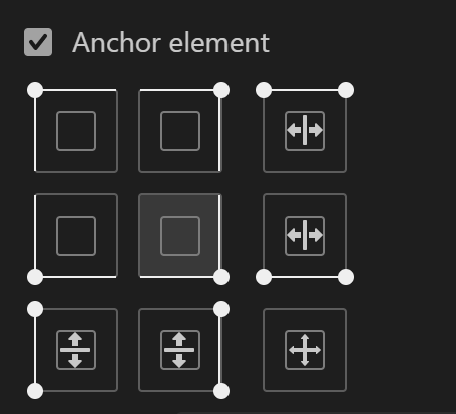
Anchors options
So far there are a few variations for anchoring an element that are set from the additional anchoring options inside the Panel.
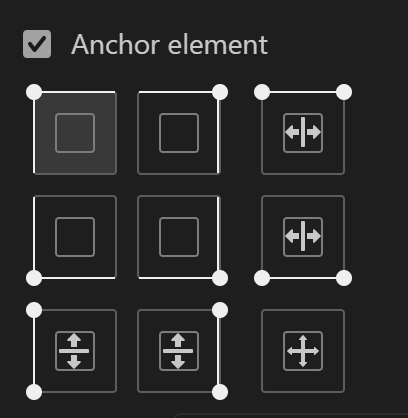
You can anchor elements with some of the four corners of the parent.
Top-left
Will anchor the element to the parent's top-left corner. When the parent is resized the element won't change its top and left offsets from the parent.
| Top-left option | Result |
|---|---|
 |
 |
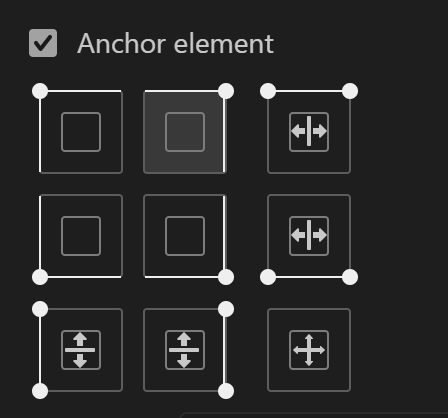
Top-right
Will anchor the element to the parent's top-right corner. When the parent is resized the element won't change its top and right offsets from the parent.
| Top-right option | Result |
|---|---|
 |
 |
Bottom-left
Will anchor the element to the parent's bottom-left corner. When the parent is resized the element won't change its bottom and left offsets from the parent.
| Bottom-left option | Result |
|---|---|
 |
 |
Bottom-right
Will anchor the element to the parent's bottom-right corner. When the parent is resized the element won't change its bottom and right offsets from the parent.
| Bottom-right option | Result |
|---|---|
 |
 |
You can anchor an element to some side of the parent and also make its width or height be stretched when the parent is resized:
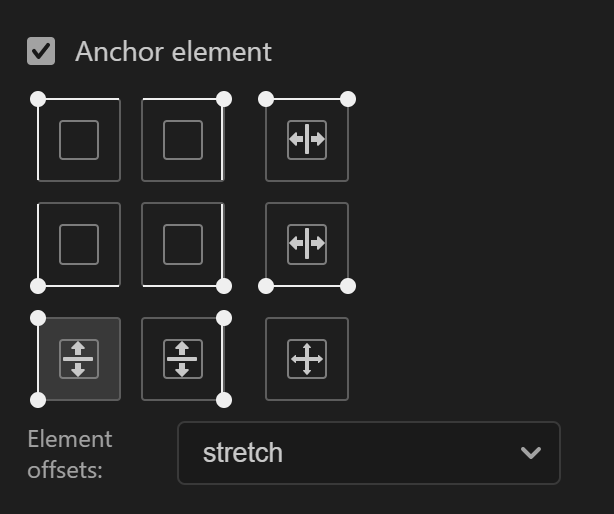
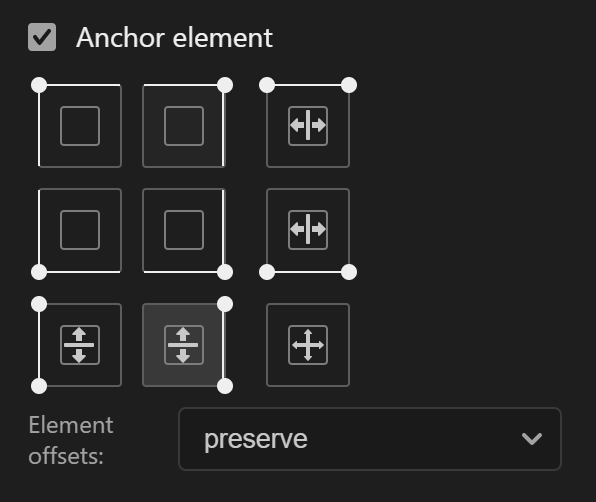
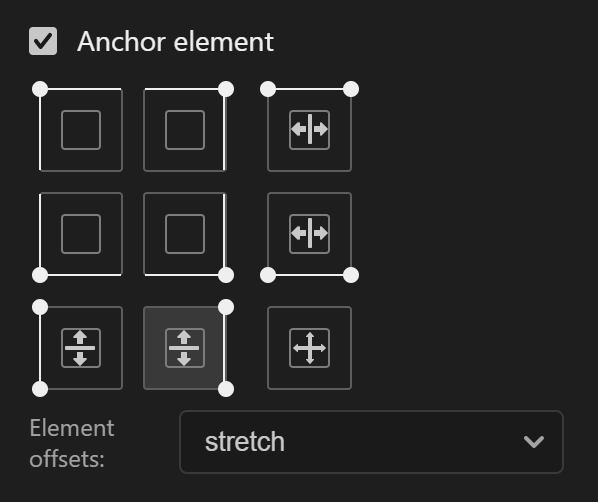
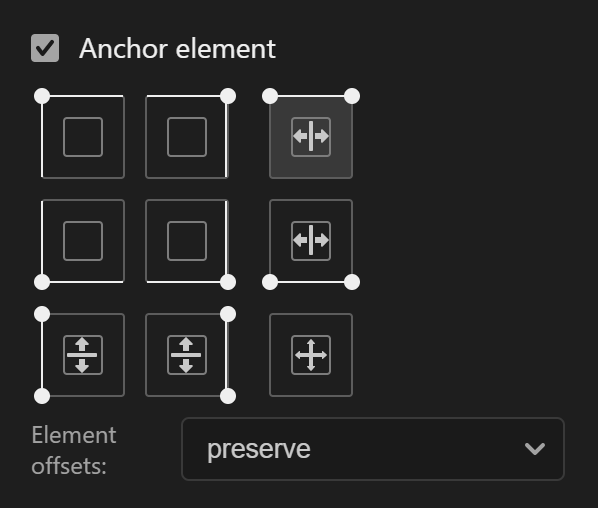
Left-height
Will anchor the element to the parent's left side and stretch its height when the parent height is changed. When the element is anchored in this way additional options are shown that specify if the top and bottom offsets to be preserved or stretched as well.
| Left-height option - preserve offsets | Result |
|---|---|
 |
 |
| Left-height option - stretch offsets | Result |
|---|---|
 |
 |
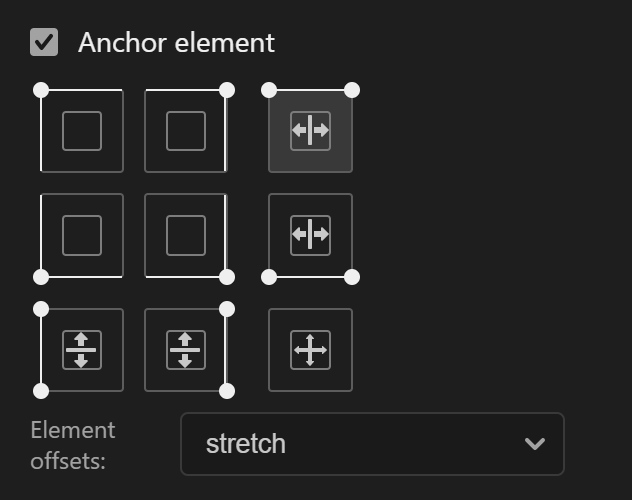
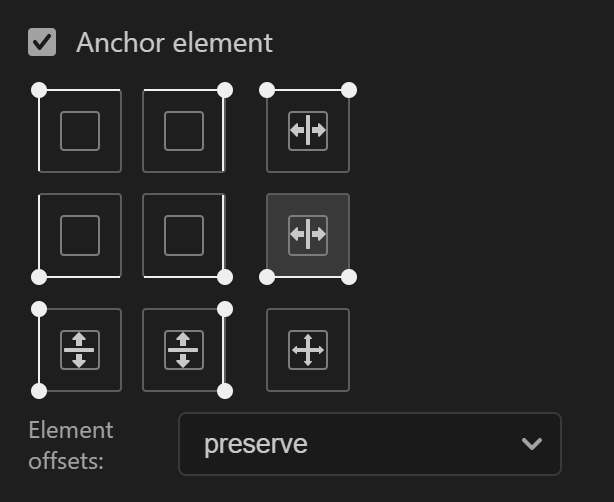
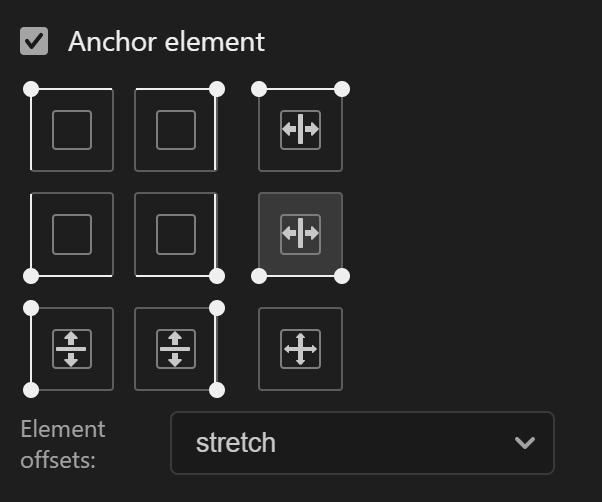
Right-height
Will anchor the element to the parent's right side and stretch its height when the parent height is changed. When the element is anchored in this way additional options are shown that specify if the top and bottom offsets to be preserved or stretched as well.
| Right-height option - preserve offsets | Result |
|---|---|
 |
 |
| Right-height option - stretch offsets | Result |
|---|---|
 |
 |
Top-width
Will anchor the element to the parent's topside and stretch its width when the parent width is changed. When the element is anchored in this way additional options are shown that specify if the left and right offsets to be preserved or stretched as well.
| Top-width option - preserve offsets | Result |
|---|---|
 |
 |
| Top-width option - stretch offsets | Result |
|---|---|
 |
 |
Bottom-width
Will anchor the element to the parent's bottom side and stretch its width when the parent width is changed. When the element is anchored in this way additional options are shown that specify if the left and right offsets to be preserved or stretched as well.
| Bottom-width option - preserve offsets | Result |
|---|---|
 |
 |
| Bottom-width option - stretch offsets | Result |
|---|---|
 |
 |
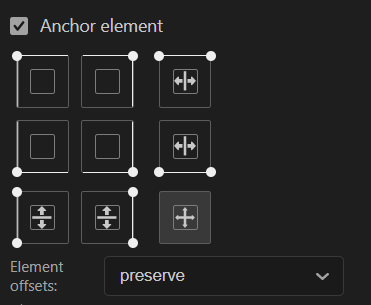
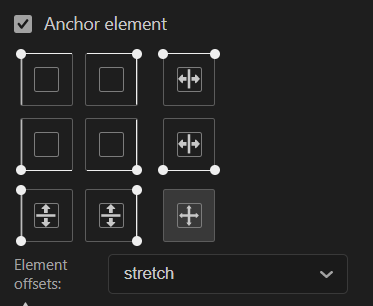
All
Will anchor the element to the parent's top and bottom side and stretch its width and height when the parent width and height are changed. When the element is anchored in this way additional options are shown that specify if the top, left, right and bottom offsets to be preserved or stretched as well.
| All option - preserve offsets | Result |
|---|---|
 |
 |
| All option - stretch offsets | Result |
|---|---|
 |
 |
Anchors and units
When an element is anchored then some of its units that are set from the Properties tab -> Units accordion will be overwritten on export. However, the units from the symbol or symbol instance will be propagated to the symbol's children shape elements as it works now. Like this, you can directly make a symbol with a shape inside to be stretched on the x or y-axis just by anchoring the symbol and setting percents as unit values to the height and width of the symbol. The samples above are created using this approach.
The units that will be overwritten on export in every scenario are:
| Anchoring to | Overwritten units |
|---|---|
| Top-left | Top, Left |
| Top-right | Top, Left |
| Bottom-left | Top, Left |
| Bottom-right | Top, Left |
| Top-width | Top, Left, Width |
| Bottom-width | Top, Left, Width |
| Left-height | Top, Left, Heigth |
| Right-height | Top, Left, Heigth |
| All | Top, Left, Width, Heigth |